So here’s the thing about my 8-year-old – the kid lives on chicken nuggets and will literally pick pepperoni off pizza because it’s “too spicy.” Getting him to try anything new is like negotiating a peace treaty. But last month, when I was testing this Oreo cheesecake recipe for the third time (because I’m slightly obsessive about getting things right), something magical happened.
I caught him sneaking into the kitchen at 6 AM – still in his dinosaur pajamas – with a fork, going straight for this cheesecake. No coaxing, no bribing with screen time. Just pure, voluntary dessert enthusiasm from my kid who once declared vanilla ice cream “too fancy.”
That’s when I knew this recipe was a keeper. If it can convert my most stubborn food critic, it can win over anyone.
How I Discovered This Recipe (AKA My Desperation Creation)
Honestly? This recipe came about because I was completely overwhelmed during soccer season two years ago. Between weekend tournaments and weeknight practices, I was spending way too much time trying to make elaborate desserts that required actual baking. One particularly stressful evening, I found myself staring at a package of Oreos and a tub of cream cheese, thinking “there has GOT to be an easier way.”
I’d seen similar recipes online, but they all seemed either too complicated or too simple (read: not impressive enough for my own ridiculously high standards). So I started experimenting. The first version was… let’s call it a learning experience.
My First Failure (And What I Learned)
Picture this: I’m feeling all confident, throwing ingredients together like I’m some kind of dessert wizard. I used regular whipped topping straight from the tub – didn’t even think about stabilizing it. The result? A sad, deflated mess that looked more like Oreo soup than cheesecake. The kids took one look and asked if we could order pizza instead. Ouch.
That disaster taught me the most important lesson: you absolutely cannot skip the gelatin. It’s what gives this no-bake version its structure. Now I always dissolve a packet of unflavored gelatin in a little warm water first. Game changer.

The Recipe That Actually Works
Oreo Crust:
- 36 Oreo cookies (I always buy two packages because someone cough the kids cough always eat half the cookies)
- 6 tablespoons melted butter
Filling:
- 1 packet unflavored gelatin
- 3 tablespoons warm water
- 24 oz cream cheese, softened (and I mean REALLY softened – learn from my lumpy mistakes)
- 1 cup powdered sugar
- 1 teaspoon vanilla extract
- 1½ cups heavy whipping cream
- 20 Oreo cookies, roughly chopped
Crush the cookies for the crust (food processor if you have it, rolling pin and a bag if you don’t – we’ve all been there). Mix with melted butter, press into a 9-inch springform pan.
For the filling: dissolve gelatin in warm water, let it sit for 5 minutes. Beat softened cream cheese until fluffy – this takes longer than you think, but trust the process. Add powdered sugar and vanilla. In a separate bowl, whip the cream to stiff peaks (not soft peaks, STIFF peaks – this matters!).
Fold the gelatin mixture into the cream cheese, then gently fold in the whipped cream and chopped Oreos. Pour over crust, refrigerate at least 4 hours.
My Real-Life Tips (Because I’ve Made This A Million Times)
Cream cheese temperature is everything. I usually take mine out the night before, but if I forget, I’ll microwave it for 15 seconds at a time until it’s soft. Just don’t overdo it or you’ll have cream cheese soup.
About those Oreos: I’ve tried the fancy organic sandwich cookies thinking I was being all healthy. Don’t. Just use regular Oreos. The kids noticed immediately and staged a revolt.
Heavy cream vs. Cool Whip: I’ve tried both. Heavy cream whipped fresh tastes infinitely better, but honestly? When I’m in a time crunch, Cool Whip works fine. Use the whole 8oz container and add an extra packet of gelatin to be safe.
Springform pan alternative: Don’t have one? I’ve made this in a regular 9×13 pan and just cut squares. Less pretty, but equally delicious.
How My Family Really Reacts
My 12-year-old insists this is better than any restaurant cheesecake. My 8-year-old always asks if he can have the “cookie parts” first – so I started setting aside some of the chopped Oreos just for him. My husband claims he doesn’t like cheesecake but somehow a quarter of it disappears every time I make one.
The soccer moms? They’ve been requesting this recipe for two years. I finally decided to share it because keeping dessert secrets is just mean.

The Shortcuts I Actually Use
When life gets crazy (which, let’s be honest, is most of the time), I buy pre-made Oreo crust from the grocery store. Is it as good as homemade? No. Does anyone actually notice when they’re diving into that creamy, Oreo-loaded filling? Also no.
I’ve also discovered that making this the night before actually improves it. The flavors meld together, and it firms up perfectly. So now I try to plan ahead – though we all know how that usually goes.
This cheesecake has seriously saved me so many times. Birthday parties, potlucks, random Tuesday evenings when I wanted something sweet but didn’t want to turn on the oven. It’s foolproof, impressive-looking, and honestly tastes like you spent way more time on it than you actually did.
Plus, there’s something deeply satisfying about crushing Oreos with a rolling pin after a long day. Better than therapy, and cheaper too.
What about you – do you have a go-to desperation dessert? I’m always looking for new ideas for those last-minute moments!
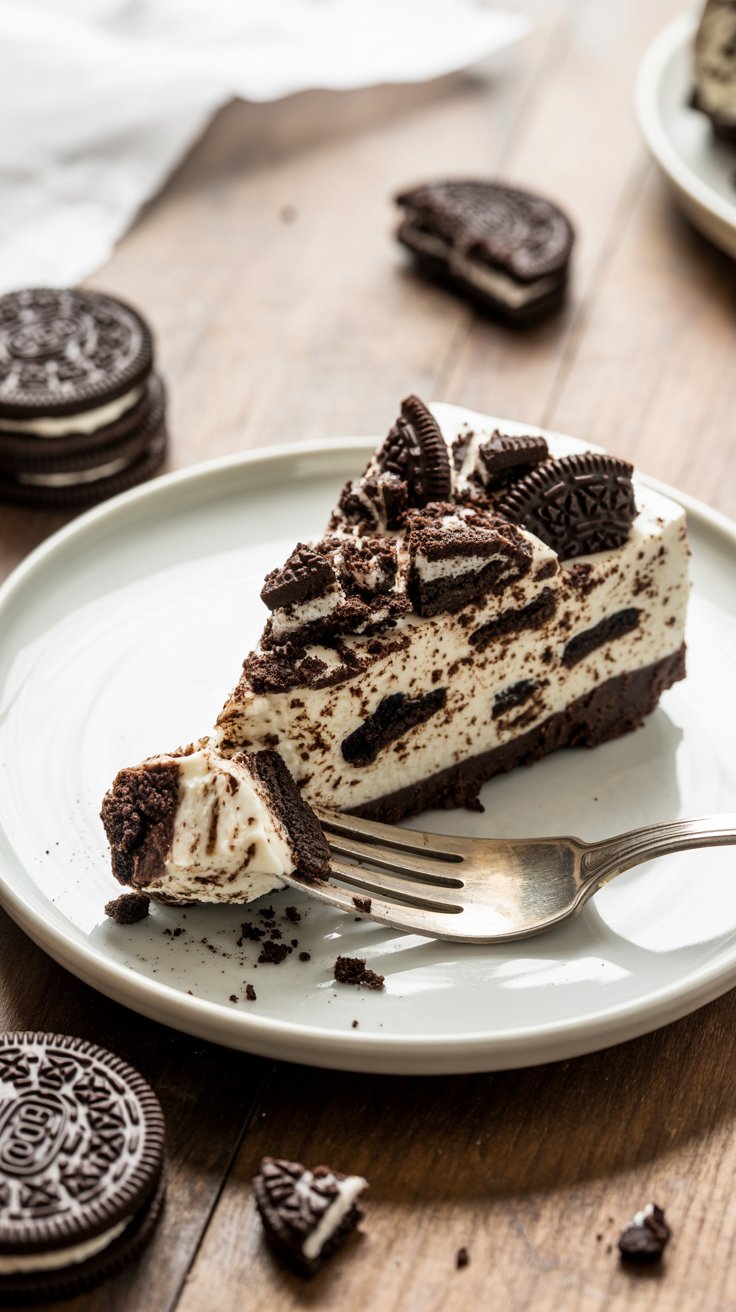
The No-Bake Oreo Cheesecake That Won Over My Pickiest Eater
Course: DessertCuisine: AmericanDifficulty: Easy12slices
servings30
minutes485
kcal5
hoursKeep in mind that Chill Time: 4+ hours
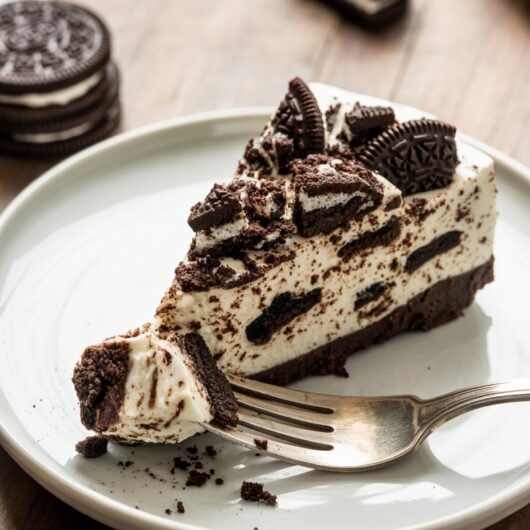
This creamy, dreamy no-bake Oreo cheesecake is the perfect dessert when you need something impressive but don’t want to turn on the oven. With a crunchy Oreo crust and a smooth, cookie-studded filling, it’s guaranteed to be a crowd-pleaser!
Ingredients
For the Crust:
36 Oreo cookies (about 1 sleeve + 8 cookies)
6 tablespoons unsalted butter, melted
- For the Filling:
1 packet (0.25 oz) unflavored gelatin
3 tablespoons warm water
24 oz cream cheese, softened to room temperature
1 cup powdered sugar
1 teaspoon vanilla extract
1½ cups heavy whipping cream, cold
20 Oreo cookies, roughly chopped into chunks
Directions
Make the Crust:
- Prepare the pan: Lightly grease a 9-inch springform pan.
- Crush the cookies: Using a food processor, pulse 36 Oreo cookies until they form fine crumbs. Alternatively, place cookies in a sealed plastic bag and crush with a rolling pin.
- Mix with butter: Combine cookie crumbs with 6 tablespoons melted butter, stirring until mixture holds together when pressed.
- Press into pan: Firmly press mixture into bottom of prepared springform pan, creating an even layer. Refrigerate while preparing filling.
- Make the Filling:
- Prepare gelatin: In a small bowl, sprinkle gelatin over 3 tablespoons warm water. Let stand 5 minutes until gelatin blooms and becomes spongy.
- Beat cream cheese: In a large bowl, beat softened cream cheese with electric mixer until light and fluffy, about 3-4 minutes.
- Add sugar and vanilla: Beat in powdered sugar and vanilla extract until smooth and combined.
- Add gelatin: Stir bloomed gelatin mixture into cream cheese until fully incorporated.
- Whip cream: In a separate clean bowl, whip cold heavy cream to stiff peaks (be careful not to overwhip).
- Fold together: Gently fold whipped cream into cream cheese mixture in three additions, being careful not to deflate the cream.
- Add cookies: Fold in chopped Oreo cookies until evenly distributed.
- Assemble and Chill:
- Fill pan: Pour filling over prepared crust, spreading evenly with a spatula.
- Smooth top: Gently tap pan on counter to release air bubbles and smooth the surface.
- Chill: Refrigerate for at least 4 hours or overnight until completely set.
- Serve: Run a knife around edges before removing springform pan sides. Cut with a sharp knife, wiping clean between cuts.
Notes
- Room temperature cream cheese is crucial – take it out 2-3 hours before making, or microwave in 15-second intervals if forgotten
Don’t skip the gelatin – it’s what gives structure to the no-bake filling
Whip cream to stiff peaks – soft peaks won’t provide enough stability
Chill overnight for best results – the flavors meld and texture improves
Use a hot, clean knife for clean slices
