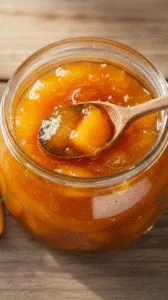
Last Updated: August 25, 2025
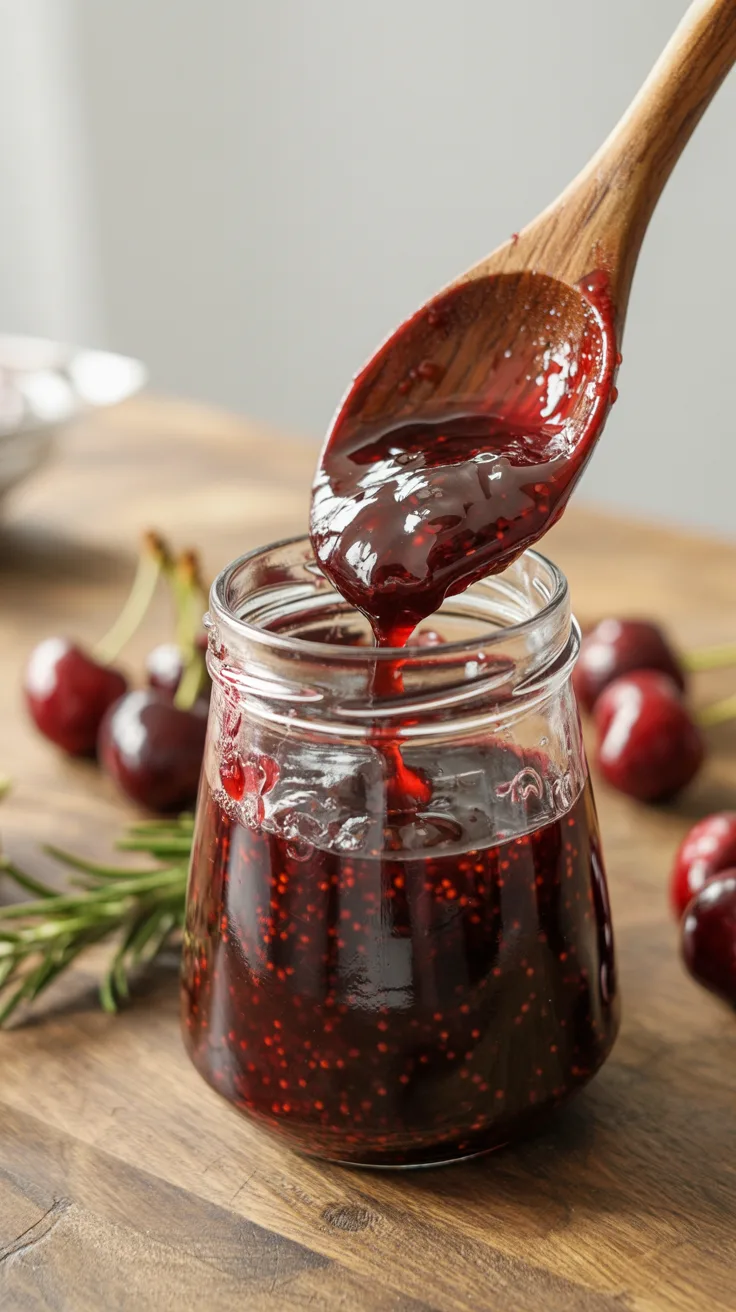
There’s a quiet magic in transforming just-ripe cherries into jam—jewel-hued, gently sweet, and tangy all at once. This cherry jam recipe is my go-to when I want something that’s not too sugary, spreads like a dream, and works as well on toast as it does in a thumbprint cookie. What sets this version apart? Hand-chosen cherries, a squeeze of natural pectin power (no bottled pectin needed), and a few kitchen-tested tricks to get just the right set every time—even if you’re making a small batch in a regular pot without fancy equipment.
Pro Tip: Tossing cherries halfway through cooking (instead of constantly stirring) lets you avoid scorching, reduces foam, and gives a clearer, smoother jam—an easy win for beginners and time-savers alike.
Why This Recipe Works
Cherry jam is deceptively simple, but there’s subtle science in every scoop. Cherries, especially sweet varieties, are naturally low in pectin (the substance that helps jam gel). I boost this with lemon juice for acidity to brighten the fruit flavor, and grated pith (the white part) for natural pectin, so you get a proper set without gumminess.
Sugar isn’t just a sweetener here; it’s a preservative and texture agent. Cooking jam is a balance: too little sugar, and your jam might mold quickly. Too much, and it masks the fruit. I’ve found a middle ground that tastes natural, keeps well, and spreads easily. The gentle simmer—not a raging boil, preserves the cherries’ fresh flavor and color. Small batches are forgiving and quick to make, so you get more reward for less effort.

Ingredients
- Fresh cherries (stemmed, pitted): 500g (about 4 cups, lightly packed)
Sweet or tart cherries both work. Don’t use frozen without thawing and draining excess liquid. - Granulated sugar: 300g (1½ cups)
Adjust down to 275g for tart cherries. Avoid unrefined sugars—they can make jam cloudy. - Lemon juice (freshly squeezed): 30ml (2 tbsp)
Acidity aids set and prevent crystallization. - Lemon zest (optional): 1 tsp, finely grated
Brightens the jam’s aroma. - Coarse salt: a pinch
Balances flavor and enhances fruitiness.
Equipment
Required:
- Heavy-bottomed saucepan or Dutch oven (2–3L): Even heat prevents burning.
- Wooden spoon or silicone spatula: Gentle stirring is best.
- Kitchen scale: For precise measurements.
- Metal spoon or small plate (chill in freezer): To test jam set.
- Fine-mesh sieve: For skimming foam.
- Thermometer (optional): Target set point is around 105°C (220°F).
- Clean jars with lids: For storage.
Nice-to-have:
- Cherry pitter or chopstick: For easy pitting.
- Funnel: For mess-free jar filling.
- Jam funnel and ladle: For easier pouring.
Step-by-Step Instructions
Step 1: Prep and Measure
Wash, stem, and pit your cherries. Don’t rush this—whole, unblemished fruit makes the best jam. Measure everything before you start.
Visual cue: Cherries should look plump, glossy, and smell sweet-tart. Discard any mushy or bruised fruit.

Step 2: Macerate
Combine cherries, sugar, lemon juice, zest (if using), and salt in your pot. Stir gently to coat. Let sit for at least 30 minutes—this draws out juices and starts dissolving the sugar.
Visual cue: You’ll see cherry juice pooling at the bottom of the pot.

Step 3: First Simmer
Place the pot on the stove over medium-low heat. Stir occasionally until the sugar fully dissolves. Then increase the heat to bring the mixture to a gentle boil.
Visual cue: Liquid should be clear, not grainy. Cherries will soften but still hold their shape.

Step 4: Cook to Set
Once bubbling, reduce the heat to maintain a steady simmer. Skim off any foam with a spoon. Stir now and then, but don’t overdo it, let the jam reduce naturally.
Visual cue: Bubbles will become larger, slower, and jam will thicken slightly. Cherry pieces will look glossy and translucent.

Step 5: Test for Set
To test, spoon a little jam onto your chilled plate. Let it cool for a minute, then push with your finger. If it wrinkles and holds its shape, it’s ready. If not, cook another 5 min and retest.
Visual cue: A dollop on the plate won’t run when tilted. Jam will coat the back of a spoon.
Step 6: Jar and Cool
Remove from heat. Let the jam rest 5 minutes to settle any foam. Skim once more, then pour into clean jars. Seal and cool completely before storing.
Visual cue: Jam should be thick but pourable, with whole cherry pieces visible.

Troubleshooting: Common Jam Issues and Fixes
| Problem | Likely Cause | Fix Next Time |
|---|---|---|
| Jam is too runny | Under-cooked, low pectin, or too much juice | Cook longer, add a touch more lemon or apple peel (pectin source). Reboil if needed. |
| Jam is too firm | Over-cooked or too much sugar | Next batch, reduce sugar slightly, pull off heat sooner. |
| Jam tastes burnt | Heat too high, pot too thin, or not stirred enough | Use heavy pot, stir gently, keep heat moderate. |
| Jam is cloudy | Stirred too aggressively or unrefined sugar | Stir gently, use white granulated sugar. |
| Crystals in jam | Undissolved sugar or high acid | Ensure sugar fully dissolves before boiling. |
| Mold after a few weeks | Not properly sealed or too little sugar | Use clean jars, process properly, don’t cut sugar too much. |
| Jam separates in jar | Not rested before jarring or over-stirred | Let jam sit 5 min after cooking, skim foam once. |
Substitutions and Variations
Dietary swaps:
- Sugar-free: Use your preferred sweetener, but note texture and shelf life will change. Xylitol or erythritol can work in small batches—follow package guidance for substitution ratios.
- Vegan: Already vegan; just check your sugar is plant-based if strict.
- Gluten-free: Naturally gluten-free.
Flavor variations:
- Vanilla cherry jam: Add 1 split vanilla pod or 1 tsp pure extract at the end.
- Spiced cherry jam: Stir in ½ tsp cinnamon or a pinch of cardamom with the sugar.
- Almond cherry jam: Add ½ tsp almond extract (or 2 tbsp toasted slivered almonds) at the end.
- Berry blend: Swap up to half cherries for raspberries, blueberries, or blackberries.
No cherry pitter?
Use a chopstick or metal straw to push the pits out from the stem end.
Storage, Make-Ahead, and Freezing
Counter: Tightly sealed, unopened jars keep up to 2 weeks in a cool pantry.
Fridge: Opened jars last 3–4 weeks. Let come to room temp before serving for best texture.
Freezer: Spoon jam into a freezer-safe container, leaving 1cm headspace. Freeze up to 3 months. Thaw overnight in the fridge.
Do not freeze in glass jars unless specifically designed for freezing to avoid breakage.
Serving Suggestions and Pairing Ideas
- On toast with ricotta or labneh for a tangy-sweet breakfast.
- Swirled into yogurt or oatmeal.
- Filling for thumbprint cookies, scones, or layer cakes.
- As a glaze for roasted chicken or pork—brush on in the last 10 minutes of cooking.
- With aged cheeses like manchego or gouda.
Internal links:
- [How to Make Perfect Scones] (recommend pairing with cherry jam)
- [Small-Batch Vanilla Cake Recipe] (jam filling idea)
- [Easy Freezer-Friendly Muffins] (jam swirl option)
- [DIY Yogurt Guide] (jam topping idea)
- [Lemon Curd for Toast] (compare with cherry jam for sweet-tart contrast)
FAQs
Can I use frozen cherries?
Yes, but thaw and drain thoroughly first—excess liquid from frozen fruit can water down your jam.
What if my jam doesn’t set?
You can reboil the jam, or use it as a sauce. For next time, double-check your cherry variety and pectin source, and cook a bit longer.
How do I double or halve this recipe?
Scale ingredients exactly. For bigger batches, use a wider pot (not taller) for even evaporation.
Best sugar type for jam?
White granulated sugar gives the clearest jam and best set. Avoid brown or raw sugars unless you want a deeper flavor and don’t mind a darker color.
Can I use bottled lemon juice?
Fresh is best for pectin and flavor. Bottled juice may work in a pinch for acidity but not for pectin content.
Can I make this in a slow cooker or air fryer?
Traditional stovetop is best for control. Air fryers/slow cookers don’t offer enough evaporation for proper jam texture.
Notes from My Kitchen
Batch 1: Used all sweet cherries, skipped lemon zest, and stirred constantly—jam was too sweet, a bit cloudy, and set too soft.
Batch 2: Mixed sweet and tart cherries, added lemon zest, used the “toss not stir” method—jam was tart-sweet, glossy, with a lovely fruit shine and perfect set.
Batch 3: Skimmed thoroughly, let jam rest before jarring—fewer bubbles, clearer jam, easier to pour.
Final Take: Aim for a mix of cherry types, macerate well, toss instead of over-stirring, and skim with patience.
Nutrition and Disclaimer
Approximate per tablespoon (20g):
Calories: 35 | Carbs: 9g (sugars) | Fat: 0g | Protein: 0g
Values are estimates. Adjust for specific brands and portion sizes. Always follow food-safety best practices for home canning.
Homemade Cherry Jam: Tips for Perfect Texture
Course: Jams u0026amp; Spreads300ml
servings20
minutes40
minutes35
kcal1
hour10
minutesA bright, tangy-sweet cherry jam made with fresh fruit, no bottled pectin, and a pro’s touch for perfect set—ideal for toast, baking, or gifting. Crafted for small kitchens and busy bakers.
Ingredients
Fresh cherries 4 cups
Granulated sugar 1½ cups
Lemon juice (fresh) 2 tbsp
Lemon zest (optional) 1 tsp
Coarse salt Pinch
Directions
- Prep
Wash, stem, and pit cherries. Discard any bruised fruit.
15 min
Cherries plump, glossy, no blemishes. - Measure
Weigh cherries and sugar. Juice and zest lemon if using.
5 min
Ingredients neatly laid out, scale at zero. - Macerate
In a large pot, mix cherries, sugar, lemon juice, zest, and salt. Let sit 30 minutes.
30 min
Sugar dissolves; cherry juices collect at bottom. - Dissolve
Place pot on low heat, stir until sugar fully dissolves.
10 min
Liquid clear, cherries soft, no grit. - Simmer
Bring to a gentle boil. Simmer, stirring occasionally, skimming foam.
20–30 min
Bubbles slow and large, cherries shiny and translucent. Jam coats spoon lightly. - Set Test
Place a spoonful on chilled plate. Let cool; push—if jam wrinkles, it’s ready.
5 min/test
Jam holds shape, wrinkles when pushed, doesn’t flow. - Jar
Remove from heat. Rest 5 min, skim foam, ladle into clean jars, seal, cool.
10 min
Jam thick but pourable, cherry pieces visible. Jars sealed, labels ready.
Notes
- Pro Tips for Perfect Cherry Jam
Use a mix of sweet and tart cherries for balanced flavor and natural acidity, which helps with setting and brightens the taste—don’t be afraid to blend varieties.
Macerate with sugar and lemon for at least 30 minutes to draw out juices and dissolve sugar evenly, leading to a clearer, smoother jam.
Toss, don’t stir constantly while cooking—gentle, occasional stirring reduces foam and prevents fruit from breaking down too much, so your jam keeps its lovely fruit pieces.
Skim foam at the end for a clean, glossy jam. A fine-mesh sieve works best, and letting the jam rest for 5 minutes before jarring helps foam settle for easier skimming.
Test for set with a cold plate—the jam should wrinkle when pushed, not run. If it doesn’t, cook a few more minutes and test again.
