Friend, if you’re bracing for a rambling, real-life tale about almond milk ice cream that’s filled with chaos, honest mistakes, family quirks, and a ton of home-tested tips… buckle up. This recipe isn’t just a staple in our house, it’s one of those “memory-makers” that somehow brings everybody to the kitchen (and occasionally reminds me I’m not a professional chef, just a real mom, figuring it out as I go).
The Saturday I Discovered Almond Milk Ice Cream—By Accident
It was one of those mornings again—the kind where the clock says 8:15 am, but my body says, “Isn’t it still Thursday?” My 8-year-old was already spinning in the living room, running an imaginary bakery out of sofa cushions, while my 12-year-old was “definitely awake.” We’d just limped through a long week: a broken water bottle, a forgotten science project, a last-minute work email that meant dinner was sandwiches… again.
Saturday is my sacred “try something new” day. I was craving a project, but, classic mom move, I forgot the actual milk at the store. Staring into the fridge, I spotted a full carton of Trader Joe’s unsweetened almond milk and leftover heavy cream from last week’s pasta. Vanilla in the pantry. Sugar. Some hope. An idea struck… “Let’s try making ice cream with almond milk!”
My Not-So-Genius Mistake: Learning the Hard Way
True confession: Impatience is my vibe, especially when there’s ice cream at stake. During my first successful-ish batch, I skipped the part where you really chill the base before churning. “Does this step really matter?” I wondered, visions of frozen delight already dancing in my head.
The answer is YES. I poured a slightly warm base into the ice cream machine. The churned result melted faster than my patience, a soupy, semi-solid mass that needed an emergency trip to the freezer (and still never quite set up right). Lesson learned: Never shortcut that chill step. If I’m organized, I make the base the night before and let it hang out in the fridge. If not, I pop it in the freezer for an hour or two before churning. It’s worth every minute of anticipation.

Ingredient Brand Crushes & Regular Mom Swaps
- Almond Milk: I stand by Trader Joe’s unsweetened for price, flavor, and texture. If you want a sweeter, more dessert-like note, go for vanilla almond milk (Silk is good too).
- Cream: I use heavy cream because I like that “real ice cream” creaminess. Swapped once for full-fat coconut milk (for a dairy-free friend)—it works! Texture is a bit denser, and there’s a subtle coconut aftertaste, but it’s still delicious.
- Sweetener: Standard is granulated sugar, but maple syrup (especially the dark kind) gives caramel undertones, my husband loves. Honey is nice but distinct. Once, in an act of pantry desperation, I tried coconut sugar: tasted good, but kinda tan.
- Vanilla: Nielsen-Massey or bust. This is not the place to use imitation. Once, I tossed in a vanilla bean because I found one in the freezer; the little black specks made me feel like Martha Stewart for eight minutes.
- Salt: Always, always—just a pinch. I forgot once and noticed the flavor felt “flat.” A tiny bit of salt lifts everything.
Tips That Took Me Dozens of Batches to Learn
- Blend your base before chilling. Just a quick zap with an immersion blender ensures the cream and almond milk emulsify, so you don’t get separated layers or weirdly icy bits.
- Chill the machine bowl overnight. Not just a few hours. If your ice cream maker uses a freezer bowl, put it in at least 8 hours ahead. Trust me, I’ve cut corners—churned for 40 minutes and ended up with milkshakes.
- Don’t boil the base. Warm until the sugar dissolves, then off the heat—that’s it! Boiling changes the flavor, and you’ll lose that fresh vanilla note.
- Tweak texture with add-ins. Want extra creaminess? Add a tablespoon of vodka (won’t taste it, but helps prevent super-hard freezing). Want chunkier texture? Toss in mini chocolate chips, chopped nuts, or swirls of peanut butter after churning.
- Soft-serve lovers, unite. My kids eat it straight from the churn—fluffy, like soft-serve at a fair. For classic, scoopable ice cream, stash it in a shallow container and freeze for four hours.
How The Family Eats It (And How They Sabotage My Batches)
This recipe is now our “family ice cream.” The actual scene every time: both kids stake out a spot by the machine to watch it churn, and when it’s done, they argue about who gets the paddle. My husband acts indifferent, but manages to “just happen to walk by” around the time it’s ready.
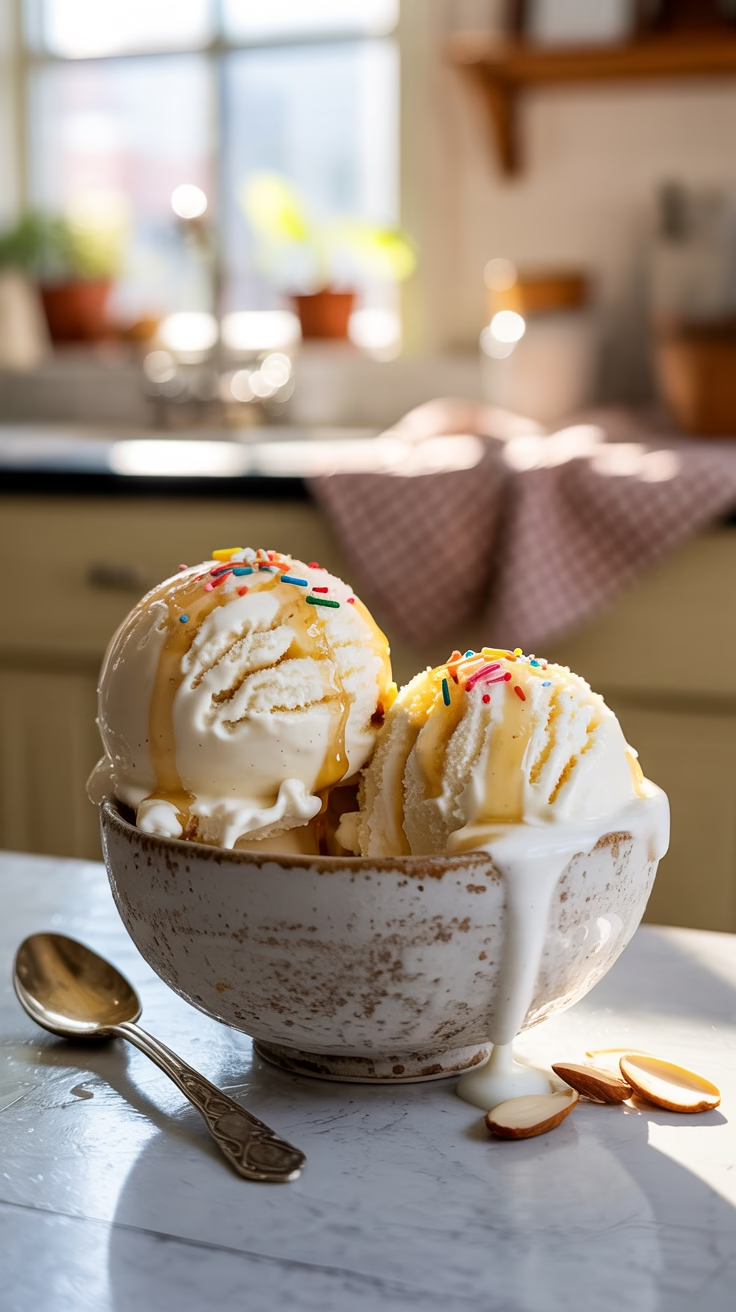
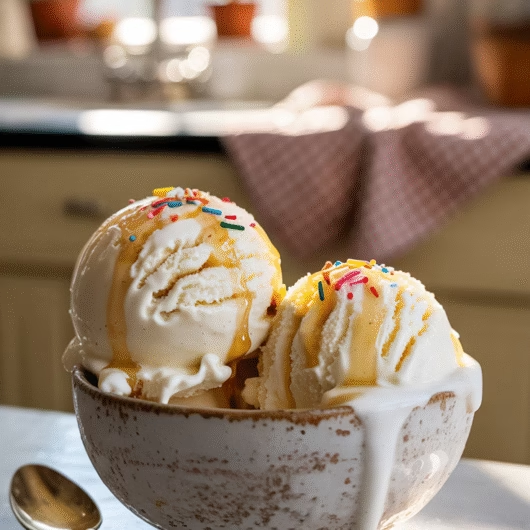
- Modifications my kids demand: The 8-year-old refuses any batch without rainbow sprinkles (“It’s not REAL ice cream without sprinkles, Mom!!”). The 12-year-old goes for a swirl of Nutella or crushed Oreos. I even caved once and tried mini marshmallows—messy, but memorable.
- My go-to: Drizzle with honey, toss on a handful of toasted sliced almonds.
- Husband’s order: Cone, immediately. No toppings. If we have waffle cones, I get “bonus points.”
Every now and then, I toss in surprise add-ins: quick raspberry puree, a scoop of peanut butter, or a handful of coconut flakes. The basic vanilla-almond base is like a blank canvas.
The Full Recipe (With All My No-Fuss Notes)
YOU’LL NEED:
1¾ cups (420ml) unsweetened almond milk (Trader Joe’s if possible)
2 cups (480ml) heavy cream (or full-fat coconut milk for dairy-free!)
¾ cup (150g) granulated sugar (or ½ cup maple syrup/honey)
Pinch of kosher salt
1 tablespoon (15ml) Nielsen-Massey vanilla extract
OPTIONAL ADD-INS:
Rainbow sprinkles, chocolate chips, peanut butter, Nutella, chopped fruit, toasted nuts, marshmallows—whatever “feels right.”
Directions:
- Heat the Base:
In a medium saucepan, gently combine almond milk, cream, sugar, and salt. Heat on medium-low, stirring constantly until the sugar dissolves. Don’t boil! Turn off the heat and stir in vanilla. - Emulsify:
Blend the mixture for 20–30 seconds (immersion blender = less mess, but a regular blender works). This step really makes the texture better. - Chill, Chill, Chill:
Pour the base into a big bowl. Let it cool, then chill in the fridge for at least four hours (overnight is best). If you’re in a hurry, freezer for 60–90 minutes, stirring a couple times. - Churn Time:
Make sure your ice cream maker bowl is frozen solid. Churn according to the manufacturer’s directions, usually 20–25 minutes. - Add Extras:
Once churned, fold in any extra bits and pieces—sprinkles, chocolate, fruit, you name it. - Freeze to Scoop:
For firmer, scoopable ice cream, spread into a shallow airtight container. Press a layer of plastic wrap directly on the surface (to prevent ice crystals), then freeze 3–4 hours. - Serve & Savor:
Let the container sit at room temp for 5 minutes before scooping, especially if your freezer runs cold.
What I’d Tell My Best Friend
Here’s the thing: You’ll mess up this recipe at least once. It’ll be a little too soft, or too hard, or melt because you didn’t chill enough. You’ll stare into the freezer wondering if it’s supposed to look like that. But it always gets eaten, every time. Real family food is like that—imperfect and a little chaotic.
If you try one tweak, make it: blend your base, chill it long and hard, and never ever feel bad about skipping fancy add-ins. Let your kids throw their own toppings on, and celebrate the mess.
Next time you’re out of “real” milk, or just want a lighter summer scoop, give this one a whirl. Your kitchen will smell like vanilla, your floor will be sticky, your kids will squabble, and everyone will leave happy. Isn’t that what a good recipe is all about?
Creamy Vanilla Almond Milk Ice Cream (That Actually Works!)
Course: DessertCuisine: AmericanDifficulty: Easy6-8
servings10
minutes240
kcal5
hoursChilling: 4 hours (overnight is best)
Creamy, vanilla-scented ice cream made with almond milk and real cream—light, smooth, and endlessly adaptable for family fun. Perfect for hot days, out-of-milk moments, or when you want a scoop that feels both indulgent and just a little lighter.
Ingredients
1¾ cups unsweetened almond milk (Trader Joe’s is our favorite)
2 cups heavy cream (for dairy-free, use full-fat coconut milk)
¾ cup granulated sugar (sub maple syrup or honey if you like)
1 pinch kosher salt
1 tablespoon real vanilla extract (Nielsen-Massey makes a difference!)
Optional Add-ins: Rainbow sprinkles, chocolate chips, peanut butter swirl, Nutella, toasted almond slices, fresh fruit, marshmallows—anything your crew loves
Directions
- Heat the Base
In a medium saucepan, gently stir together almond milk, heavy cream, sugar, and salt. Heat on medium-low just until the sugar dissolves—don’t let it boil. Remove from heat and stir in vanilla. - Blend It Smooth
Pour the mixture into a blender or use an immersion blender right in the pan. Blend for 20–30 seconds until completely smooth and emulsified. This step is key for the creamiest texture. - Chill Hard
Pour the base into a large bowl, let it cool to room temperature, then cover and refrigerate for at least 4 hours (overnight is best). If you’re in a hurry, move the bowl to the freezer for 60-90 minutes, stirring occasionally, but don’t let it freeze solid. - Churn Your Ice Cream
Make sure your ice cream maker bowl is frozen solid (overnight in the freezer is best). Pour in the chilled base and churn according to your machine’s instructions (usually 20–25 minutes). The ice cream will look like soft-serve. - Fold in Fun Stuff
When the churning is done, gently stir in any add-ins—sprinkles, chocolate chips, peanut butter, etc.—by hand. - Freeze to Scoop (Optional)
For classic, scoopable ice cream, transfer the mixture to a shallow, airtight container. Press a piece of plastic wrap directly on the surface to prevent ice crystals. Freeze for 3–4 hours. For soft-serve, eat right away! - Serve with Love
Let the container sit at room temperature for 5 minutes before scooping if your freezer is extra-cold. Top with extra sprinkles, honey, or whatever makes your family smile.
Notes
- Tips (Because Real Kitchens Need Them):
Blend Every Time: Prevents separation and icy bits.
Chill the Base Overnight: Seriously, this matters!
Salt is Magic: A pinch lifts the vanilla and balances sweetness.
Chill the Churn Bowl: Frozen solid = perfect texture.
Vodka Trick: Add 1 tbsp if you want a softer freeze (no alcohol taste).
Add-Ins: Stir them in after churning, not before. - Enjoy your scoops, your way—straight from the churn, piled high with toppings, or savored quietly after the kids are in bed. Because sometimes, the best recipes are the ones that remind you: real food is about more than perfection.