There’s something incredibly comforting about a warm apple crisp bubbling in the oven, especially when the topping turns perfectly golden and the kitchen smells like cinnamon and baked apples. This version is my go-to when I want a reliable, fuss-free dessert that still feels bakery-quality. Instead of guessing textures or hoping it sets right, this recipe is designed to give you a thick, jammy apple filling and a crisp, crunchy oat topping every single time. One pro tip I always follow? Let the crisp cool for at least 10 minutes before serving—this short rest helps the filling thicken properly instead of turning runny on the plate.
My biggest pro tip? Toast your oats before assembling. It adds a deep, nutty warmth and keeps them from going limp under the fruit. Once you try it, you’ll never go back.
Why This Recipe Works
Apple crisp looks simple, but small technique changes completely transform the final bake. Here’s the baking science behind this version:
- Cornstarch + apple juices → As the apples bake, they release water. Cornstarch gently thickens the mixture into a glossy sauce instead of a watery puddle. Too much thickener creates a gummy filling, so the ratio here (10g per 700g apples) is calibrated for tender apples with body.
- Oats + flour balance → Rolled oats alone would yield a topping that crumbles apart. The addition of flour provides structure so the topping bakes into crisp clusters that hold up under heat.
- Butter temperature matters → Cold, cubed butter melts slowly in the oven, creating little steam pockets in the topping. This is what gives you those crave-worthy crunchy edges.
- Lemon juice (acid) brightens sweetness and prevents browning, but also helps balance the richness of the topping so the dessert doesn’t taste heavy.
This is a beginner-friendly recipe with intermediate-level results: crisp, structured, balanced.
Ingredients With Weights & Purpose
For the Apple Filling
- Apples — 700g (about 4 medium) — sweet-tart varieties like Honeycrisp or Pink Lady hold their shape well.
- Light brown sugar — 50g (¼ cup) — adds moisture and caramel notes.
- Cornstarch — 10g (1 tbsp) — thickens the filling.
- Ground cinnamon — 1 tsp — warmth and aroma.
- Lemon juice — 10g (2 tsp) — brightness and prevents oxidation.
- Vanilla extract — 1 tsp — flavor depth.
- Salt — a pinch — enhances sweetness.
For the Oat Crisp Topping
- Rolled oats — 90g (1 cup) — texture and crunch.
- All-purpose flour — 65g (½ cup) — structure for crisp clusters.
- Cold unsalted butter — 85g (6 tbsp) — richness and browning; must stay cold.
- Light brown sugar — 70g (⅓ cup) — caramel flavor and moisture.
- Cinnamon — ½ tsp — warmth.
- Salt — ¼ tsp — rounds flavor.
Equipment
Required
- 8-inch (20 cm) square or round baking dish
- Mixing bowls
- Silicone spatula
- Knife and peeler
- Digital scale (recommended for accuracy)
- Oven/OTG
Nice-to-Have
- Pastry cutter (for topping)
- Microplane for zesting (optional variation)
- Parchment-lined tray (for toasting oats)
Step-by-Step Instructions With Timing & Visual Cues
Step 1: Preheat and Prepare
Preheat oven to 180°C (350°F). Place rack in the center.
Visual cue: Oven should reach full temperature before baking—underheated ovens cause soggy topping.
Step 2: Toast the Oats (Optional but Recommended)
Spread oats on a parchment-lined tray. Toast for 6–7 minutes until lightly golden and nutty-smelling.
Visual cue: Oats should feel dry and slightly crisp to the touch, not brown.
Pro tip: This alone keeps the topping crunchy even the next day.
Step 3: Mix the Apple Filling
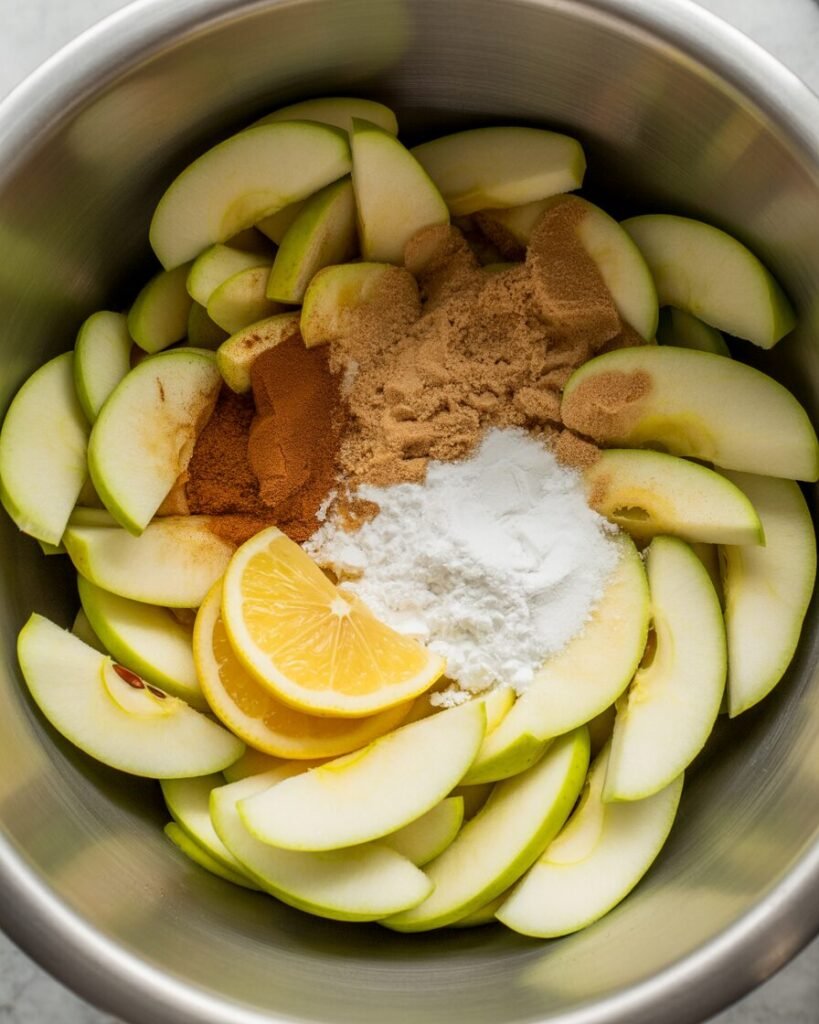
In a bowl, combine sliced apples, brown sugar, cornstarch, cinnamon, lemon juice, salt, and vanilla. Toss for 1 minute until every slice is coated.
Visual cue: The apples should look glossy, not wet; no dry cornstarch patches.
Transfer to your baking dish and spread evenly.
Step 4: Make the Crisp Topping
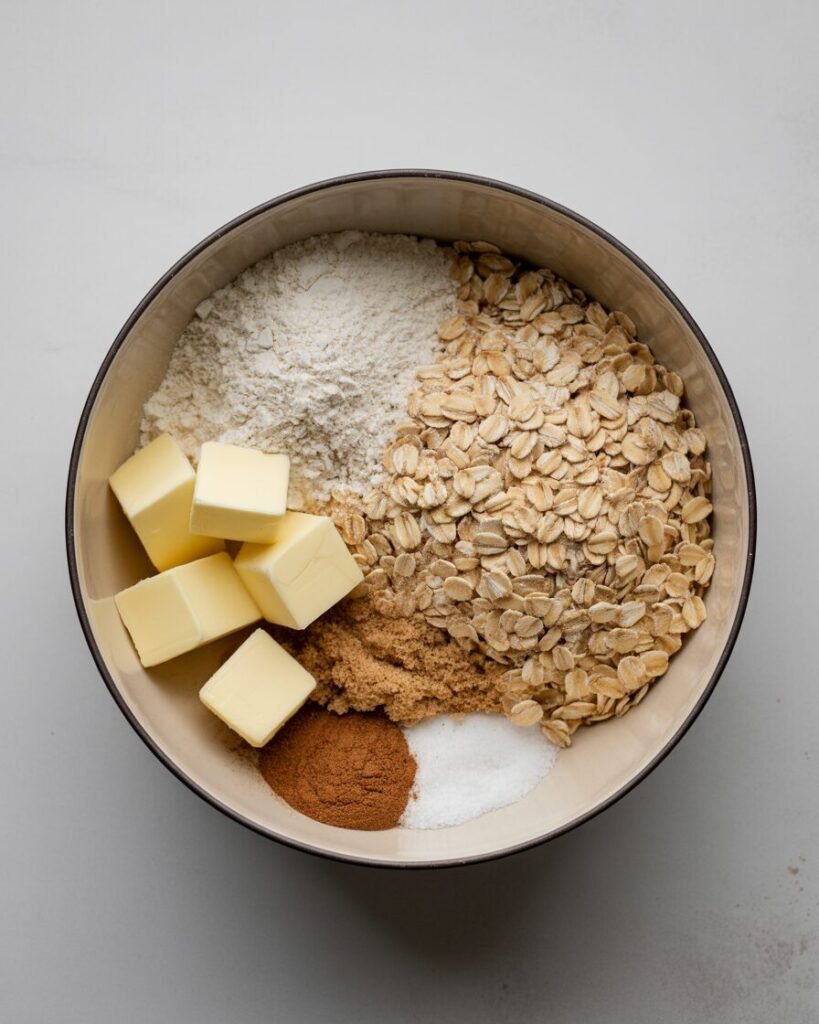
In a medium bowl, mix toasted oats, flour, brown sugar, cinnamon, and salt. Add cold butter cubes. Work them in with a pastry cutter or fingertips for 2–3 minutes until clumps form.
Visual cue: Mixture should look sandy with some pea-sized clusters—these clusters bake into crunchy bites.
Step 5: Assemble and Bake
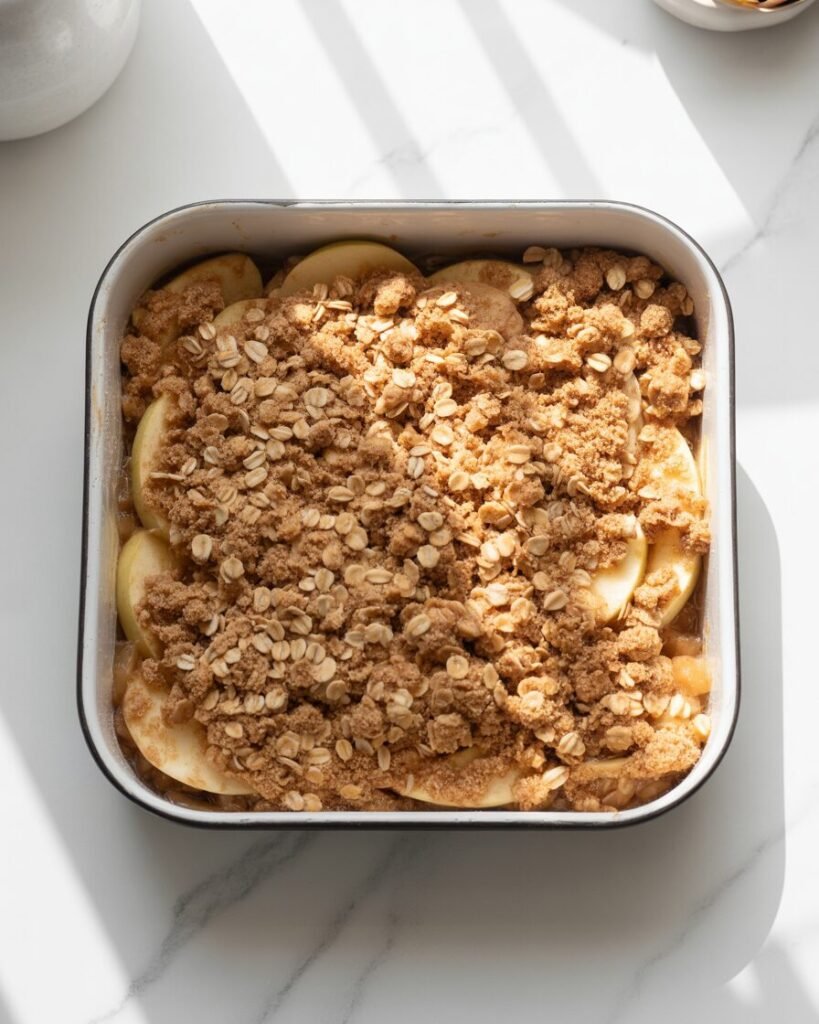
Scatter the topping evenly over the apples.
Bake for 38–45 minutes until the topping is deeply golden and the filling is bubbling at the edges.
Doneness cues:
- Topping should feel firm when tapped lightly.
- The apples should be soft when pierced but not mushy.
- Bubbling is essential—it activates the cornstarch and thickens the filling.
Step 6: Cool Slightly
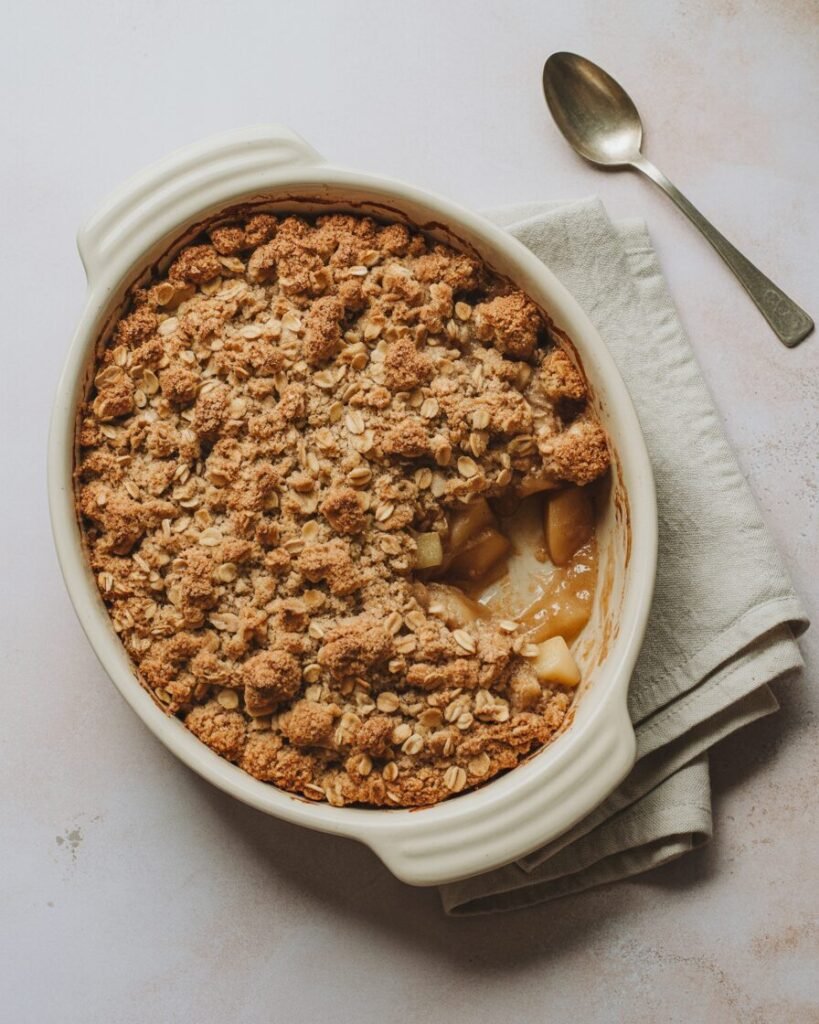
Cool for 10–15 minutes before serving.
Visual cue: The filling thickens as it cools; cutting too early may seem watery.
Troubleshooting (5–8 common issues)
Problem: Topping turns soggy.
Likely causes: Underbaking, un-toasted oats, apples too watery.
Fix: Bake until bubbling fully; toast oats; use crisp apples (avoid Red Delicious).
Problem: Filling is watery.
Causes: Not enough bake time for cornstarch activation.
Fix: Extend bake by 5–10 minutes until edges bubble vigorously.
Problem: Apples turned mushy.
Causes: Using soft apples or slicing too thin.
Fix: Slice apples ¼ inch thick; use firm varieties.
Problem: Topping tastes floury.
Causes: Butter not mixed properly; topping underbaked.
Fix: Ensure pea-sized clusters; bake to deep golden.
Problem: Too sweet.
Causes: Very sweet apple variety + full sugar amount.
Fix: Reduce sugar in filling by 15–20g next time.
Problem: Crisp burns on top.
Causes: Oven running hot or dish too close to top element.
Fix: Lower rack; tent foil at the 25-minute mark.
Substitutions & Variations
Dietary Swaps
- Gluten-free: Use certified GF oats + 1:1 GF all-purpose flour. Texture will be slightly softer; topping may brown quicker.
- Dairy-free: Replace butter with 80g cold coconut oil (solid). Flavor becomes lightly tropical; topping is more crumbly.
- Refined sugar-free: Use coconut sugar in both filling and topping; expect darker color and deeper caramel notes.
Flavor Variations
- Add ½ tsp nutmeg or cardamom to filling.
- Stir 2 tbsp chopped pecans or walnuts into topping for extra crunch.
- Mix 1 tsp orange zest into the apple filling for a brighter finish.
- Add ¼ cup raisins or cranberries for texture contrast.
Scaling the Recipe
For a 6-inch (15 cm) dish (¾ batch)
- Apples: 525g
- Oats: 70g
- Flour: 50g
- Butter: 64g
- Brown sugar filling: 38g
- Brown sugar topping: 53g
Bake 5 minutes less.
For a 9-inch (23 cm) dish (1.5× batch)
- Apples: 1050g
- Increase all other ingredients by 1.5×
Bake 5–10 minutes more.
Storage, Make-Ahead & Freezing
Counter
Store covered for 1 day. Topping will soften slightly.
Fridge
Keeps 3–4 days. Reheat at 175°C (350°F) for 8–10 minutes to restore crispness.
Freezing
- Freeze unbaked crisp (assembled) for up to 2 months. Bake from frozen +10 minutes.
- Freeze baked crisp for up to 1 month. Thaw overnight, then re-crisp in oven.
Do not freeze raw apples without sugar and starch—they turn gritty.
Serving Suggestions
- Scoop with vanilla ice cream, maple whipped cream, or plain Greek yogurt.
- Drizzle with caramel sauce for a richer dessert.
- Serve warm with a sprinkle of sea salt flakes to balance sweetness.
FAQs
Can I use instant oats instead of rolled?
Not recommended—instant oats dissolve and make a mushy topping.
How do I keep the topping crunchy?
Toast the oats and bake fully until bubbling. Cold butter is key.
Can I use whole-wheat flour?
Yes, but start with 55g instead of 65g; whole-wheat absorbs more moisture.
Can I bake this in an OTG?
Yes—use the middle rack, lower rod off, preheat fully for best browning.
How do I double the recipe?
Use a 9×13 inch pan; bake 45–55 minutes.
Notes From My Kitchen (Testing Log)
Batch 1: Used Red Delicious apples. Filling turned watery; apples collapsed. Switched to Honeycrisp.
Batch 2: No oat toasting. Topping softened after cooling. Began pre-toasting oats.
Batch 3: Increased cornstarch to 15g. Filling too thick. Returned to 10g.
Batch 4: Tried melted butter. Topping baked flat and sandy. Cold butter confirmed as ideal.
Batch 5: Reduced sugar slightly for balance. Winner—bright flavor without heaviness.
Final method chosen for: crispy top, saucy but thick filling, dependable structure.
Nutrition & Disclaimer
Approx (per 1 of 6 servings): 285 kcal, 11g fat, 45g carbs, 3g protein.
Values are estimates; actual numbers vary by brand. Practice safe food handling when storing and reheating.
Conclusion / Final Thoughts / To Conclude the Post
Apple crisp is one of those desserts that rewards small improvements—better apple choices, cold butter, toasted oats—and this version brings all of those tweaks together into a fool-proof, cozy bake you can rely on all year long. Whether you’re a beginner learning fruit desserts or an experienced home baker looking for a more structured, dependable crisp, this recipe gives you the clarity, technique, and texture you’ve been chasing.