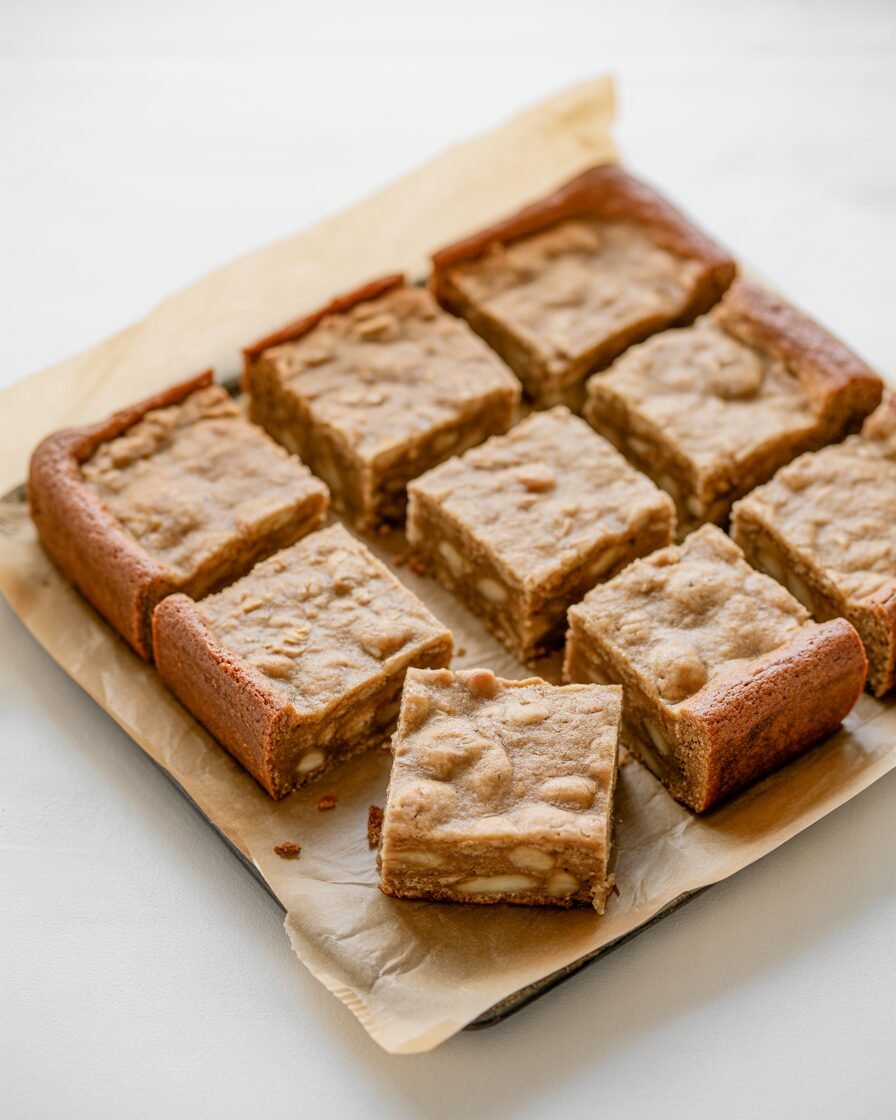
These baked banana oat breakfast bars are my “grab-and-go but still feels homemade” solution for busy mornings: softly set in the middle, lightly crisp at the edges, and naturally sweet from very ripe bananas. They slice cleanly once cooled, but warm up like a cozy bowl of oatmeal. The unique part: I treat the mixture like a thick batter, not a dry granola mash, so you don’t get crumbly bars. Pro tip: press the batter firmly into the pan and bake until the center is fully set—many banana-oat bars fail because they’re simply underbaked in the middle.
Why this recipe works (baking science, 120–200 words)
Bananas do three jobs here: sweetness, moisture, and binding, which is why the riper (more fragrant, spottier) the better—your bars taste fuller without extra sugar. Oats absorb liquid as they bake and as they cool, so the bars seem “too soft” when hot but finish setting as they rest; slicing early is the #1 reason people think they’re gummy. Baking powder gives lift and keeps the texture from turning dense and spoon-bread-like, but it needs enough heat time to finish setting the center—think “set custard meets baked oatmeal,” not “cake.” Finally, firm pressing in the pan removes big air pockets, so you get an even slice instead of tunnels and craters.
Ingredients (weights + purpose)
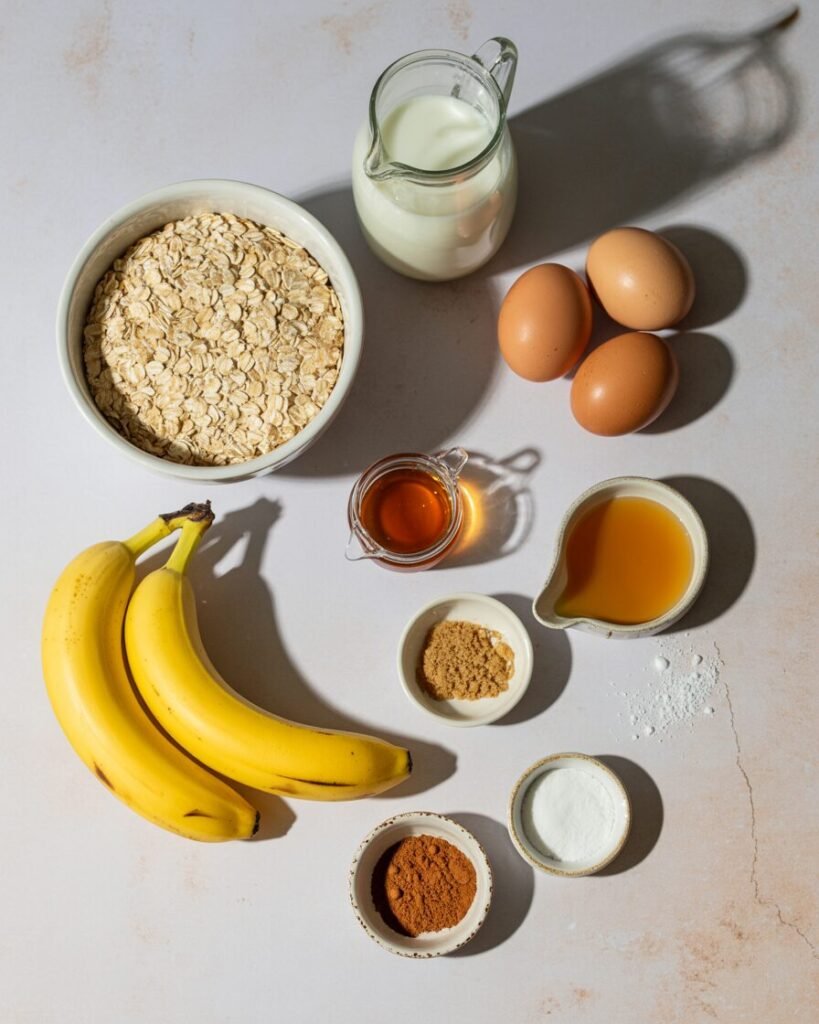
Yield: 9 bars (8×8 in / 20×20 cm pan), beginner-friendly, no stand mixer.
- Very ripe bananas, mashed — 225 g (1 cup) — Sweetness, moisture, binding.
- Rolled oats (old-fashioned) — 180 g (2 cups) — Structure + chew (the main “crumb”).
- Milk (dairy or unsweetened plant milk) — 120 g (1/2 cup) — Hydration so oats bake up tender, not dry.
- Large eggs — 2 — Protein structure to help the bars set and slice.
- Honey (or maple syrup) — 60–85 g (3–4 Tbsp) — Extra sweetness + moisture; adjust for banana ripeness.
- Baking powder — 5 g (1 tsp) — Lift; prevents heavy, stodgy centers.
- Ground cinnamon — 2 g (1 tsp) — Warm flavor (optional but recommended).
- Fine salt — 2 g (about 1/3 tsp) — Balances sweetness and sharpens banana flavor.
- Vanilla extract — 5 g (1 tsp) — Rounds out the banana aroma.
Optional mix-ins (choose 1–2): chocolate chips, chopped nuts, raisins (about 60–90 g / 1/2 cup).
Equipment
Required:
- 8×8-inch (20×20 cm) square pan, parchment paper.
- Mixing bowls, fork/potato masher (for bananas), whisk/spatula.
- Oven/OTG, middle rack position.
- Kitchen scale (recommended for consistent oat/banana ratio).
Nice-to-have:
- Instant-read thermometer (helps avoid underbaked centers).
- Metal bench scraper for neat slices (after cooling).
Step-by-step (timing + visual cues)
Step 0: Prep (10 min)
- Heat oven to 175°C (350°F) and let it preheat fully (OTG users: give it a solid 15 minutes). Line an 8×8 pan with parchment, leaving “handles.”
Visual cue: parchment should sit flat in the corners; if it pops up, clip it briefly while you mix.
Step 1: Mash bananas (2–3 min)
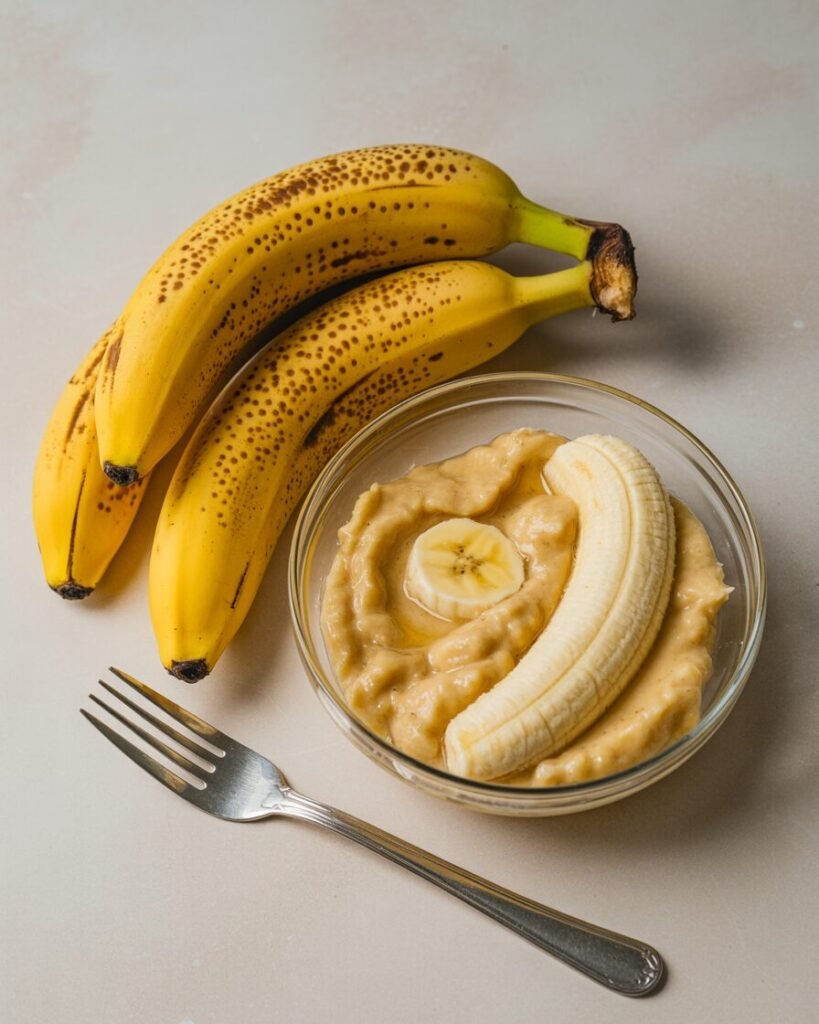
Mash bananas until mostly smooth; small pea-size lumps are fine.
Visual cue (right): glossy puree with a few soft lumps.
Visual cue (wrong): big slippery chunks—these create wet pockets that look underbaked later.
Step 2: Combine dry (1 min)
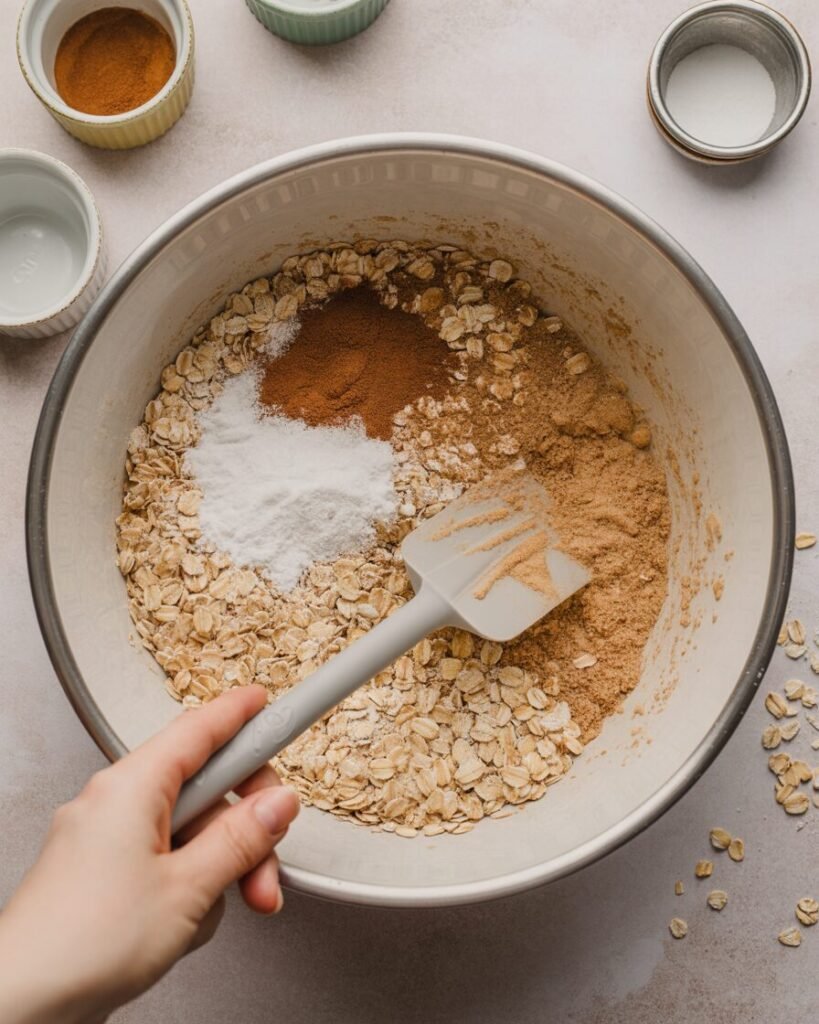
In a large bowl, stir oats + baking powder + cinnamon + salt so the leavening is evenly distributed.
Avoid this: dumping baking powder straight into wet ingredients can leave bitter “hot spots.”
Step 3: Add wet + rest briefly (5 min)
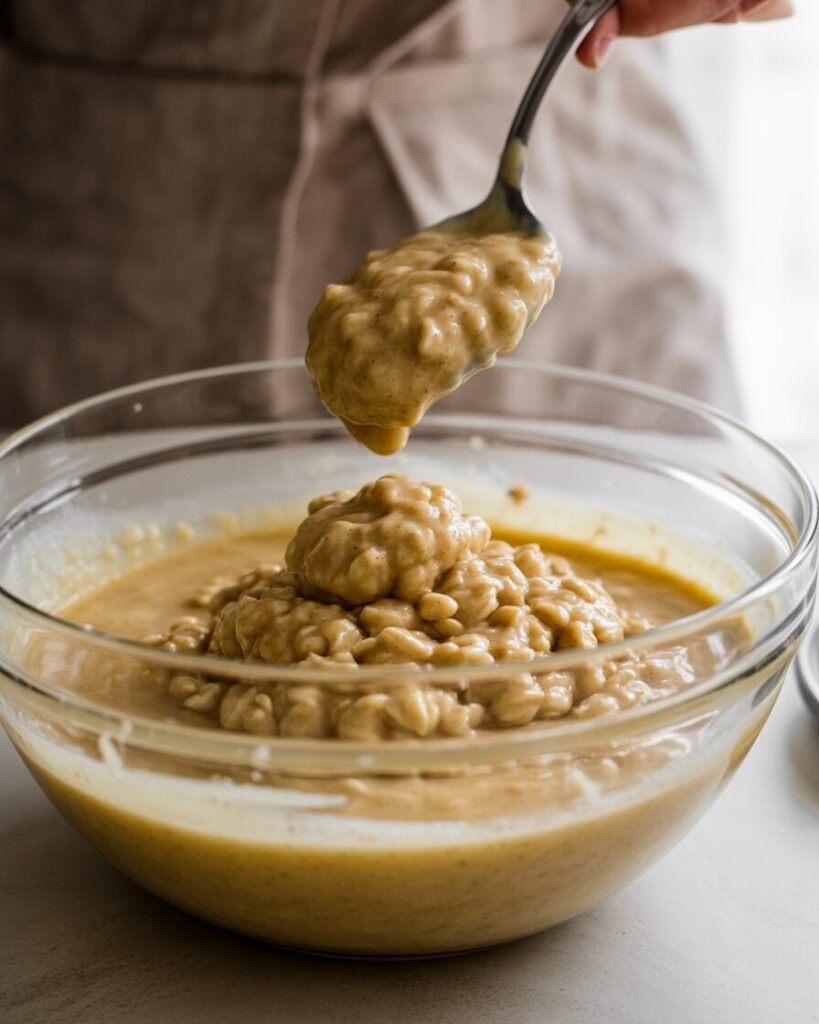
Whisk in mashed banana, milk, eggs, honey, and vanilla until everything looks evenly moistened, then fold in optional mix-ins.
Rest 5 minutes so oats begin absorbing liquid (this reduces crumbly edges and helps the center set).
Visual cue: mixture should look like thick porridge—spoonable, not pourable.
Step 4: Pan + press (2 min)

Scrape into pan and press firmly into an even layer, especially at the corners.
Checkpoint: the surface should look compact and slightly glossy, not fluffy.
Step 5: Bake (40–45 min)
Bake on the middle rack for 40–45 minutes, until the center is set and edges are browned.
Doneness tests: center should spring back when tapped (no “wet jiggle”), and a toothpick should come out mostly clean (a few moist crumbs are fine).
If using a thermometer: aim for “set like baked oatmeal,” not liquid in the middle (thermometer is optional—use the set/springy cue first).
Step 6: Cool before slicing (45–90 min)

Cool in pan 15 minutes, lift out, then cool fully before slicing.
Did you know? Many banana-oat bars feel underbaked when hot because oats keep absorbing moisture as they cool and firm up.
Troubleshooting (common failures + fixes)
- Problem: Center is gummy/wet even after cooling. Likely causes: underbaked, too much banana for the oat amount, sliced hot. Fix next time: bake longer (check at 45 min+), weigh banana (225 g), cool completely before cutting.
- Problem: Bars crumble when lifted. Likely causes: not pressed firmly, too little moisture, cut too soon. Fix next time: press harder, add 2–4 Tbsp more milk, cool fully.
- Problem: Dry, tough bars. Likely causes: overbaked, oats-to-banana ratio too high. Fix next time: pull when center is just set, add 30–60 g more banana or a splash more milk.
- Problem: Bitter/metallic aftertaste. Likely causes: too much baking powder or uneven mixing. Fix next time: use 5 g (1 tsp) and mix it into oats first.
- Problem: Sinks or looks “collapsed.” Likely causes: center not set yet (essentially underbaked). Fix next time: bake until the middle springs back and edges brown.
- Problem: Wet pockets. Likely causes: banana not mashed enough, mix-ins clumped. Fix next time: mash smoother; fold mix-ins evenly.
Substitutions and variations
Dietary swaps
- Egg-free: Replace 2 eggs with 2 “flax eggs” (2 Tbsp ground flax + 6 Tbsp water; gel 10 min). Expect a softer, slightly more tender set; bake a few minutes longer and cool fully for clean slices. (General baking practice; not from provided sources.)
- Dairy-free: Use any unsweetened plant milk 1:1.
- Gluten-free: Use certified gluten-free rolled oats 1:1 (texture stays similar; check labels). (General guidance; not from provided sources.)
Flavor swaps (tested-style guidance)
- “Banana bread” version: add extra cinnamon + a pinch of nutmeg; walnuts pair especially well.
- Chocolate-chip version: fold in 60–90 g chips; bake until set, then cool completely for clean squares.
Scaling
- 8×8 pan (9 bars): use the base recipe and bake 40–45 min.
- 9×13 pan (about 18 bars): double the recipe; start checking around 45–55 min (thicker batter depth can vary).
Storage, make-ahead, and freezing
- Room temp: Treat these like a moist baked oatmeal—don’t leave out longer than 2 hours total.
- Fridge: Store airtight for 3–5 days (meal-prep friendly); refrigerate promptly after cooling.
- Freezer: Freeze well portioned; use freezer-safe bags/containers for best quality.
Refresh: Warm a bar briefly so the edges re-crisp and the center softens (microwave or toaster-oven/OTG works; watch closely). (Technique guidance; not from provided sources.)
Food-safety note: cooked oat-based foods are perishable; cool, seal, and refrigerate within 2 hours.
Serving suggestions and pairing ideas
Serve warm with yogurt and berries for contrast, or drizzle with a little extra honey if your bananas weren’t ultra-ripe. These are naturally sweet, so pair them with something tangy (Greek yogurt, kefir-style yogurt) to keep breakfast from tasting flat. (Pairing guidance; not from provided sources.)
FAQs
Can I use quick oats instead of rolled oats?
Yes, but the texture is softer and more “set oatmeal” than chewy bar, because quick oats hydrate faster.
How do I stop banana oat bars from being gummy?
Bake until the center is set and springs back, then cool completely before slicing (they finish firming as they cool).
Can I halve or double the recipe?
Doubling works well in a 9×13 pan; start checking doneness around the 45–55 minute mark and bake until set.
What pan size is best for thick, sliceable bars?
An 8×8 pan gives a thicker bar and a more reliable set; line with parchment for clean lifting.
How long do they last in the fridge?
Stored airtight, cooked oatmeal-style bars keep about 3–5 days in the refrigerator.
Notes from my kitchen (testing log)
Batch 1: I didn’t press the mixture firmly, and the middle baked up uneven—some slices held, others crumbled at the edges.
Batch 2: I sliced while still warm; they seemed underbaked and gummy, but the same pan sliced clean once fully cooled (oats keep absorbing moisture as they rest).
Batch 3: I mixed baking powder into the wet bowl first and tasted a faint bitter spot in one corner—mixing leavening into the oats fixed that.
Batch 4: I used less-ripe bananas and the bars tasted flat; adding a touch more honey and vanilla brought back the “banana bread” vibe.
Batch 5: Longer bake time was the key: baking until the center was truly set (not jiggly) gave the best slice and stopped the sinky look.
Final: The winning method is weighing the banana (225 g), using rolled oats, pressing firmly, baking until set, and cooling completely before cutting.
Nutrition and disclaimer (short)
Nutrition varies widely with mix-ins and sweetener amount, so calculate based on your exact brands and portion size. Values are estimates; follow food-safety best practices, refrigerate within 2 hours, and discard if stored improperly.
final thoughts
If you want a dependable baked banana oat breakfast that slices cleanly and reheats well, focus on the set-in-the-center bake and the full cool-down before cutting. Once you nail the base, you can swap mix-ins seasonally (nuts in winter, berries in summer) without changing the core method.