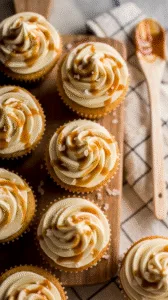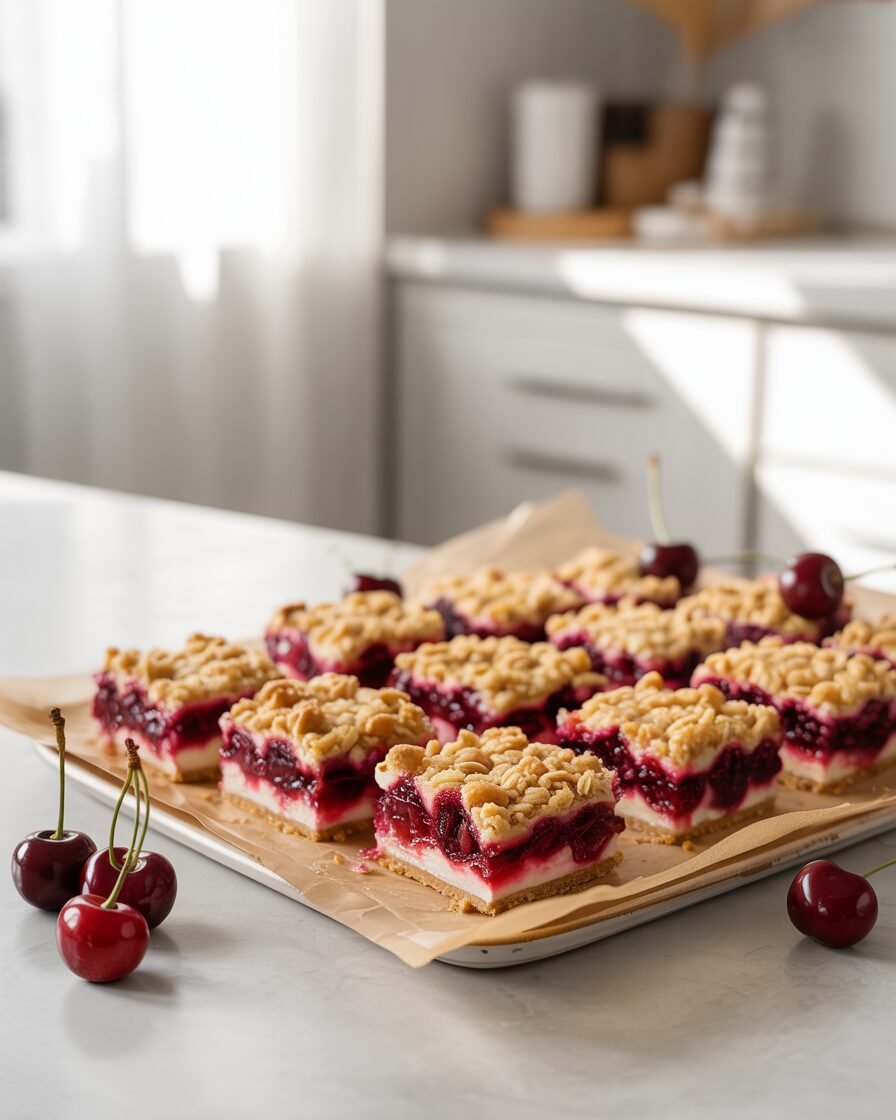
Some recipes earn a permanent spot in your baking rotation not because they’re fancy, but because they never let you down—and these Cherry Crumble Bars are exactly that kind of dessert. They’re the bars you make when you need something reliable, comforting, and secretly impressive, the kind you can pull together on a weeknight without pulling out a mixer or a dozen bowls.
What makes this version special is the balance: a buttery shortbread base that doesn’t crumble apart, a bright cherry layer that stays thick and glossy instead of leaking, and a golden crumble top that bakes up crisp every single time. If you’ve ever had bars that fell apart, turned mushy, or baked unevenly, this recipe fixes those frustrations from the very first attempt.
Promise: you’ll get clean slices, a chewy–crisp texture, and a flavor that’s equal parts sweet and tart—plus one simple trick that makes all the difference: briefly pre-baking the base so it stays firm under the juicy cherry layer.
Why This Recipe Works
Cherry crumble bars only seem simple — but getting the right ratio of fat, flour, and fruit can make or break them. Here’s the science behind why this version works:
- Butter + Flour = Two Textures in One Dough
By using one dough for both the base and crumble, you get a sturdy shortbread bottom (thanks to pressed, compacted dough) and a sandy, crisp top (loosened, unpressed dough). The butter coats part of the flour, preventing gluten overdevelopment, which keeps everything tender. - Cornstarch in the Cherry Filling
Cornstarch activates at 93°C (199°F), meaning your filling thickens only after it’s in the oven — giving you clean layers instead of runny cherry juice that seeps into the crust. - Brown Sugar for Caramel Notes
Brown sugar’s molasses adds moisture retention and chewiness. It also deepens the flavor so the cherries shine. - Proper Bake Time
The bars bake longer than expected because the base must fully set before cooling. Underbaking leads to gummy, sunken centers — a common reader issue solved here.
Ingredients

For the Crust + Crumble
- All-purpose flour — 260g (2 cups) — structure and crispness
- Unsalted butter, melted — 170g (¾ cup) — binds dough, creates tender shortbread
- Brown sugar — 100g (½ cup, packed) — moisture + flavor depth
- Granulated sugar — 50g (¼ cup) — sweetness + crisp edges
- Baking powder — ½ tsp — light lift in the crumble
- Salt — ¼ tsp — balances sweetness
- Vanilla extract — 1 tsp — flavor
For the Cherry Layer
- Pitted cherries (fresh or frozen) — 450g (3 cups) — main fruit layer
- Granulated sugar — 100g (½ cup) — sweetness, balances tartness
- Cornstarch — 2 tbsp — thickener to avoid runny bars
- Lemon juice — 1 tbsp — brightness + natural pectin activation
- Almond extract (optional) — ⅛ tsp — enhances cherry flavor
Equipment
Required
- 8×8-inch (20×20 cm) metal baking pan
- Mixing bowls
- Whisk and spatula
- Digital scale
- Oven/OTG
- Parchment paper
- Cooling rack
Nice to Have
- Offset spatula (for even pressing)
- Instant-read thermometer (for doneness check)
- Sieve (for dusting powdered sugar if desired)
Step-by-Step Instructions (with timing + visual cues)
Step 1 — Prepare the pan (2 minutes)
Line an 8×8 pan with parchment, leaving overhang for lifting.
Visual cue: Smooth, even parchment — avoids sticking and uneven corners.
Step 2 — Make the crust/crumble (5 minutes)

Whisk flour, both sugars, salt, and baking powder. Stir in melted butter and vanilla until sandy.
Reserve 1 cup of the mixture for the crumble top.
Press the rest firmly into the pan.
Visual cue: Base should look compact and matte, not sticky. If loose, press harder.
Step 3 — Pre-bake the base (10 minutes at 180°C/350°F)

Bake until the edges look slightly dry but not browned.
Visual cue: Base should look set but pale — this prevents sogginess later.
Step 4 — Prepare the cherry filling (5 minutes)
Combine cherries, sugar, cornstarch, and lemon juice.
Visual cue: Cherries should look coated in a thin white film — that’s the cornstarch.
Step 5 — Assemble (1 minute)

Spread cherry mixture over warm crust. Sprinkle reserved crumble over the top.
Visual cue: Crumble pieces should vary in size — this creates texture.
Step 6 — Bake (35–40 minutes at 180°C/350°F)

Bars are done when the top is golden and the cherry layer bubbles thickly at the edges.
Visual cue: Filling should be glossy, not watery.
Internal temp of fruit layer: 93–95°C (200–203°F).
Step 7 — Cool + Slice (minimum 2 hours)

Cool completely, then chill 30–60 minutes for clean cuts.
Visual cue: Filling should jiggle slightly but not slosh.
Troubleshooting (5–8 items)
Problem: Bars fall apart while slicing
- Likely cause: Didn’t cool long enough.
- Fix: Chill fully; ensure filling reaches 93°C during bake.
Problem: Cherry layer is runny
- Likely cause: Not enough cornstarch or underbaked center.
- Fix: Add 1 extra tbsp cornstarch next time; extend baking by 5 minutes.
Problem: Crumble is too soft
- Likely cause: Low oven temp or too much butter.
- Fix: Bake on middle rack, confirm oven accuracy with thermometer.
Problem: Crust is tough
- Likely cause: Overmixing.
- Fix: Mix only until sandy; don’t knead.
Problem: Bars taste overly sweet
- Likely cause: Using sweet cherries without adjusting sugar.
- Fix: Reduce cherry-layer sugar by 25–30g.
Substitutions & Variations
Dietary Swaps
- Gluten-free: Replace flour with 1:1 GF baking blend (tested with King Arthur). Add 1 tbsp extra butter if mixture looks chalky.
- Dairy-free: Use melted vegan butter or refined coconut oil. Bars will be slightly more tender.
- Egg-free: Already eggless!
Flavor Variations
- Swap cherries for raspberries, blueberries, or mixed berries (add +1 tsp cornstarch for berries).
- Add spices: ¼ tsp cinnamon or cardamom in the crumble.
- Add texture: Sprinkle 40g chopped almonds on top before baking.
Scaling
9×13 pan: Multiply ingredients by 1.5×.
6-inch pan: Use half the recipe.
Storage, Make-Ahead & Freezing
Room Temperature
- 2 days in airtight container.
Refrigerator
- 5 days. Let bars come to room temp for best texture.
Freezer
- Freeze cut bars or the whole slab for 2 months.
- Wrap tightly to prevent freezer burn.
- Thaw overnight in fridge.
- To refresh crumble: Reheat slices in oven at 150°C (300°F) for 5 minutes.
Do Not Freeze
- Bars topped with powdered sugar — it melts during thawing.
Serving Suggestions
Serve these bars with:
- Vanilla ice cream
- Lightly whipped cream
- Lemon glaze drizzle (adds brightness)
- Almond slivers for crunch
Perfect for potlucks, picnics, bake sales, and freezer stashing.
FAQs
1. Can I use cherry pie filling instead of fresh cherries?
Yes, but reduce sugar in the filling to 2 tbsp and skip the cornstarch.
2. Why did my crumble melt into the cherry layer?
Your butter was too hot. Use warm—not steaming—melted butter.
3. Can I bake this in an OTG?
Absolutely. Use the middle rack and preheat 15 minutes.
4. How do I double the recipe?
Use a 9×13 pan and bake 5–10 minutes longer.
5. Can I reduce the sugar?
Yes. Remove up to 20% without affecting structure.
Notes From My Kitchen (Testing Log)
Batch 1: Used frozen cherries + 1 tbsp cornstarch. Filling was runny.
Adjustment: Increased cornstarch to 2 tbsp.
Batch 2: Butter was too hot; crumble melted.
Adjustment: Cooled butter before mixing.
Batch 3: Tried coconut oil. Results: softer base, great flavor.
Final Method Chosen: Melted butter + 2 tbsp cornstarch + pre-bake base for 10 minutes → best structure and flavor.
Nutrition (Estimate Only)
Approx. per bar (1 of 16): 210 kcal | 3g protein | 28g carbs | 10g fat
Values vary by brands; follow food-safety practices.
Conclusion & Final Thoughts
Cherry crumble bars are one of those bakes that deliver maximum payoff with minimum fuss — and this version is carefully tested to make sure your bars slice cleanly, hold their shape, and taste like something from a boutique bakery. Whether you’re baking for a weekend treat or stocking your freezer for future cravings, these bars are dependable, customizable, and endlessly crowd-pleasing.