Last Updated: September 3, 2025
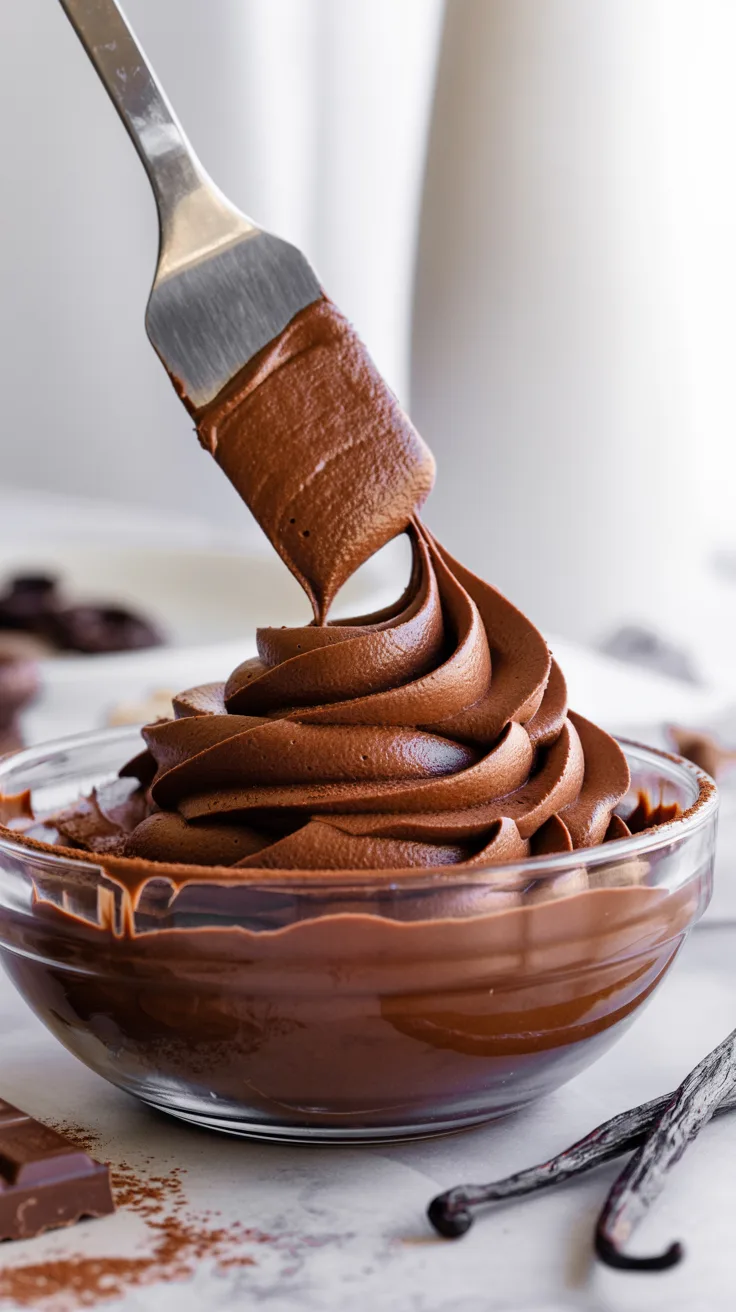
Dreaming of a chocolate buttercream that’s lush, not greasy, and pipes like a dream, even with a handheld mixer and without fancy ingredients? After a dozen test batches and a few “why is it grainy?!” meltdowns, I’ve nailed a recipe that delivers velvety texture, deep chocolate flavor, and perfect stability for stacking layer cakes, piping borders, or frosting cupcakes. Use this when you want a frosting that stays put in summer, but still melts on your tongue.
Pro tip: Chill your buttercream for 10 minutes before piping it transforms the finish from blobby to bakery-sharp, even if your kitchen is warm.
Why This Recipe Works
Most buttercreams rely on powdered sugar, which can leave a gritty mouthfeel and cloying sweetness. This version balances European-style butter for richness, good-quality cocoa powder for intense flavor, and a splash of milk for silkiness. The process is as important as the ingredients:
- Creaming butter and sugar aerates the mix, creating a light base that won’t collapse under chocolate’s weight.
- Dissolving cocoa in hot milk eliminates any powdery bitterness and ensures the frosting is ultra-smooth.
- Gradual addition of sugar prevents clumping and gives you control over sweetness critical if your brand of powdered sugar runs sweeter than others.
This method skips fussy tempering or egg whites, for a no-waste, no-thermometer frosting that’s beginner-friendly but impressively lush.

Ingredients
Here’s what you’ll need for enough frosting to fill and cover a 7-inch cake (about 750g total):
| Ingredient | Grams | Cups (approx.) | Purpose | Notes |
|---|---|---|---|---|
| Unsalted butter | 250 | 1 cup + 2 tbsp | Base, richness, structure | Softened to 18–20°C (cool room temp) |
| Powdered sugar (icing) | 250 | 2 cups | Sweetness, body, smooth texture | Sift if lumpy |
| Cocoa powder (unsweetened) | 40 | ½ cup | Chocolate flavor, color | Use Dutch-process for depth, natural for sharper taste |
| Milk (full-fat) | 60 | ¼ cup | Liquid, dissolves cocoa, adds silkiness | Heat to 60°C (140°F) |
| Vanilla extract | 5 | 1 tsp | Flavor enhancer | Pure, not essence |
| Salt | 2 | ¼ tsp | Balances sweetness, enhances chocolate | Fine table salt |
Equipment
Essential:
- Handheld electric mixer or stand mixer
- Medium mixing bowl
- Rubber spatula
- Kitchen scale (0.1g precision ideal, but 1g is fine)
- Small saucepan or microwave-safe bowl
- Sieve
Nice-to-have:
- Offset spatula for smooth finishes
- Piping bags and tips (e.g., Wilton 1M for swirls)
- Bench scraper for sharp edges
- Instant-read thermometer (for milk)

Step-by-Step Instructions
Step 1: Bloom the Cocoa
Time: 5 minutes | Temp: 60°C (140°F) | Action: Heat milk, whisk in cocoa
Warm milk in a saucepan or microwave until just steaming (not boiling). Sift cocoa into the hot milk and whisk vigorously until no lumps remain. It should look like a glossy chocolate syrup. Cool to room temp (test by touching no warmth left).

Step 2: Cream Butter
Time: 5 minutes | Speed: Medium-high | Visual cue: Pale, fluffy, no graininess
Beat softened butter in a bowl until creamy and lightened in color. Scrape sides often. Avoid this: Don’t let butter get oily or melted it will ruin the texture.

Step 3: Add Sugar Gradually
Time: 8 minutes | Speed: Low to medium | Visual cue: Thick, holds peaks
Sift powdered sugar into the butter in 3–4 batches, beating well after each. Mix on low first to avoid a sugar cloud, then increase speed once incorporated. When done, the mix should hold a soft peak when the beater is lifted.

Step 4: Incorporate Cocoa Mixture and Vanilla
Time: 3 minutes | Speed: Medium | Visual cue: Uniform color, silky sheen
With the mixer running, drizzle in the cooled cocoa-milk mixture and vanilla. Beat until fully combined and the frosting is smooth, scraping the bowl once. It should look like dark, glossy satin. If it looks curdled, the butter was too cold. Warm the bowl slightly with your hands and keep beating.

Step 5: Final Adjustments
Time: 2 minutes | Visual cue: Stiff but spreadable
If too soft, chill 10 minutes and rewhip. If too thick, add milk 1 tsp at a time. The perfect texture holds its shape when piped but is easy to spread with a spatula.

Troubleshooting: Common Failures & Fixes
- Grainy texture: Sugar wasn’t sifted or butter wasn’t creamy enough. Beat longer and warmer.
- Too soft: Kitchen was hot or butter too soft. Chill 10–15 minutes and rewhip.
- Too stiff: Overbeat or added too much sugar. Soften with a splash of milk.
- Curdled: Butter and cocoa mix were different temps. Keep beating it will come together.
- Dull color: Low-quality cocoa. Use a richer brand next time.
- Bitter taste: Natural cocoa can be harsh. Use Dutch-process or add 1–2 tbsp more sugar.
- Air bubbles: Overmixed. Fold gently with a spatula before using.
- Splits when piping: Temperature shock. Let frosting sit at room temp 10 minutes before piping.
Substitutions & Variations
Dietary Swaps
- Dairy-free: Use plant-based butter and any non-dairy milk. Coconut milk adds subtle flavor; almond is neutral.
- Egg-free: This recipe is naturally egg-free.
- Gluten-free: Use certified GF powdered sugar (most are, but check labels).
Flavor Variations
- Mocha: Add 1 tsp instant coffee to the hot milk.
- Orange: Zest 1 orange into the butter, or add 1 tsp orange extract.
- Mint: Add ½ tsp peppermint extract (not oil, which can split the frosting).
- Spiced: Add ¼ tsp cinnamon or a pinch of cayenne with the cocoa.
- Peanut Butter: Replace 50g butter with smooth peanut butter (reduce sugar by 20g).
Scaling
- 6-inch cake: Halve all ingredients.
- 8-inch cake: Multiply by 1.5.
- Cupcakes (12): Use full recipe for generous swirls.
Storage, Make-Ahead & Freezing
- Counter: Up to 2 days in an airtight container. Not recommended in hot/humid climates.
- Fridge: Up to 1 week. Bring to room temperature and rewhip before using.
- Freezer: Up to 3 months in a sealed container. Thaw overnight in the fridge, then rewhip with a splash of milk.
- Do not freeze decorated cakes texture changes on thawing.
- Refresh: If separated after thawing, beat in 1–2 tbsp softened butter to re-emulsify.
Serving Suggestions & Pairing
This frosting loves vanilla, chocolate, or coffee cakes. Pair with tart raspberry jam or salted caramel for balance. For cupcakes, top with crushed nuts or chocolate shavings.
Internal Links (contextual recommendations)
- Small-batch vanilla cake base
- Stabilized whipped cream frosting
- Raspberry compote filling
- How to level and stack cakes
- Piping techniques for beginners
FAQs
Can I use salted butter?
Yes, but omit added salt. Results may be slightly less sweet.
Why does my frosting weep on the cake?
Likely due to temperature changes or high humidity. Chill cake before frosting, and don’t overfill layers.
Can I make this without a mixer?
Yes, but it’s labor-intensive. Use a stiff whisk and strong arms expect a workout!
Best cocoa powder in India?
Cadbury Bournvita (for drinking) is surprisingly smooth. For baking, Weikfield or Hershey’s work well.
How to fix split frosting?
Gently warm the bowl over a pan of hot water (not boiling) and beat until smooth.
Can I color this frosting?
Yes, but gel colors work best. Liquids can thin the texture.
Notes From My Kitchen (Testing Log)
Used cold butter—frosting was lumpy and hard to pipe. Fix: Let butter soften fully at room temp.
Overbeat after adding cocoa frosting became grainy. Fix: Stop once just combined.
Substituted 50g butter with peanut butter divine flavor, but a bit softer. Adjustment: Reduce milk slightly.
Tried with coconut oil (vegan) texture was glossy but melted quickly. Not recommended for piping.
Added coffee flavor was a hit, but don’t exceed 1 tsp or it overpowers.
The recipe above is my gold standard rich, pipeable, and stays put in Indian heat.
Nutrition & Disclaimer
Per serving (1/12 of recipe, about 60g):
Calories: 220 | Fat: 15g | Carbs: 20g | Protein: 2g
Values are estimates; adjust for brands and portion size. Follow food-safety best practices. Not a medical resource.
How to Make Luxurious Chocolate Buttercream Easily
Course: DessertCuisine: AmericanDifficulty: Easy12
servings20
minutes180
kcal40
minutesSilky, rich chocolate buttercream that’s pipeable and stable—not cloyingly sweet or gritty. Perfect for cake decorating or frosting cupcakes. This version uses melted dark chocolate for deep flavor and stable structure, with science-backed tips for perfect texture every time, even by hand. Works in Indian kitchens and hot climates—just adjust milk as needed.
Ingredients
Unsalted butter, softened
Powdered sugar (icing sugar)
Dutch-process cocoa powder
Melted dark chocolate
Milk (whole or plant-based)
Vanilla extract
Salt
Light corn syrup (optional)
Directions
- Softening Butter (10 minutes):
Let butter sit at room temp until soft but cool (about 15–20°C/60–68°F). Cut into cubes. - Beating Butter (3–5 minutes):
Whip butter in a bowl with a whisk (hand or electric) until pale, fluffy, and increased in volume. Visual cue: Butter will look almost white and there should be no lumps. If butter appears greasy or separates, chill for 5 minutes, then re-whip. - Adding Dry Ingredients (3 minutes):
Sift together powdered sugar and cocoa powder. Add to butter in 3–4 batches, beating well after each. Scrape down the bowl between additions. - Melting Chocolate (2 minutes):
Melt dark chocolate in a double boiler or microwave (15-second bursts, stirring each time). Cool to room temperature. - Adding Chocolate & Wet Ingredients (2 minutes):
Drizzle cooled chocolate into buttercream, beating until fully incorporated. Add vanilla, salt, and optional corn syrup. Mix until smooth. - Adjusting Consistency (2 minutes):
Beat in milk, 1 tbsp at a time, until the frosting is silky and holds a soft peak when lifted with a spatula. - Resting (20 minutes):
Cover and let the frosting sit at cool room temperature for 20 minutes to set consistency and allow air bubbles to escape. - Ready to Use:
Pipe or spread onto cakes or cupcakes, or store as directed.
Notes
- Visual & Texture Cues
Butter: Pale, fluffy, not greasy—stop & chill if it looks separated.
After adding chocolate: Frosting will thicken and deepen in color.
Correct consistency: Frosting should ribbon softly and hold its shape when piped. If too stiff, add more milk; if too runny, chill and re-whip.
Final color: Deep, rich brown—no visible specks, smooth surface. - Notes & Substitutions
Dairy-free/vegan: Use vegan butter and plant milk; coconut oil works but sets firm.
Chocolate: Milk chocolate is too sweet; white changes texture. For cocoa-only: Double cocoa, skip chocolate, add extra 2–4 tbsp milk.
Storage: Store in fridge up to 1 week or freeze in an airtight container (2–3 months). To refresh, let come to room temp, then re-whip with 1–2 tbsp milk.
Serving: Bring to room temperature before using for best texture. - Pro Tips
Rest 20 minutes before piping for smooth results.
If your kitchen is hot: Chill bowl and whisk before starting.
For piping: Use a large star tip for beautiful swirls.
Avoid overbeating—stop when the frosting is smooth and holds its shape.
