if you’re scrolling through dessert recipes at 2 AM wondering what magical creation will satisfy that sweet tooth, you’ve hit the jackpot. This chocolate peanut butter pie recipe isn’t just another dessert; it’s basically edible heaven wrapped in a graham cracker crust. And trust me, I’ve made my fair share of questionable kitchen experiments to know the difference between “meh” and “OMG, I need the recipe NOW!”
Why This Chocolate Peanut Butter Pie Recipe Rules Supreme
Ever wonder why some desserts just hit different? This pie combines two of the most beloved flavors on the planet – rich chocolate and creamy peanut butter – in a way that makes store-bought versions look like sad imitations. I’ve been perfecting this recipe for years, and let me tell you, it’s been quite the delicious journey.
The Perfect Flavor Balance
Here’s what makes this chocolate peanut butter pie recipe stand out from the crowd:
- Silky smooth peanut butter filling that doesn’t taste like eating straight-up peanut butter (we’ve all been there)
- Decadent chocolate ganache that doesn’t overpower the peanut butter
- Crunchy graham cracker crust that adds the perfect textural contrast
- Zero artificial flavors – because who needs that when you’ve got the real deal?
The magic happens when these layers come together. The creamy peanut butter mousse melts on your tongue while the chocolate layer adds that rich, indulgent finish. It’s like a Reese’s cup decided to become a sophisticated dessert – and honestly, we’re here for it.
Ingredients You Actually Need (No Weird Substitutions Here)
Let’s be real – some recipes ask for ingredients you’d need a treasure hunt to find. Not this one. Here’s what you’ll need for this chocolate peanut butter pie recipe:
For the Crust:
- 1½ cups graham cracker crumbs (about 12 crackers)
- ⅓ cup melted butter
- ¼ cup granulated sugar
- Pinch of salt (because everything needs a little salt)
For the Peanut Butter Filling:
- 8 oz cream cheese, softened (don’t skip the softening part – trust me)
- 1 cup creamy peanut butter
- 1 cup powdered sugar
- 1 tsp vanilla extract
- 1½ cups heavy whipping cream
- 2 tbsp granulated sugar
For the Chocolate Layer:
- 6 oz semi-sweet chocolate, chopped
- ½ cup heavy cream
- 2 tbsp butter
- 1 tbsp corn syrup (for that glossy finish)
See? Nothing too fancy. You can probably find most of these ingredients in your pantry right now – well, except maybe the heavy cream, but that’s what grocery runs are for 🙂

Step-by-Step Instructions That Actually Make Sense
Making the Graham Cracker Crust
Start with your graham cracker crust because it needs time to set. Crush those crackers until they’re fine crumbs – and I mean really fine. Nobody wants surprise chunks in their crust.
Mix the crumbs with melted butter, sugar, and that pinch of salt. Press this mixture firmly into a 9-inch pie pan. Here’s a pro tip I learned the hard way: use the bottom of a measuring cup to press it down evenly. Your fingers will thank you later.
Bake at 350°F for about 10 minutes until it’s set and lightly golden. Let it cool completely – and I mean completely. Impatient me learned this lesson when my filling turned the warm crust into a soggy mess.
Creating the Peanut Butter Filling
This is where the magic happens. Beat that softened cream cheese until it’s smooth and fluffy. Add the peanut butter, powdered sugar, and vanilla, mixing until everything’s combined and looking gorgeous.
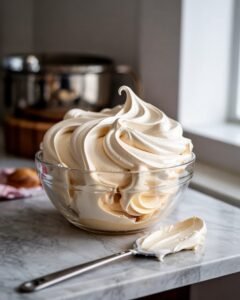
In a separate bowl, whip the heavy cream with granulated sugar until you get stiff peaks. Don’t overwhip it – we want fluffy clouds, not butter. Gently fold this whipped cream into your peanut butter mixture. The key word here is “gently” – we want to keep all that beautiful air we just whipped in.
The Chocolate Ganache Game-Changer
Here’s where things get fancy (but not complicated). Heat your heavy cream until it’s just about to simmer – little bubbles around the edges, but not a full rolling boil. Pour it over your chopped chocolate and let it sit for 2 minutes. Then stir from the center outward until it’s smooth and glossy.
Add the butter and corn syrup, stirring until everything’s incorporated. This chocolate ganache should be smooth as silk and shiny enough to see your reflection in.
Assembly Time: Where It All Comes Together
Now comes the fun part – putting this masterpiece together. Spread your peanut butter filling evenly in the cooled crust. I use an offset spatula because it makes me feel like a professional baker, but a regular knife works just fine.
Pour the chocolate ganache over the peanut butter layer, starting from the center and working outward. Don’t worry about making it perfect – rustic looks are totally in right now, right?
The Waiting Game (AKA The Hardest Part)
Here’s the brutal truth: this pie needs to chill in the refrigerator for at least 4 hours, but overnight is even better. I know, I know – waiting is torture when you’ve got a beautiful chocolate peanut butter pie sitting right there, but trust the process.
The chilling time lets all the flavors meld together and gives the filling time to set properly. Think of it as delayed gratification that pays off in the most delicious way possible.
Pro Tips From Someone Who’s Made Every Mistake
Temperature Matters
Room temperature ingredients mix better than cold ones. Take your cream cheese out about an hour before you start baking. Your future self will thank you when you’re not wrestling with chunks of cold cream cheese.
The Whipping Cream Sweet Spot
Watch your whipped cream like a hawk. Under-whipped cream won’t hold its shape, but over-whipped cream turns into butter faster than you can say “oops.” You want peaks that hold their shape but still look soft and billowy.
Storage Solutions
This pie keeps beautifully in the fridge for up to 5 days (if it lasts that long). Cover it loosely with plastic wrap, but don’t let the wrap touch the chocolate surface – nobody wants plastic-textured ganache.
Variations That’ll Keep Things Interesting
Crunchy Peanut Butter Version
Swap out half the creamy peanut butter for crunchy. It adds texture and makes each bite a little different. Some people love it, some people hate it – but that’s what makes life interesting, right?
Chocolate Cookie Crust
Trade the graham crackers for chocolate sandwich cookies. Remove the filling, crush the cookies, and follow the same process. It’s like double chocolate therapy.
Salted Caramel Drizzle
Drizzle some salted caramel sauce between the peanut butter and chocolate layers. Because sometimes more is more, and we’re not here to judge.
Serving Suggestions That Don’t Suck
This chocolate peanut butter pie is rich – and I mean rich. A small slice goes a long way, so don’t feel like you need to serve massive portions. A dollop of whipped cream on the side never hurt anyone, though.
For special occasions, dust the top with a little cocoa powder or add some chopped peanuts for crunch. FYI, it photographs beautifully if you’re the type to document your culinary victories on social media.
Troubleshooting Common Disasters
Runny Filling
If your filling won’t set, you probably didn’t whip the cream enough or added ingredients that were too warm. Next time, make sure everything’s the right temperature and consistency.
Cracked Ganache
This usually happens when the cream is too hot or you stir too aggressively. Let the cream cool slightly before pouring, and stir gently in one direction.
Soggy Crust
Make sure your crust is completely cool before adding the filling. A warm crust plus cold filling equals disaster.
The Final Verdict
This chocolate peanut butter pie recipe has been my go-to crowd-pleaser for years. It looks impressive enough for dinner parties but easy enough for a random Tuesday when you need something sweet in your life. Plus, it’s no-bake except for the crust, which means less time in the kitchen and more time enjoying the results.
IMO, life’s too short for mediocre desserts. This pie delivers on flavor, texture, and that “wow, you made this yourself?” factor that makes all the effort worthwhile. Whether you’re celebrating something special or just treating yourself because you deserve it, this recipe won’t let you down.

Chocolate Peanut Butter Pie Recipe That’ll Make Your Taste Buds Dance
Course: DessertCuisine: AmericanDifficulty: Easy8-10
servings30
minutes4
minutes520
kcal4
minutesThis decadent no-bake chocolate peanut butter pie features a rich, creamy peanut butter filling nestled in a chocolate graham cracker crust and topped with silky chocolate ganache. The perfect balance of sweet and salty flavors makes this an irresistible dessert that’s surprisingly easy to make and always impresses guests.
Ingredients
For the Crust:
1½ cups chocolate graham cracker crumbs
⅓ cup melted butter
2 tablespoons granulated sugar
- For the Peanut Butter Filling:
8 oz cream cheese, softened
1 cup creamy peanut butter
1 cup powdered sugar
1 teaspoon vanilla extract
1½ cups heavy whipping cream
2 tablespoons granulated sugar
- For the Chocolate Topping:
4 oz semi-sweet chocolate, chopped
½ cup heavy cream
2 tablespoons butter
Chopped peanuts for garnish (optional)
Directions
Prepare the Crust:
- Preheat oven to 350°F (175°C).
- Mix graham cracker crumbs, melted butter, and 2 tablespoons sugar in a bowl.
- Press mixture firmly into bottom and up sides of 9-inch pie dish.
- Bake for 10 minutes. Cool completely.
- Make the Filling:
- Beat cream cheese until smooth and fluffy.
- Add peanut butter, powdered sugar, and vanilla. Beat until combined.
- In separate bowl, whip heavy cream with 2 tablespoons sugar until stiff peaks form.
- Gently fold whipped cream into peanut butter mixture.
- Spread filling evenly into cooled crust.
- Prepare Chocolate Topping:
- Heat ½ cup cream in small saucepan until just simmering.
- Pour over chopped chocolate in bowl. Let sit 2 minutes.
- Stir until smooth. Add butter and mix until glossy.
- Cool for 10 minutes, then spread over pie.
- Final Steps:
- Refrigerate pie for at least 4 hours or overnight.
- Garnish with chopped peanuts before serving if desired.
- Use warm knife to cut clean slices.
Notes
- Use room-temperature cream cheese for smooth mixing
Don’t overwhip the cream to avoid lumps
Store covered in refrigerator for up to 5 days
Can be frozen for up to 3 months (thaw overnight before serving)