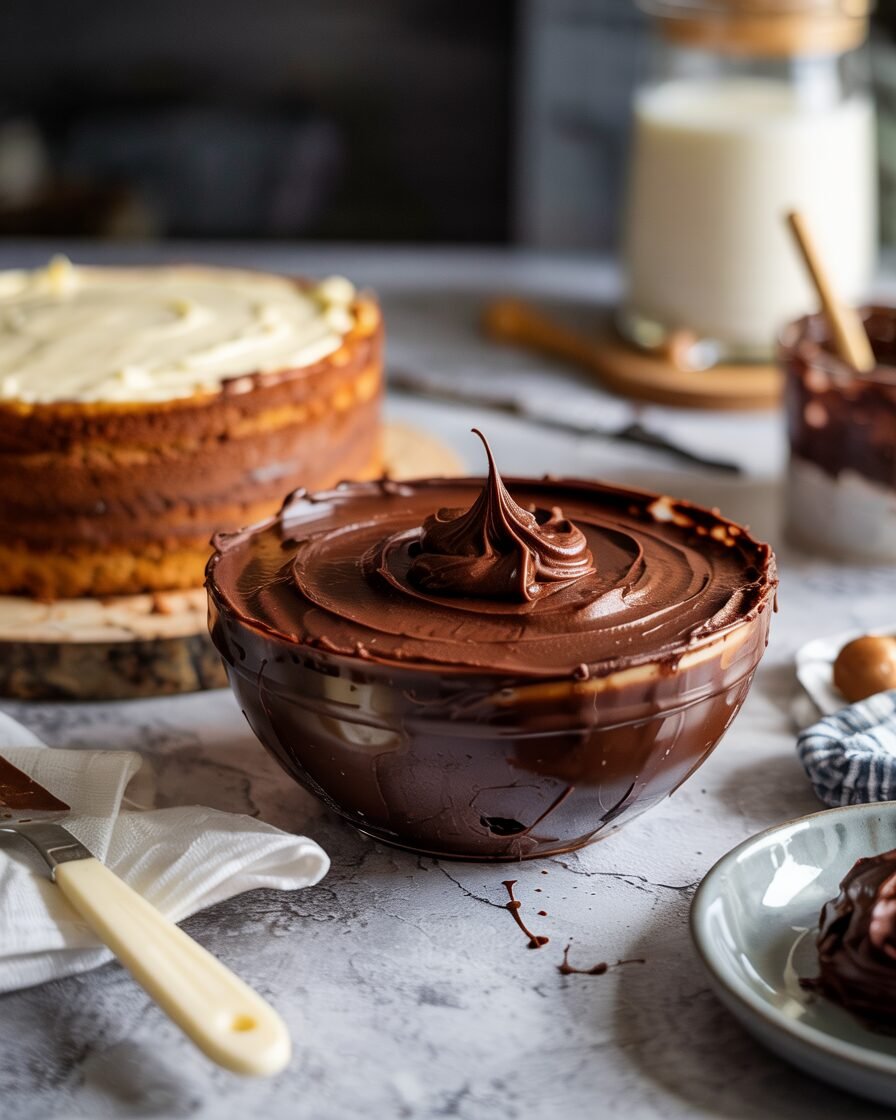
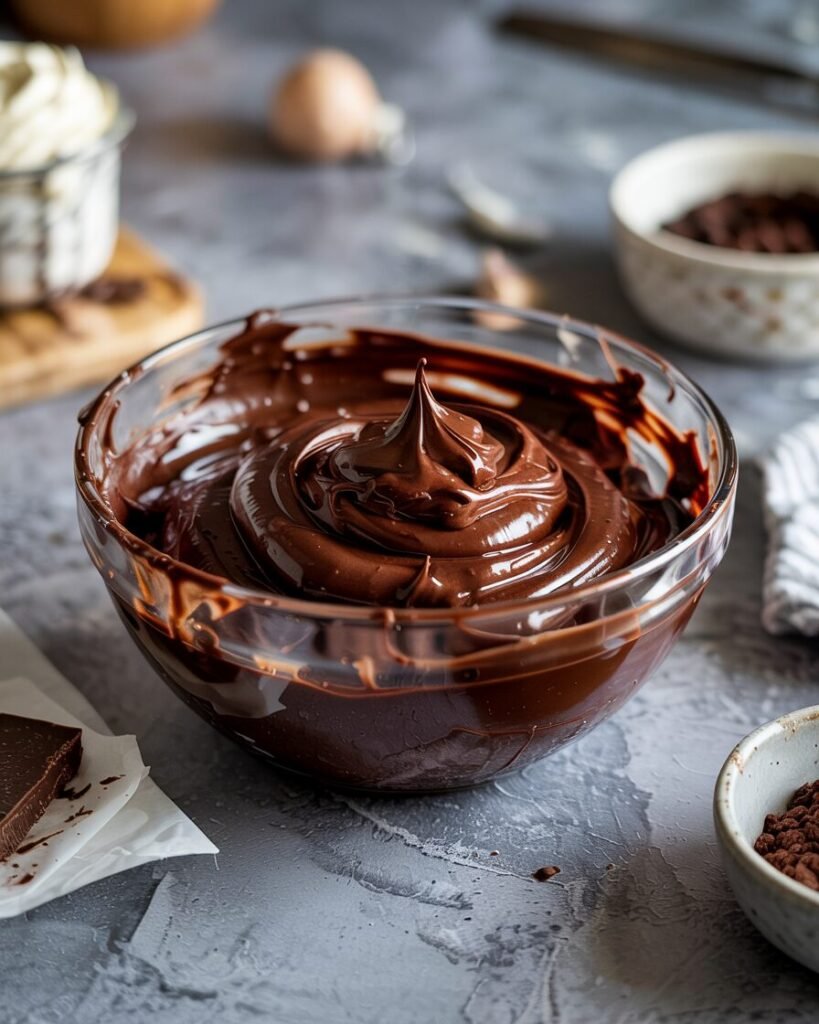
There’s nothing quite like a glossy, rich, deeply chocolatey frosting that clings perfectly to your cake without sliding off or turning gritty. This Dark Chocolate Fudge Frosting isn’t just any chocolate frosting—it’s silky, scoopable, and holds up beautifully for piping, spreading, or layering. Pro tip: tempering the chocolate with a tiny bit of hot cream at the right moment ensures shine and avoids a grainy texture. By the end, you’ll have a frosting that tastes luxurious, looks professional, and spreads like a dream—even if you’re a home baker using just a hand whisk or an OTG oven.
Why This Recipe Works
Chocolate frosting can be tricky. Too much heat, too little cream, or overwhipping can turn it into a dull, brittle mess. Here’s why this recipe hits the sweet spot:
- Chocolate choice matters – I use 70% dark chocolate (or Dutch‑process cocoa for cocoa powder-based) for a deep flavor without excess sweetness. The cocoa solids give structure, while the cocoa butter adds smoothness.
- Cream and fat balance – Heavy cream and a small amount of unsalted butter create a stable emulsion. Butter adds flavor and pliability, while cream ensures the frosting is soft enough to spread yet firm enough to pipe.
- Room‑temperature handling – Allowing chocolate and butter to reach room temp before combining prevents seizing. Overheating chocolate coagulates cocoa solids, giving a gritty texture, while cold butter creates lumps.
Science-backed insight:
- Cocoa solids + sugar ratio determines sweetness perception and mouthfeel.
- Fat + chocolate emulsion stabilizes over time, meaning the frosting can sit at room temp for a while without losing structure.
- Whipping introduces air pockets carefully; overwhipping can break the emulsion, resulting in a grainy or split frosting.
Ingredients & Their Purpose
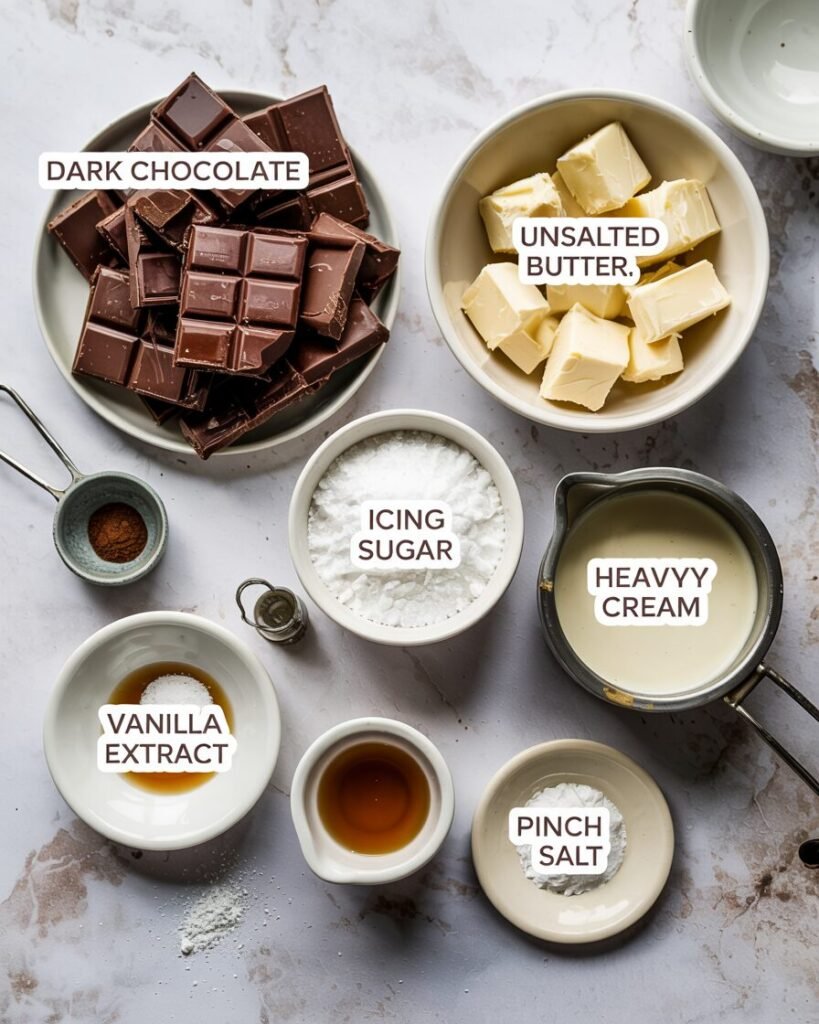
| Ingredient | Weight | Volume | Purpose |
|---|---|---|---|
| Dark chocolate (70%) | 200g | 7 oz | Flavor, structure, shine |
| Unsalted butter, room temp | 80g | 6 tbsp | Softness, flavor, spreadability |
| Heavy cream | 60ml | ¼ cup | Creaminess, emulsion, spreadability |
| Icing sugar, sifted | 100g | ¾ cup | Sweetness, smooth texture |
| Vanilla extract | 5ml | 1 tsp | Flavor enhancer |
| Pinch of salt | 1g | ¼ tsp | Balances sweetness, deepens chocolate flavor |
Pro tip: For a dairy-free version, swap butter for vegan butter and cream for full-fat coconut cream. Results are slightly softer, so chill briefly before piping.
Equipment
Required:
- Heatproof bowl
- Whisk or hand mixer
- Spatula
- Kitchen scale
- Oven/OTG (for optional warming step)
- Small saucepan (for cream)
Nice-to-have:
- Offset spatula for smooth spreading
- Fine sieve (for icing sugar)
Step-by-Step Instructions
Step 1: Melt the chocolate
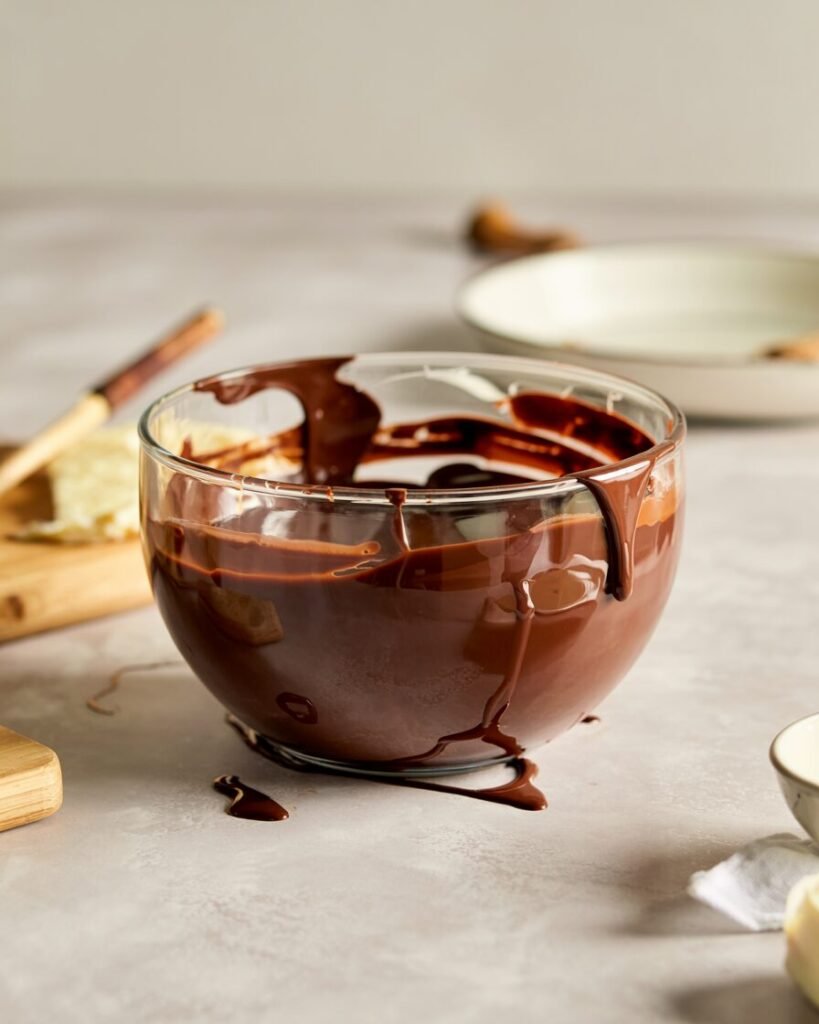
- Action: Chop chocolate finely and place in a heatproof bowl.
- Time & method: Microwave in 20‑second bursts or double boiler over simmering water. Stir after each burst. Stop when 90% melted; residual heat melts the rest.
- Visual cue: Chocolate should be glossy, pourable, and smooth with no lumps. Avoid overheating—grainy or clumpy chocolate signals it’s gone too hot.
Step 2: Warm cream
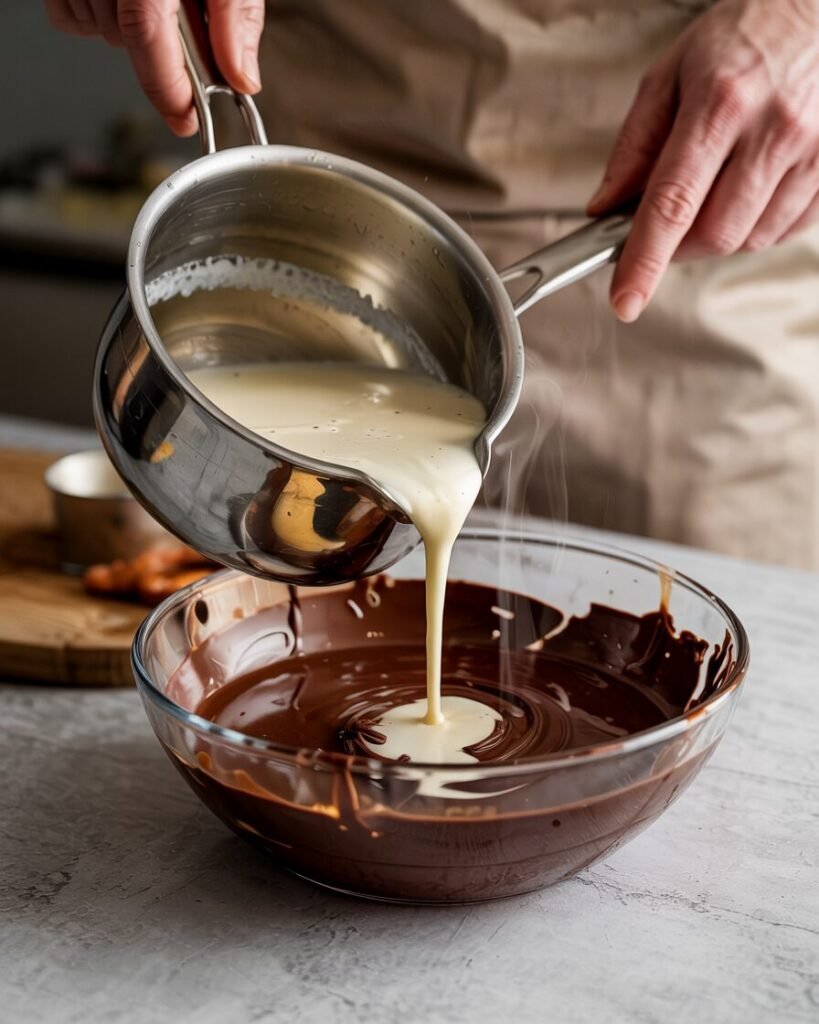
- Action: In a small saucepan, heat cream until just below boiling (~85°C / 185°F).
- Visual cue: Steam rises, small bubbles form at edges. Don’t let it fully boil.
Step 3: Combine chocolate and cream
- Action: Pour hot cream slowly over melted chocolate. Let sit 1 min, then stir gently to form a smooth ganache.
- Visual cue: Texture should be shiny and thick but pourable. If it looks lumpy, gently whisk—do not overwhip.
Step 4: Incorporate butter
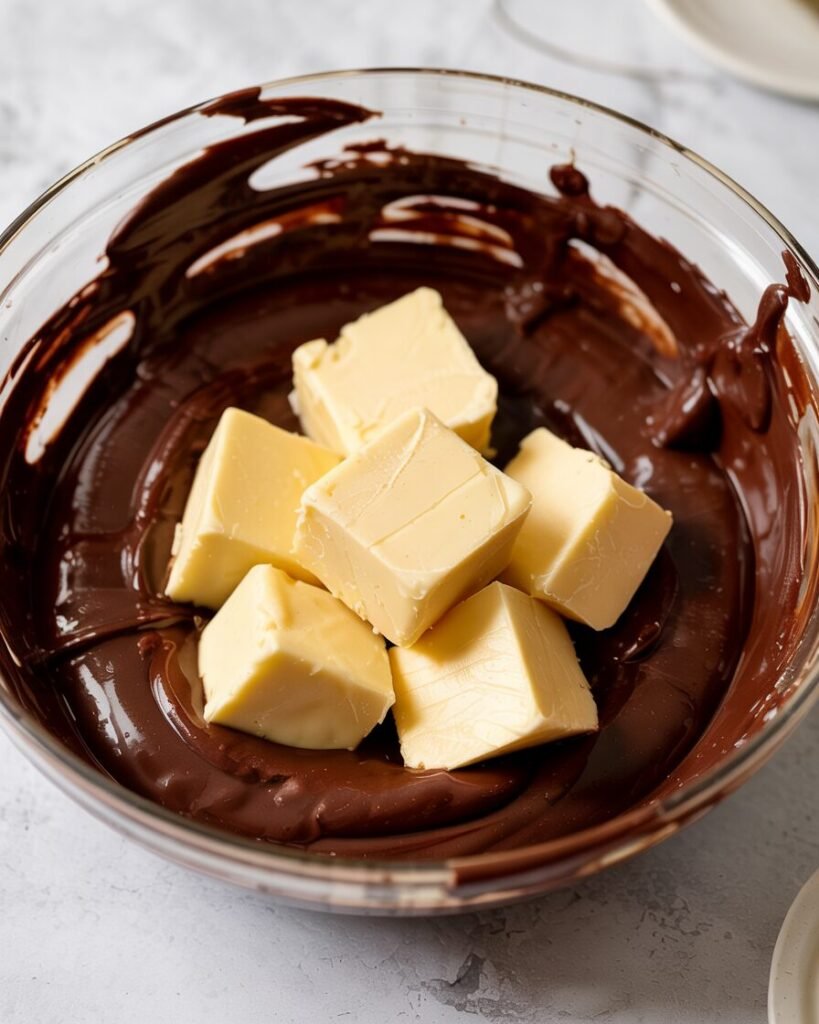
- Action: Add room-temp butter in cubes, stirring until fully incorporated.
- Visual cue: Frosting becomes softer and silkier. Avoid adding cold butter straight from the fridge—this causes seizing.
Step 5: Sweeten and flavor
- Action: Sift icing sugar and fold in with vanilla extract and salt.
- Visual cue: Frosting is thick but spreadable. Taste: should be balanced—rich chocolate, slightly sweet, not bitter.
Step 6: Whip for texture (optional)
- Action: Whisk by hand or use hand mixer on medium speed for 1–2 min.
- Visual cue: Airy but stable. Peaks should bend slightly, not collapse.
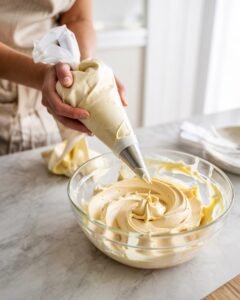
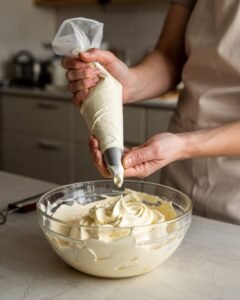
Step 7: Apply frosting

- Spread immediately on cakes or cupcakes. For piping, chill 10–15 min to firm up.
Troubleshooting: Common Failures & Fixes
| Problem | Likely Cause | Fix Next Time |
|---|---|---|
| Frosting grainy | Chocolate overheated or cream added too hot | Let chocolate cool slightly; pour warm cream gradually |
| Too thin/runny | Low butter, over‑heated ganache | Chill briefly; check butter weight |
| Too stiff | Cold butter, overwhipped | Warm gently 5–10 sec; fold until smooth |
| Bitter taste | Dark chocolate too high % | Adjust sugar by 5–10g or blend with milk chocolate |
| Split frosting | Whipped too long | Fold gently, add 1 tsp warm cream to re-emulsify |
Substitutions and Variations
- Egg-free: Already eggless.
- Dairy-free: Vegan butter + full-fat coconut cream. Slightly softer, chill before piping.
- Gluten-free: Naturally gluten-free.
- Flavor swaps: Add orange zest (½ tsp), espresso (1 tsp), or cinnamon (¼ tsp). Cocoa powder adjustments: for higher cocoa %, reduce sugar slightly.
Scaling Table (6‑inch vs 8‑inch cake / 12 vs 24 cupcakes)
| Pan / Cupcake | Dark Chocolate (g) | Butter (g) | Cream (ml) | Sugar (g) | Vanilla (ml) |
|---|---|---|---|---|---|
| 6‑inch cake / 12 cupcakes | 200 | 80 | 60 | 100 | 5 |
| 8‑inch cake / 24 cupcakes | 300 | 120 | 90 | 150 | 7–8 |
Storage, Make-Ahead & Freezing
- Counter: 1–2 days in airtight container, away from heat.
- Fridge: Up to 1 week; bring to room temp, whisk lightly before spreading.
- Freezer: 2–3 months; thaw in fridge overnight, rewhip briefly.
- What not to freeze: Cakes with whipped cream layers—frosting holds, but cream may weep.
Serving Suggestions & Pairings
- Layer over vanilla sponge, banana bread, or chocolate cake.
- Drizzle salted caramel or berry compote for contrast.
- Pipe on cupcakes, top with chocolate curls or sprinkles. Balance sweetness: chocolate + fruity acid works beautifully.
FAQs
Can I replace butter with oil?
Yes, but frosting loses some body and spreadability; use coconut oil chilled to firm.
How do I prevent grainy frosting?
Avoid overheating chocolate; add warm cream gradually and whisk gently.
Can I double/halve this recipe?
Yes, scale ingredients proportionally; check bowl size for proper mixing.
Best chocolate type for deep flavor?
70% dark chocolate for richness; Dutch-process cocoa if using powdered chocolate.
Can I make this in an OTG or air fryer?
Yes, melt chocolate in a heatproof bowl set over warm OTG air; avoid direct heat.
Notes from My Kitchen
- Batch 1: Used cold butter → frosting seized, grainy. Solution: room temp butter next batch.
- Batch 2: Whipped too long → frosting split slightly. Solution: fold gently, stop when smooth.
- Batch 3 (Final): Warm cream poured gradually, butter cubed, whipped 1 min → perfect sheen, holds shape, silky texture.
Nutrition & Disclaimer
Approx. per 2‑tbsp serving: 150 kcal, 10g fat, 15g sugar. Values are estimates; adjust for brands and portion size. Follow standard food-safety best practices.
Final Thoughts
This Dark Chocolate Fudge Frosting is the frosting I reach for whenever I want decadence without fuss. It’s forgiving, adaptable, and consistently glossy and spreadable. With careful temperature control, proper butter handling, and attention to texture cues, you’ll never have gritty, collapsing chocolate again. Perfect for cakes, cupcakes, or even a chocolate dip for cookies—once you try it, this frosting becomes your go-to for chocolate perfection.