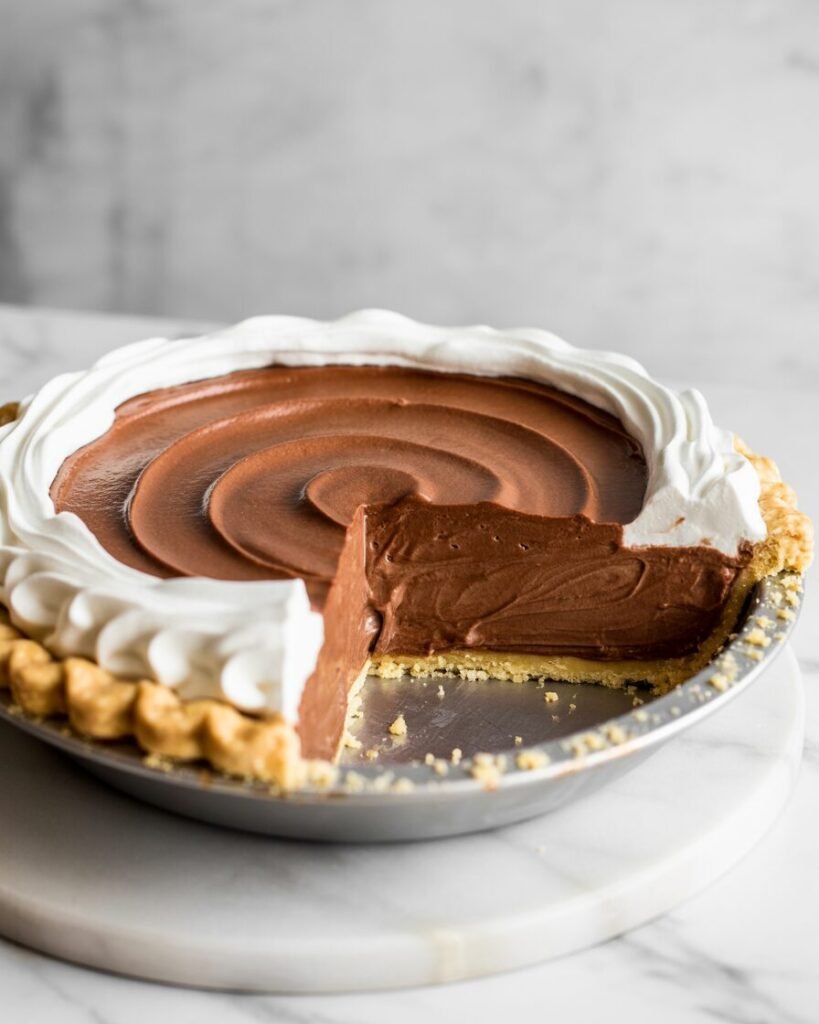
If you’ve ever wanted a French Silk Pie that tastes like a cloud made of chocolate, this is the version I want you to start with. It’s unbelievably silky, slices cleanly, and stays stable even at room temperature for serving no melting collapse, no greasy aftertaste. This French Silk Pie Recipe uses a whipped-butter emulsion plus stabilized whipped cream, giving you that signature mousse-like texture without the stress of raw eggs. My one pro tip? Whip your butter until it turns nearly white that’s the secret to the fluffy, melt-on-the-tongue filling you’ve been dreaming of.
Why This French Silk Pie Recipe Works
Classic French silk relies on creamed butter, sugar, and raw eggs for structure. I tested multiple approaches to create a safer, more beginner-friendly version that still tastes old-school luxurious. Here’s the science behind it:
1. Butter aeration creates silkiness.
When butter (22–24°C / 72–75°F) is whipped for 6–8 minutes, it traps micro-air pockets. These pockets become the “silk” when we add melted chocolate.
2. Melted chocolate sets the structure.
Using 70% dark chocolate creates a rich flavor while setting the filling as it cools. Chocolate is full of cocoa butter, which firms up in the fridge and stabilizes the pie naturally.
3. Stabilized whipped cream lightens the texture.
Instead of raw eggs, I fold in softly whipped cream. It aerates the mixture while keeping it sliceable and cloud-soft.
4. Hot sugar syrup for safety (optional upgrade).
If you’d like a cooked-egg version, the instructions include an optional pasteurized egg mousse method, which gives an ultra-silky result without raw egg concerns.
Ingredients

For the Crust
- Graham cracker crumbs — 180g (1 ½ cups) — mild base that doesn’t compete with the chocolate
- Unsalted butter, melted — 85g (6 tbsp) — binds crumbs and helps crust firm
- Fine sugar — 25g (2 tbsp) — sweetness + browning
- Salt — pinch — balances chocolate filling
For the Chocolate Silk Filling
- Dark chocolate 70% — 170g (6 oz) — rich chocolate flavor + structure
- Unsalted butter, room temperature — 170g (¾ cup) — aerates and creates that silky mousse
- Granulated sugar — 150g (¾ cup) — sweetness + structure
- Heavy cream (35%) — 240g (1 cup) — whipped to lighten filling
- Vanilla extract — 1 tsp — balances bitterness
- Salt — ⅛ tsp — enhances chocolate flavor
Optional Pasteurized Egg Mousse Upgrade
- 1 large egg + 1 egg yolk (pasteurized)
- Hot sugar syrup (70g sugar + 20g water) — cooked to 115°C (240°F) to pasteurize eggs
Equipment
Required
- 9-inch (23 cm) pie dish
- Hand mixer or stand mixer
- Heatproof bowl
- Saucepan (if using pasteurized egg method)
- Offset spatula
- Digital scale
- Rubber spatula
- Whisk
Nice-to-have
- Instant-read thermometer
- Fine sieve
- Parchment base for easy crust removal
Step-by-Step Instructions
1. Make the Crust (8–10 minutes)
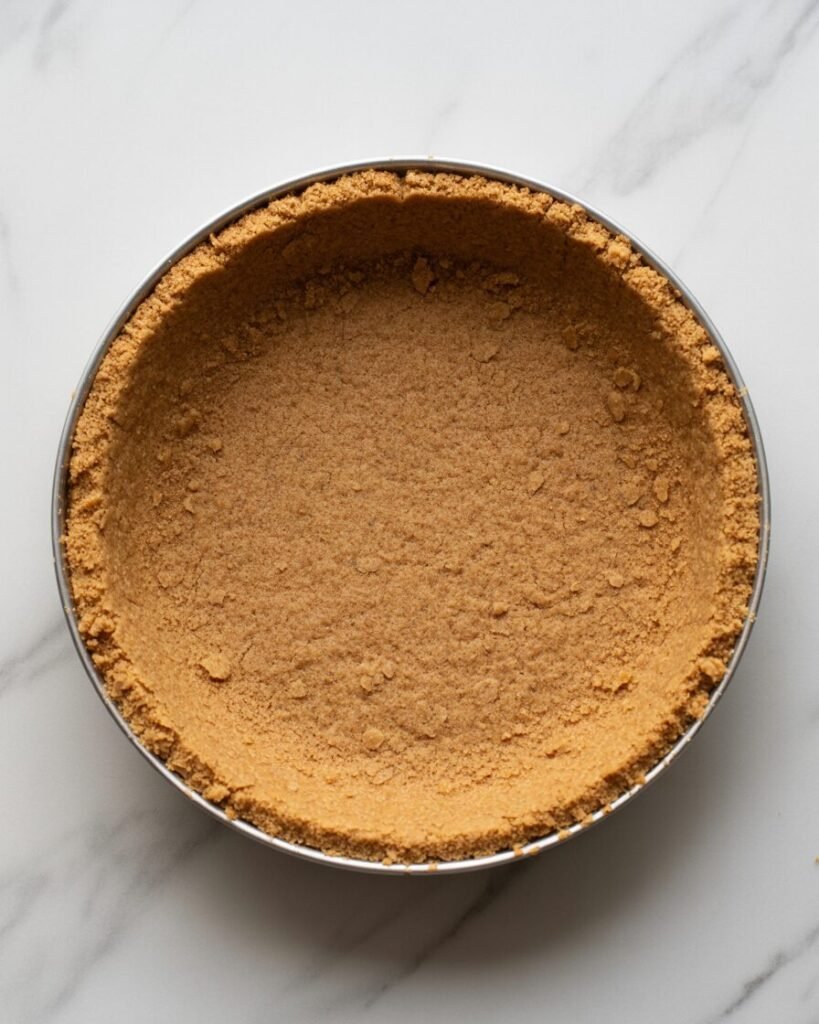
- Preheat oven to 175°C (350°F).
- Mix crumbs, sugar, melted butter, and salt until the texture resembles wet sand.
- Press firmly into a pie dish, making sure corners aren’t too thick.
- Bake 8 minutes.
Visual cue: edges slightly deeper golden, crust feels firm when tapped.
Cool completely.
2. Melt the Chocolate (5 minutes)
- Melt chocolate over a double boiler or in 20-second microwave bursts.
- Cool to 28–32°C (82–90°F) before adding.
Visual cue: smooth, shiny, pourable. Not hot or grainy.
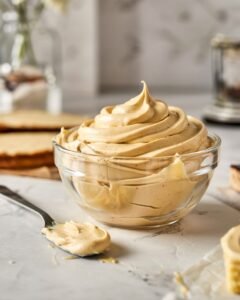
3. Whip the Butter & Sugar (6–8 minutes)
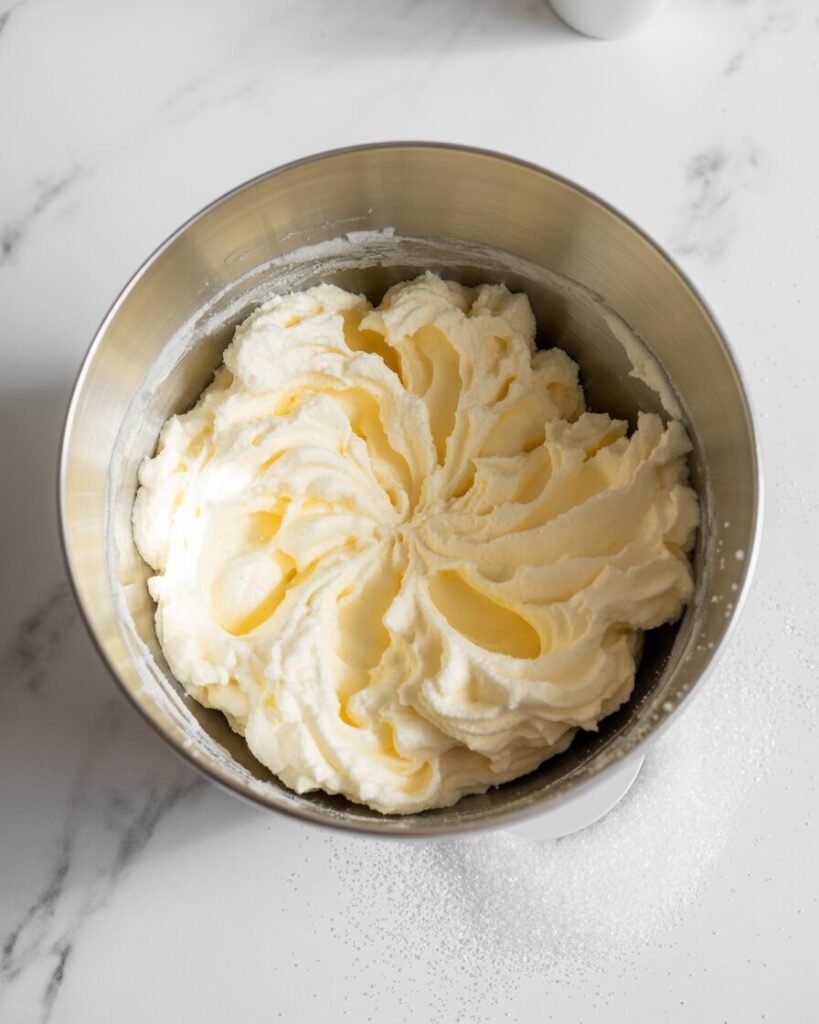
- Beat room-temp butter and sugar on medium-high until pale, fluffy, and visibly increased in volume.
Visual cue: mixture should smear smoothly without graininess.
Pro Tip: Under-whipping here = heavy filling later.
4. Incorporate Chocolate (1–2 minutes)
- Add cooled melted chocolate and mix on medium until fully combined.
Visual cue: glossy, thick chocolate cream with no streaks.
5. Whip the Cream (2–3 minutes)
- Whip heavy cream to soft peaks — they should bend like a hook.
Avoid this: stiff peaks create a grainy filling.
6. Fold & Fill (2–4 minutes)
- Gently fold whipped cream into chocolate mixture in 3 additions.
Visual cue: filling should look like chocolate mousse — fluffy, not runny.
Spread into cooled crust, smoothing top.
7. Chill (4 hours minimum)
Chill uncovered for 30 minutes, then cover and refrigerate 4–6 hours.
Doneness cue: pie should slice cleanly with a warm knife.
Troubleshooting
1. Filling feels heavy or dense
Cause: Butter wasn’t whipped long enough.
Fix: Whip 2–3 minutes longer until very pale.
2. Filling turned grainy
Cause: Chocolate added too hot.
Fix: Always cool chocolate to below 32°C (90°F).
3. Pie won’t set
Cause: Over-whipped cream or warm filling.
Fix: Whip to soft peaks only; chill a full 6 hours.
4. Crust crumbles when slicing
Cause: Not enough butter / under-baked.
Fix: Increase butter by 15g or bake 1–2 minutes longer.
5. Bitter chocolate flavor
Cause: Using >70% chocolate.
Fix: Stick to 60–70% for balanced silkiness.
6. Greasy mouthfeel
Cause: Butter too warm.
Fix: Start with butter no warmer than 24°C.
Substitutions & Variations
Dietary Swaps
- Egg-free: Use base recipe (no eggs needed).
- Dairy-free:
- Use vegan butter (same weight).
- Replace heavy cream with coconut cream (220g whipped).
- Note: Slight coconut flavor unavoidable.
- Gluten-free:
- Use GF graham crackers or almond-flour crust (200g almond flour + 60g butter).
Flavor Variations
- Mocha Silk Pie: Add 1 tsp espresso powder.
- Salted Chocolate Silk: Add ½ tsp flaky salt on top.
- Mint Variation: Add ¼–½ tsp peppermint extract.
Storage, Make-Ahead & Freezing
Counter
- 1 hour maximum (contains dairy).
Fridge
- Store 4 days, covered loosely to avoid condensation.
- For clean slices, refrigerate 30 minutes before serving.
Freezer
- Freeze up to 2 months fully assembled.
- Wrap in plastic + foil.
- Thaw overnight in the fridge.
Do not freeze: whipped-cream topping applied fresh; it weeps after thawing.
Serving Suggestions
- Top with fresh whipped cream, chocolate curls, or cocoa dusting.
- Serve with berries to cut richness.
- Pair with strong coffee or a caramel drizzle.
FAQs
1. Can I use milk chocolate?
Yes, but reduce sugar by 25g and expect a softer set.
2. Can I make this without a mixer?
Hand mixer recommended. Whipping butter by hand is tough.
3. Can I use an OTG?
Yes — bake crust on the middle rack, 175°C (350°F), same time.
4. How do I double the recipe?
Double all ingredients and use a 10-inch deep pie dish.
5. Why is my filling runny?
Chocolate was too warm or cream was whipped too softly.
Notes From My Kitchen
Batch 1: Butter whipped only 2 minutes → filling heavy. Increased whipping to 7 minutes.
Batch 2: Chocolate added too warm → graininess. Let chocolate cool longer.
Batch 3: Whipped cream too stiff → pie lost silkiness. Adjusted to soft peaks.
Final: Chosen method uses cooler chocolate + long butter whipping + soft-peak cream for the cleanest slice and lightest texture.
Nutrition (Estimate)
Per slice (1 of 10): ~430 calories
Values are estimates; adjust based on brands used. Follow standard food-safety practices when handling dairy.
Final Thoughts
This French Silk Pie Recipe gives you everything you want from a classic chocolate mousse pie — a silky filling, clean slices, and a flavor that tastes like you spent all day in the kitchen (even though it’s mostly no-bake). With the long-whipped butter technique and soft-peak cream, you can create bakery-level results without complicated steps or risky raw eggs. Whether you’re baking for a holiday, a birthday, or absolutely no reason other than chocolate cravings, this pie delivers every single time.