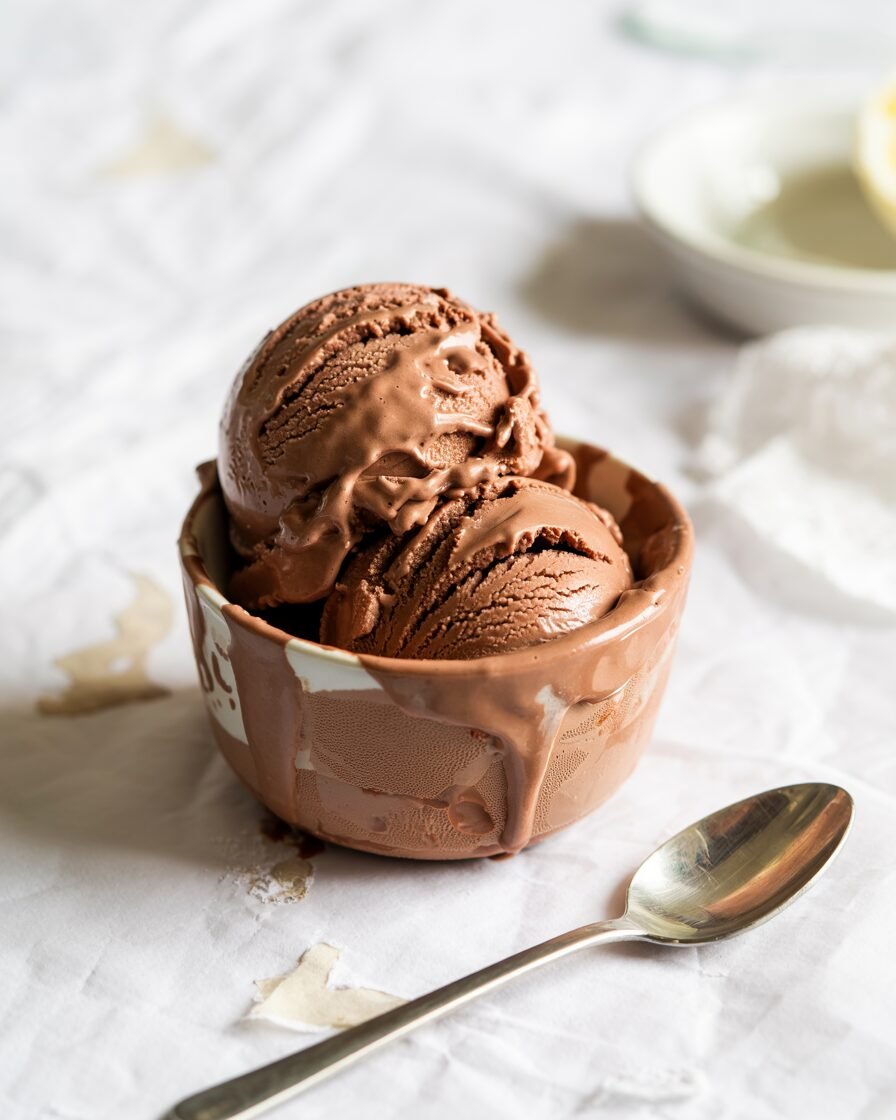
If you’ve ever tried to make high-protein ice cream at home and ended up with an icy brick, this recipe is for you. My High-Protein Chocolate Ice Cream Recipe delivers a scoopable, creamy texture with deep chocolate flavor — without a commercial stabilizer or complicated equipment.
This version is designed for beginner to intermediate home bakers, using just a hand whisk or blender and a basic freezer (no ice cream maker required). You’ll get a smooth, rich ice cream with 18–20g protein per serving and a texture that stays soft enough to scoop after 5 minutes at room temperature.
Pro tip: A small amount of liquid sweetener (like honey or maple syrup) prevents rock-hard freezing. Don’t skip it — it’s your texture insurance.
Why This Recipe Works (The Science)
High-protein ice cream fails when protein overwhelms fat and sugar. Protein binds water tightly, which sounds good — but in the freezer, it can lead to stiffness and iciness.
Here’s why this version stays creamy:
- Balanced fat-to-protein ratio
Full-fat milk plus a touch of cream creates enough fat to coat ice crystals. Fat interferes with large crystal formation, keeping texture smooth. - Dual sweeteners for softness
Granulated sugar provides structure and sweetness. Honey (or maple syrup) lowers the freezing point, keeping the ice cream scoopable. - Cocoa bloom technique
Whisking cocoa powder with hot milk “blooms” it. This hydrates cocoa solids, intensifies flavor, and reduces chalkiness — especially important in protein-enriched recipes. - Cornstarch stabilization (small amount)
Just 8g thickens the base slightly. This mimics commercial stabilizers and improves mouthfeel without making it gummy.
Did you know? Ice cream freezes best when the base is thoroughly chilled to 4°C (39°F) before freezing — it reduces large ice crystal formation.
Ingredients
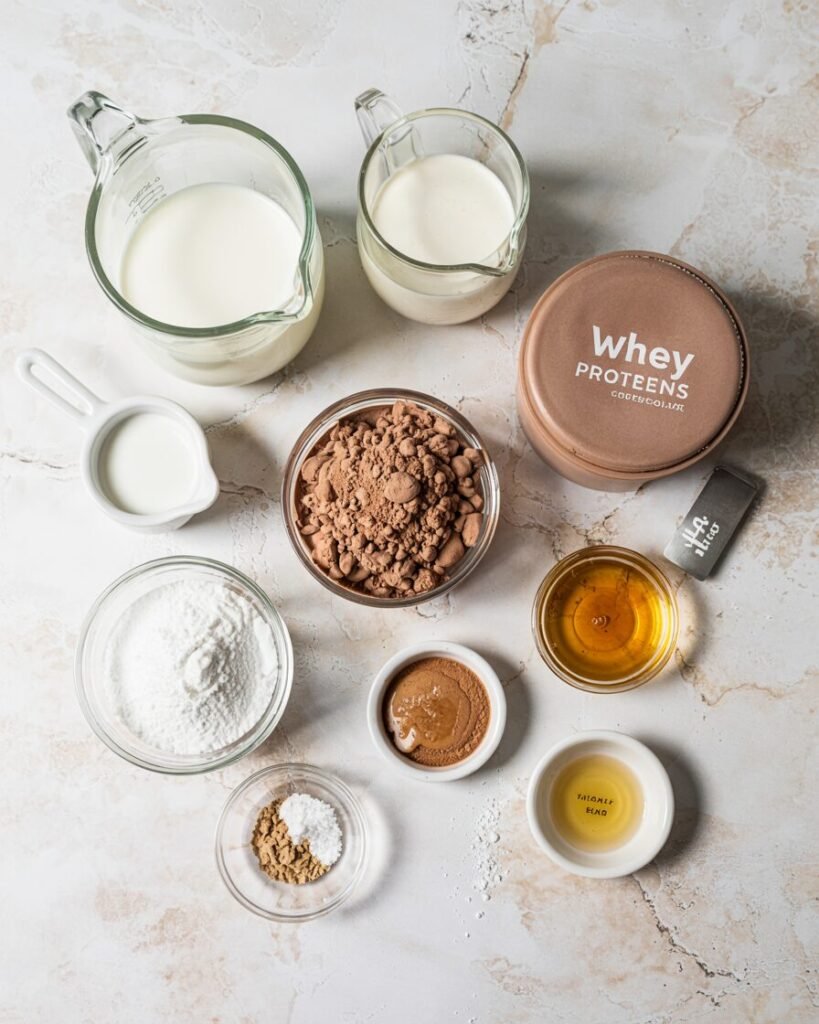
Yields: About 800 ml (4 generous servings)
- Whole milk — 360g (1½ cups) — Liquid base; provides protein and creaminess
- Fresh cream (25–35% fat) — 120g (½ cup) — Fat for smooth texture
- Whey protein isolate (unflavored or chocolate) — 60g (½ cup loosely packed) — Protein boost; structure
- Dutch-process cocoa powder — 30g (¼ cup) — Rich chocolate flavor
- Granulated sugar — 70g (⅓ cup) — Sweetness and structure
- Honey or maple syrup — 30g (1½ tbsp) — Prevents hard freezing
- Cornstarch — 8g (1 tbsp) — Light stabilizer
- Fine salt — 1g (¼ tsp) — Enhances chocolate flavor
- Vanilla extract — 5g (1 tsp) — Rounds bitterness
Note: Dutch-process cocoa gives smoother flavor. Natural cocoa will taste sharper and slightly more acidic.
Equipment
Required:
- Medium saucepan
- Whisk
- Silicone spatula
- Fine sieve (important for smoothness)
- Digital scale (highly recommended)
- 1L freezer-safe container
- Freezer
Nice-to-have:
- Hand blender (for ultra-smooth base)
- Instant thermometer
- Parchment sheet to press on surface
Step-by-Step Instructions (With Visual Cues)
Step 1: Bloom the Cocoa (5 minutes)
In a saucepan, whisk cocoa powder, sugar, salt, and cornstarch together.
Heat milk until steaming but not boiling — about 70°C (160°F).
Slowly pour half the hot milk into cocoa mixture, whisking constantly.
Visual cue: The mixture should look glossy and smooth, not grainy or dry.
Return everything to saucepan.
Step 2: Thicken the Base (4–6 minutes)
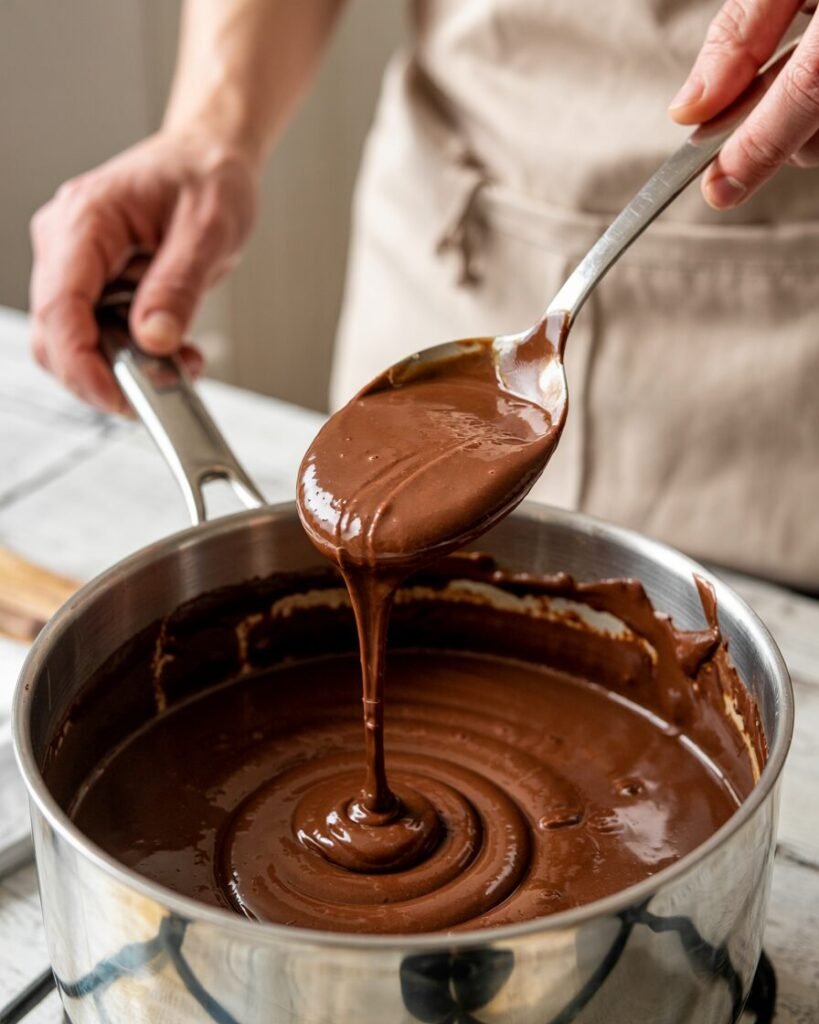
Cook over medium heat, whisking constantly.
Heat to 82–85°C (180–185°F).
Checkpoint: The mixture should coat the back of a spoon. Run a finger through — it should leave a clear line.
Avoid boiling — it can make protein grainy.
Remove from heat.
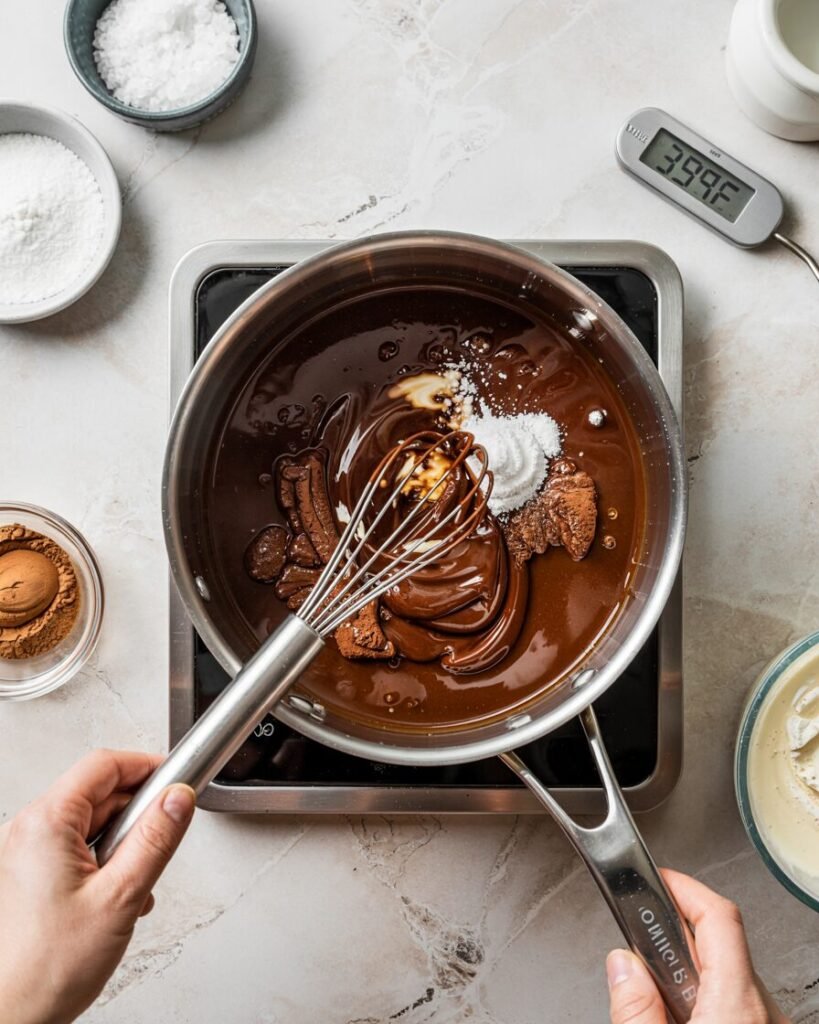
Step 3: Add Protein (Critical Step)
Let mixture cool to 60°C (140°F) before adding whey protein.
Whisk protein in gradually to prevent clumping.
Visual cue: Smooth, thick chocolate custard consistency. If you see tiny lumps, blend for 10 seconds with a hand blender.
Stir in cream, honey, and vanilla.
Step 4: Chill Thoroughly (Minimum 4 hours)
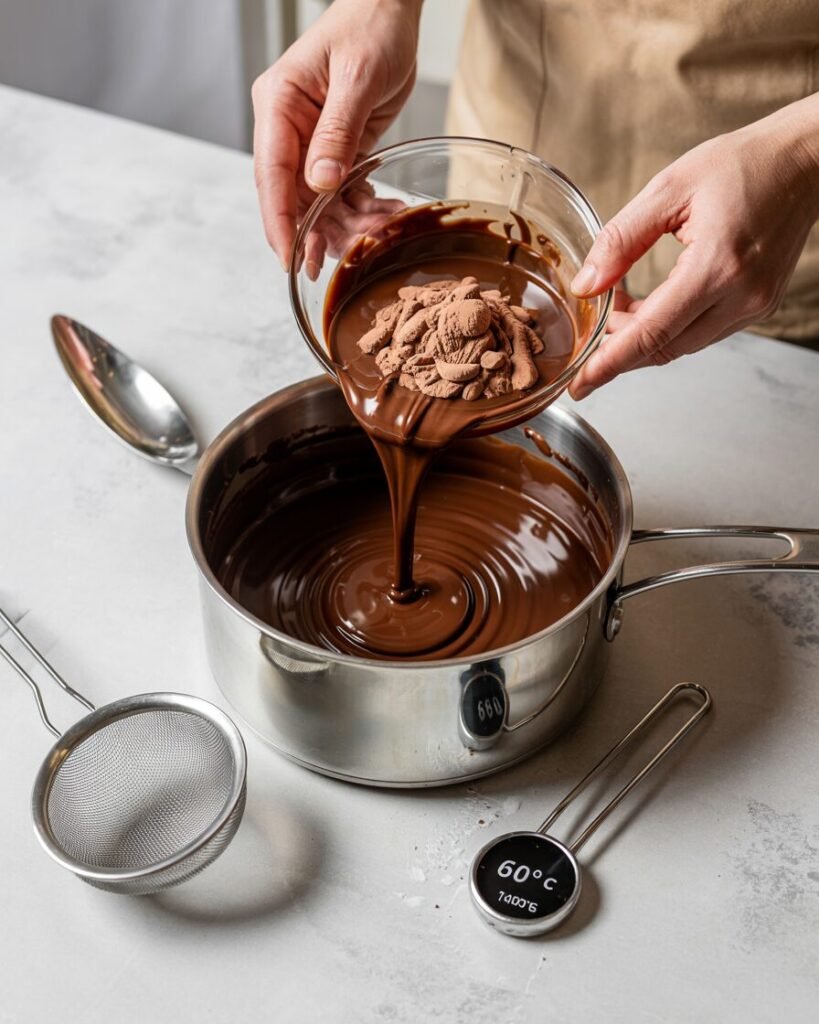
Pour base through a fine sieve into a bowl.
Press parchment onto surface to prevent skin.
Chill to 4°C (39°F) — at least 4 hours, preferably overnight.
Avoid this: Skipping full chilling leads to icy texture.
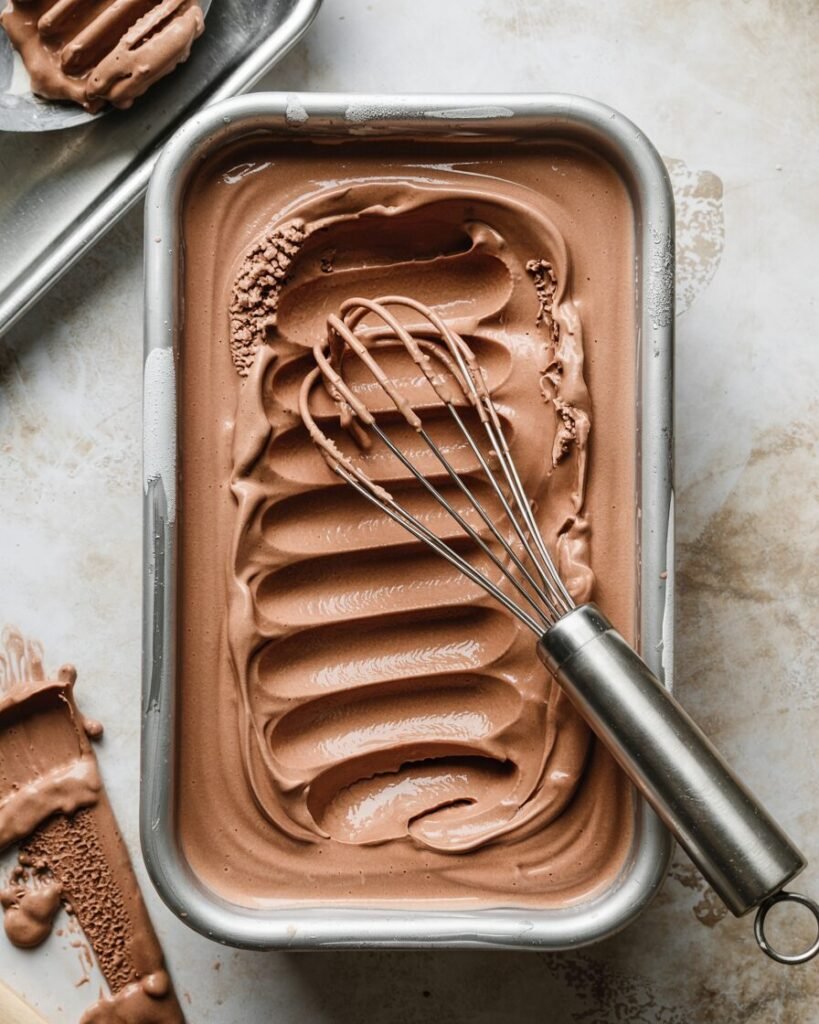
Step 5: Freeze & Stir Method (No Machine)

Pour into shallow freezer container.
Freeze 45 minutes.
Remove and whisk vigorously.
Repeat every 30–40 minutes for 3–4 cycles.
Visual cue: It should gradually thicken from milkshake consistency to soft-serve texture.
After final stir, freeze solid (about 3–4 hours).
Optional: Ice Cream Maker Method
Churn according to manufacturer instructions (usually 20–25 minutes). Freeze 2–3 hours to firm.
Troubleshooting Common Failures
Problem: Ice cream freezes rock hard
Likely cause: Not enough sugar or fat
Fix next time: Increase honey by 10g or cream by 20g
Problem: Grainy texture
Cause: Protein added when mixture too hot
Fix: Add below 60°C and blend briefly
Problem: Icy crystals
Cause: Skipped stirring cycles
Fix: Stir more frequently during first 2 hours
Problem: Bitter taste
Cause: Natural cocoa or too much protein
Fix: Add 10g more sugar or 5g more honey
Problem: Chalky mouthfeel
Cause: Cheap whey protein
Fix: Use isolate, not concentrate
Problem: Too soft
Cause: Too much liquid sweetener
Fix: Reduce honey by 5–10g
Substitutions & Variations
Egg-Free
This recipe is already egg-free.
Dairy-Free
- Replace milk with 400g almond milk
- Replace cream with 120g coconut cream
Texture will be slightly less creamy.
Vegan Protein
Use pea protein isolate (60g).
Add 5g extra honey or syrup to counter dryness.
Sugar-Reduced Version
Replace sugar with 60g erythritol + keep honey (important for softness).
Note: Slight cooling aftertaste.
Flavor Variations
- Add 40g dark chocolate (70%) melted into hot base
- Espresso: 2g instant coffee powder
- Peanut butter swirl: 60g natural peanut butter folded before final freeze
Scaling Guide
| Pan/Container | Yield | Adjustment |
|---|---|---|
| 6-inch loaf (small batch) | 400 ml | Halve all ingredients |
| 1.5L tub | 1.2L | Multiply ingredients ×1.5 |
Do not double protein beyond 1.5× without increasing fat — texture suffers.
Storage, Make-Ahead & Freezing
Freezer: Up to 2 months in airtight container.
Press parchment onto surface to prevent ice crystals.
Before serving: Let sit at room temp 5–8 minutes.
Do not refreeze repeatedly — texture degrades.
This recipe freezes well because of balanced sugar content. Dairy-free version stays slightly firmer.
Serving Suggestions
Pair with:
- Warm brownies (temperature contrast enhances creaminess)
- Salted caramel drizzle
- Fresh raspberries (acid cuts richness)
- Toasted nuts for crunch
For protein dessert bowls: Add sliced banana + granola.
FAQs
Can I replace whey with casein?
Yes, but reduce to 50g. Casein thickens more aggressively.
How do I prevent iciness without an ice cream maker?
Stir every 30–40 minutes during first freeze stage.
Can I double the recipe?
Yes, but use a wider shallow container for even freezing.
Best cocoa to use?
Dutch-process for smooth flavor. Natural cocoa tastes sharper.
Can I make this in an OTG?
No baking required — only stovetop and freezer.
Notes From My Kitchen (Testing Log)
Batch 1:
Used only milk (no cream). Result: icy and slightly hard. Lesson — fat matters.
Batch 2:
Added protein while mixture was too hot (75°C). Texture slightly grainy. Now I cool to 60°C.
Batch 3:
Reduced sugar to 50g. Froze too firm. Sweetener affects freezing point more than expected.
Batch 4:
Skipped cornstarch. Texture was acceptable but melted faster. Cornstarch improves body.
Batch 5 (Final Version):
Balanced 70g sugar + 30g honey. Smooth, scoopable, rich chocolate flavor with stable structure.
I tested 3 protein brands and found whey isolate gives the smoothest finish.
Nutrition & Food Safety Note
Approximate per serving (1 of 4):
Calories: 260–290
Protein: 18–20g
Carbohydrates: 22g
Fat: 12g
Values are estimates; adjust for brands and portion size.
Keep dairy refrigerated below 4°C (39°F). Do not leave base at room temperature more than 1 hour before chilling.
Conclusion
This High-Protein Chocolate Ice Cream Recipe proves you don’t need an ice cream machine or stabilizers to get creamy, scoopable results at home. The balance of fat, protein, and sugar is intentional — each ingredient plays a role in texture and freeze stability.
If you follow the temperature checkpoints and chilling time, you’ll get a rich chocolate ice cream with real dessert texture — not a protein compromise.