Let’s be honest—once you taste freshly made peanut butter, the store-bought jar suddenly feels a little… underwhelming. This homemade peanut butter recipe is all about simplicity, control, and real flavor. With just a handful of ingredients and one food processor, you can turn warm roasted peanuts into a rich, creamy spread that’s smoother, fresher, and completely customizable to your taste. Whether you like it silky, slightly chunky, salted, or lightly sweetened, this method gives you consistent results on the first try. The best part? You’ll actually see the transformation at every stage, so you know exactly when your peanut butter is perfectly blended and ready to jar.
Why This Recipe Works (The Science)
Peanuts are naturally high in oils, which means they can transform—from crumbly to paste to pourable butter—using nothing but friction. Here’s why this recipe gives you consistent, smooth results every time:
- Warm nuts = faster oil release. Blending warm peanuts allows the oils to separate more readily, which means smoother texture and less processor strain.
- A touch of oil = stability. Adding 5–10g (1–2 tsp) of neutral oil helps prevent separation during storage without altering flavor.
- Salt enhances flavor + controls bitterness. Roasting brings out peanut sweetness, but salt rounds the flavor and reduces the slightly bitter edge raw peanuts sometimes have.
Ingredients (with weights & purpose)
For Smooth Peanut Butter (Makes 350–360g)
- Roasted peanuts — 300g — 2 cups — main body and flavor; roasted peanuts give deeper flavor than raw.
- Neutral oil (optional) — 5–10g (1–2 tsp) — improves smoothness and shelf stability.
- Salt — 2–3g (½ tsp) — enhances peanut flavor and balances natural sweetness.
- Honey or sugar (optional) — 10–15g (2–3 tsp) — for a lightly sweetened, spreadable peanut butter.
Brand note: If using packaged roasted peanuts like Skippy No-Salt, reduce added salt by half.
Equipment
Required:
- Sturdy food processor (minimum 500–700W)
- Baking tray (if roasting peanuts yourself)
- Silicone spatula
- Airtight glass jar
- Kitchen scale
Nice to have:
- Instant-read thermometer (to check peanut temperature after roasting)
- Fine sieve (for removing peanut skins if using raw peanuts)
Step-by-Step Instructions
Step 1: Roast or Re-Roast the Peanuts
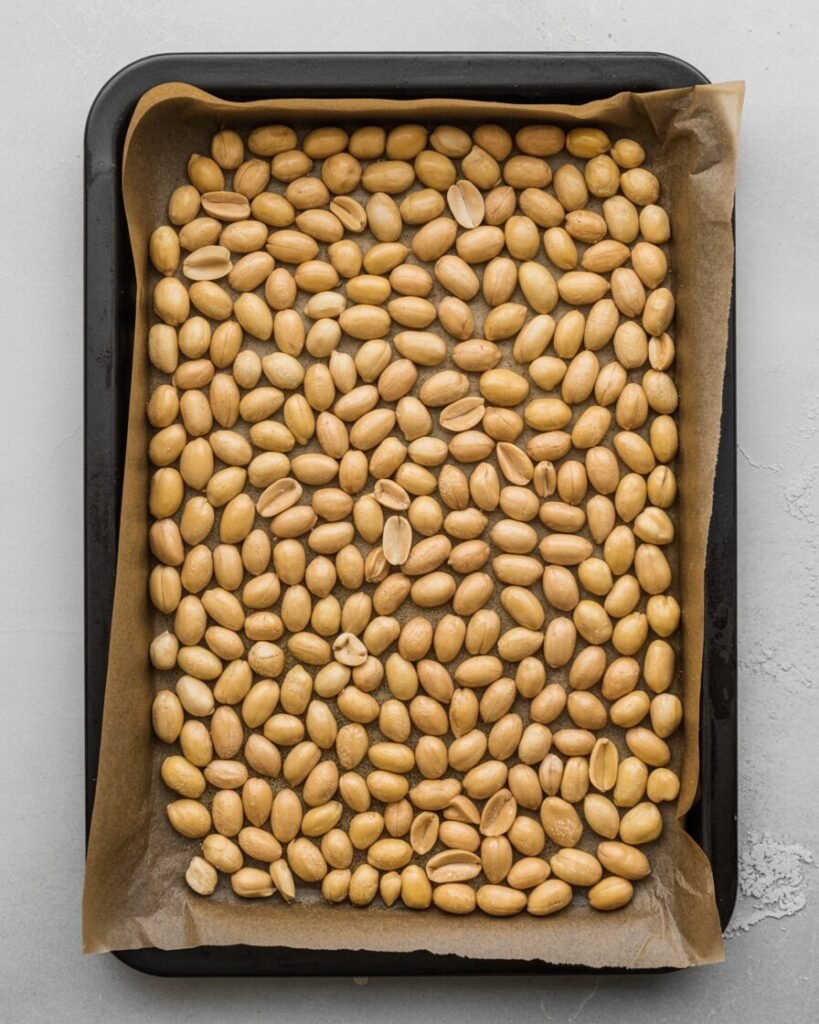
Time: 8–10 minutes at 180°C (350°F).
Action: Spread peanuts in a single layer and roast until lightly browned.
Visual cue: They should smell toasty, and the skins should crackle.
Why: Even pre-roasted peanuts benefit from a second roast—it warms the oils and amplifies flavor.
Step 2: Keep the Peanuts Warm
Temperature target: Around 50–60°C (122–140°F).
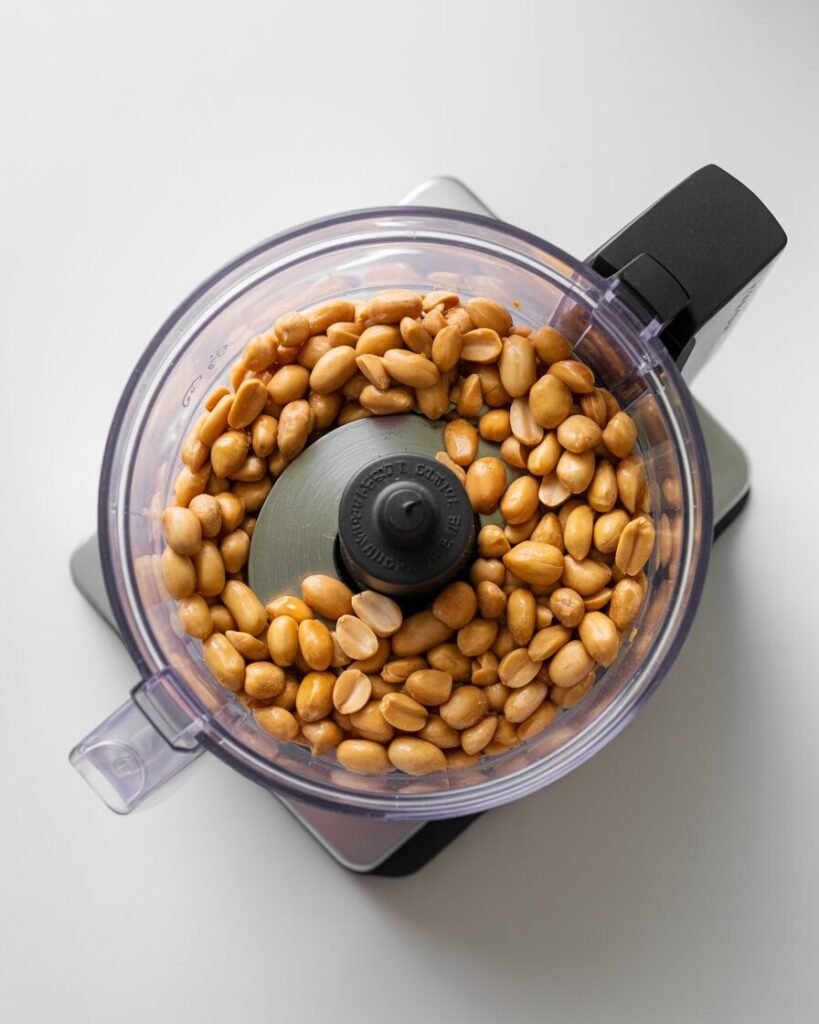
Place them directly into the food processor while warm.
Visual cue: They should feel warm but not too hot to touch.
Why: Warm nuts transform faster → smoother butter.
Step 3: First Grind — Pebbly Stage
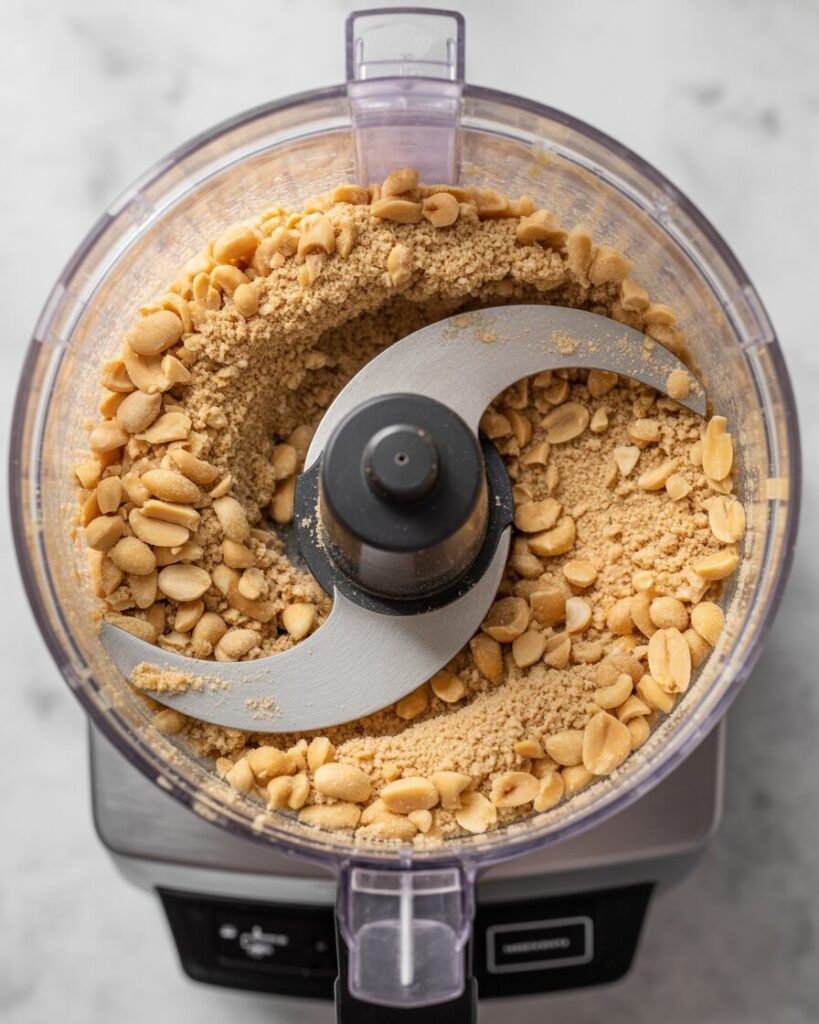
Time: 30–45 seconds
Pulse to break down the nuts.
Visual cue: You should get a coarse, sand-like texture.
Checkpoint: The mixture should mound slightly when scooped with a spatula.
Step 4: Second Grind — Dry Paste Stage
Time: 1–2 minutes, continuous
Visual cue: Peanut mixture clumps into a ball and sticks to the blade.
Smell: Toasty, fragrant, slightly warm.
Note: This stage often worries beginners, but it’s normal—keep going.
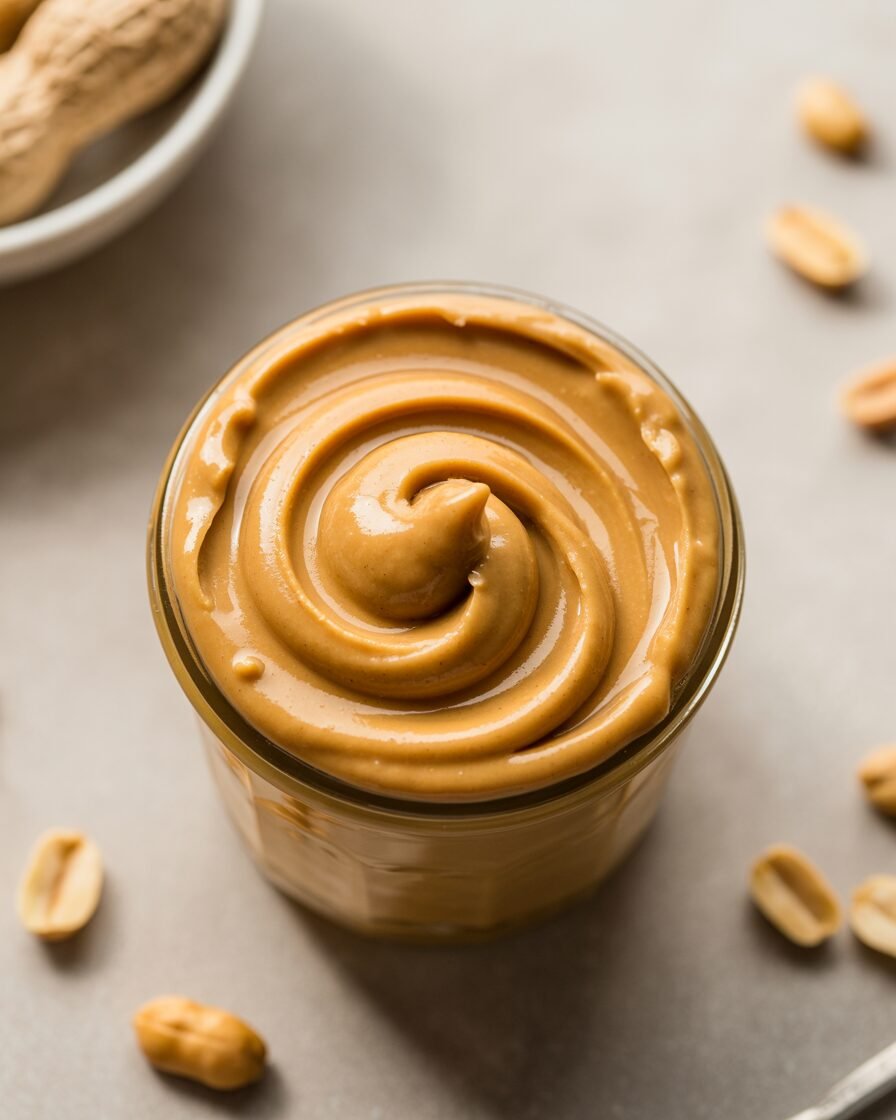
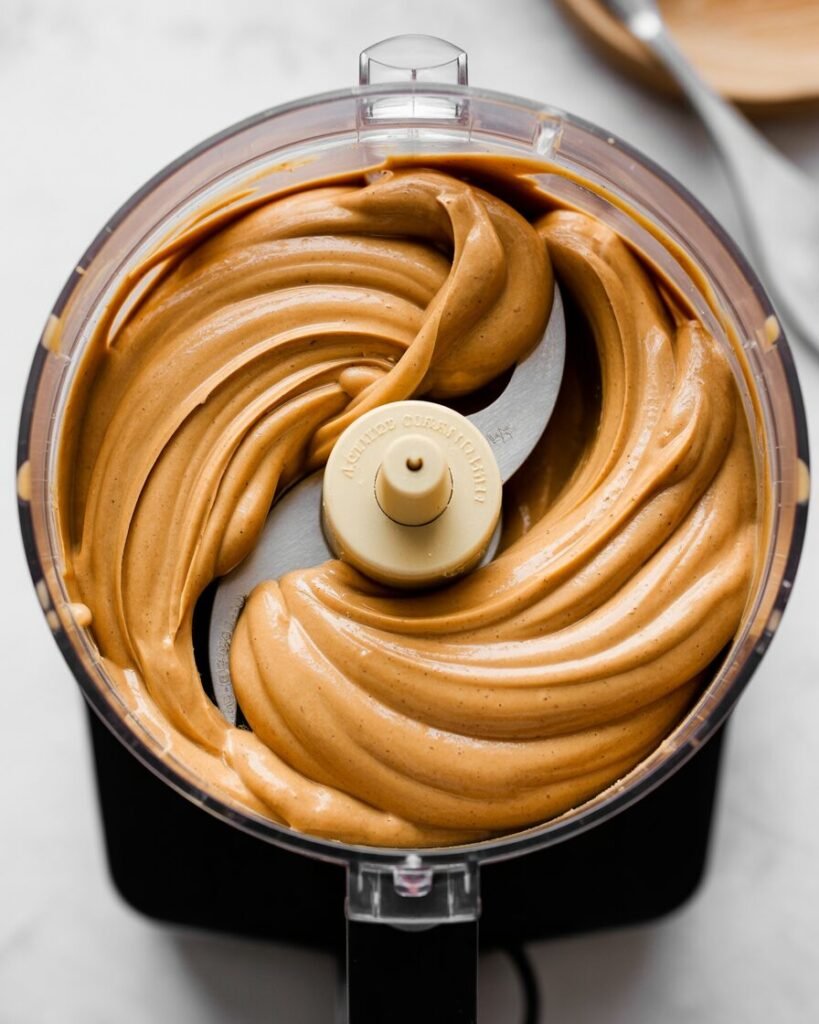
Step 5: Third Grind — Smooth Stage
Time: 2–3 minutes
The butter loosens as oils release.
Visual cue: It should flow like thick cake batter and coat the bowl evenly.
Checkpoint: When lifted with a spatula, it should fall in a slow ribbon.
Step 6: Add Enhancers (Oil, Salt, Optional Sweetener)
Time: 30–60 seconds blending
Add salt first, then 1–2 tsp oil if needed.
For sweetened peanut butter, add honey or sugar now.
Visual cue: After blending, the surface should appear glossy and uniform.
Texture check: Should feel silky when rubbed between fingers—no graininess.
Step 7: Taste + Adjust Flavor
Add more salt or sweetness ⅛ tsp at a time.
Note: A small amount dramatically changes flavor—adjust carefully.
Step 8: Final Blend & Jar It
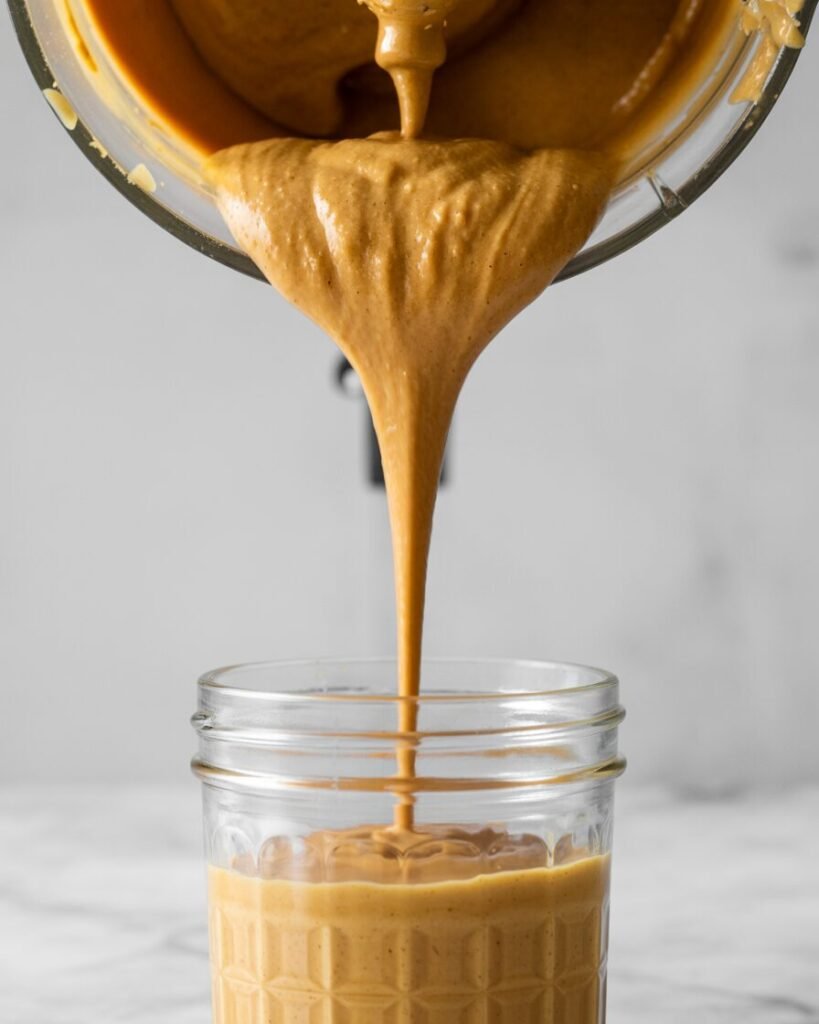
Time: 20–30 seconds
Blend once more to ensure even emulsification.
Storage visual cue: Final butter should pour slowly but smoothly into the jar.
Troubleshooting: Common Failures & Fixes
Problem: Peanut butter stays grainy
- Likely causes: Peanuts weren’t warm enough; processor too weak; not blended long enough.
- Fix: Re-warm peanut mixture in a microwave for 20–30 seconds and re-blend.
Problem: Oil separation during storage
- Likely causes: No added oil/emulsifier; high ambient heat.
- Fix: Add 1 tsp neutral oil or store in the fridge.
Problem: Peanut butter turns thick & pasty
- Likely causes: Over-roasted peanuts; peanuts too dry.
- Fix: Add 2–3 tsp oil; blend longer to coax out natural oils.
Problem: Bitter flavor
- Likely causes: Burnt peanuts.
- Fix: Start over—bitterness can’t be masked.
Problem: Food processor shuts off
- Likely causes: Overheating.
- Fix: Blend in shorter intervals; keep peanuts warm but not hot.
Substitutions & Variations
Dietary Swaps
- Sugar-free: Omit sweetener entirely; flavor stays strong and clean.
- Oil-free: Skip added oil—texture will be slightly thicker.
- Gluten-free: Naturally gluten-free; ensure add-ins are certified GF.
Flavor Variations
- Crunchy Peanut Butter: Reserve 50g crushed peanuts and fold in at the end.
- Chocolate Peanut Butter: Add 10g cocoa + 15g sugar during Step 6; blend 1 min.
- Honey-Roasted: Add 25g honey + roast peanuts 2 minutes longer.
- Spiced PB: Add ½ tsp cinnamon or ⅛ tsp nutmeg for cozy warmth.
- High-protein: Add 1 tbsp unflavored whey; expect slightly thicker texture.
Scaling the Recipe
| Yield | Peanuts | Salt | Oil | Sweetener |
|---|---|---|---|---|
| 180g small batch | 150g | ⅛ tsp | 1 tsp | 1 tsp |
| 500g large batch | 400g | ¾ tsp | 2–3 tsp | 3–4 tsp |
Note: Larger batches heat faster in the processor—blend in shorter intervals.
Storage, Make-Ahead & Freezing
Room Temperature:
- Up to 2 weeks in a dark, cool spot.
- Use a clean spoon each time to prevent contamination.
Refrigerator:
- Lasts 6–8 weeks.
- Stir after chilling—cold thickening is normal.
Freezer:
- Freeze up to 3 months in airtight jars with headspace.
- Thaw in fridge overnight.
- Do not refreeze—oil separation becomes extreme.
What NOT to freeze:
- Sweetened peanut butter made with honey tends to crystallize.
Serving Suggestions & Pairing Ideas
- Spread on warm toast with sliced bananas.
- Stir into oatmeal for richness without extra dairy.
- Blend into smoothies for creamy texture.
- Use as filling for sandwich cookies or thumbprint cookies.
- Drizzle on pancakes or waffles with maple syrup for a salty-sweet balance.
FAQs
Can I use raw peanuts?
Yes, but roast them first—raw peanuts taste grassy and blend poorly.
Can I make this in a blender?
Only if it’s high-power (like a Vitamix). Standard blenders overheat quickly.
How do I prevent graininess?
Blend while the peanuts are warm and don’t rush the process.
Can I double the recipe?
Yes—just blend in intervals to avoid overheating.
Why add oil when peanuts already have oil?
A small amount stabilizes the butter and improves smoothness.
Notes From My Kitchen (Testing Log)
Batch 1: Started with room-temp peanuts. Texture was grainy after 4 minutes. Realized peanuts need to be warm, not just roasted earlier in the day.
Batch 2: Used freshly roasted peanuts. Much smoother but processor overheated—fixed by blending in intervals.
Batch 3: Added 2 tsp oil + ½ tsp salt → Perfectly glossy spread with pourable consistency.
Batch 4: Tested honey-roasted version; too thick until I added 1 more tsp oil. Flavor = incredible.
Final Method: Warm peanuts + interval blending + small oil addition = smoothest, most stable homemade peanut butter.
Nutrition & Disclaimer
Approx per 1 tbsp (16g): ~94 calories, 8g fat, 3g protein, 2g carbs.
Values are estimates; actual nutrition varies by peanut brand and additions. Follow standard food-safety practices.
Final Thoughts
Homemade peanut butter is one of those “why didn’t I start sooner?” recipes—it’s fast, inexpensive, customizable, and tastes dramatically better than most jarred versions. Once you get used to the warm-peanut trick and trust the process (especially those early clumpy stages), you’ll have a reliable go-to peanut butter you can whip up any week. Whether you like it silky, chunky, honey-sweet, chocolate-rich, or ultra-salted, this base recipe gives you the control and confidence to make it your own.