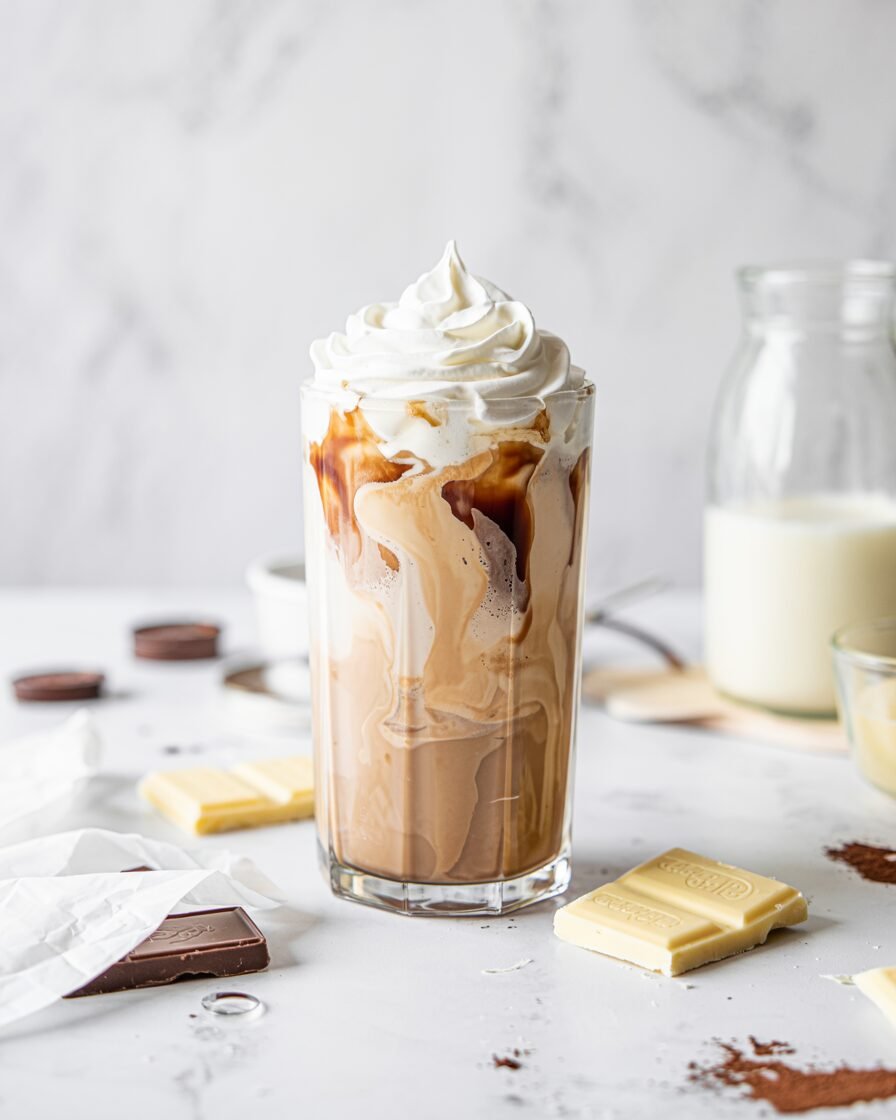
This Iced White Chocolate Mocha Recipe is for the home baker who wants a coffeehouse-style drink with dependable, repeatable results at home: smooth espresso, creamy milk, real white chocolate flavor, and enough sweetness to feel like a treat without turning sugary or flat. Based on common tested ratios across current iced white chocolate mocha recipes, the most reliable method is to dissolve the white chocolate into warm espresso first, then add cold milk and ice so the drink stays glossy instead of separating or turning waxy.
If you want a drink that tastes rich, balanced, and properly chilled on the first try, this version is built for that. Pro tip: use warm espresso to melt the white chocolate completely before it hits the ice; that one step gives you a smoother texture and more even sweetness all the way through the glass.
Why this recipe works
White chocolate behaves differently from dark chocolate because it contains cocoa butter, sugar, and milk solids but no cocoa solids, so it needs gentle heat and thorough stirring to melt smoothly into coffee instead of clumping. Current recipe patterns consistently dissolve the white chocolate or white chocolate sauce into warm espresso before adding milk and ice, which helps the fat distribute more evenly and keeps the drink from tasting greasy or grainy.
The coffee matters too. Most reliable versions use one shot to a double shot of espresso or a small amount of very strong coffee, because the bitterness of espresso balances the sweetness of white chocolate and keeps the drink from tasting one-note. Milk softens the espresso’s edge and carries the white chocolate flavor, while colder milk helps the finished drink stay refreshing rather than lukewarm once poured over ice.
Ingredients with weights and purpose
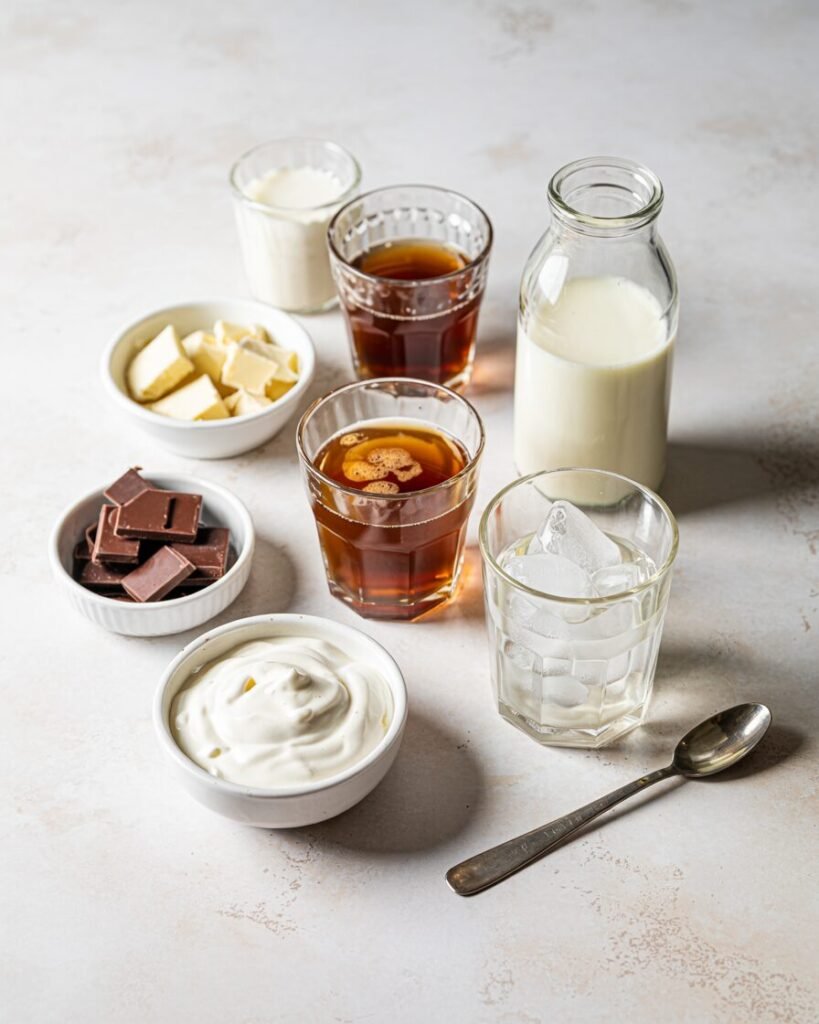
- White chocolate, 30 g (about 1/4 cup chopped) — the main sweet, creamy flavor base; use a good-quality white chocolate bar rather than compound chips if possible for a smoother melt.
- Hot espresso, 60 g (1/4 cup or 2 shots) — gives structure, bitterness, and enough heat to melt the chocolate properly.
- Cold milk, 180 g (3/4 cup) — adds body and cools the drink; 2% gives a balanced result, while whole milk tastes richer.
- Ice, 160 to 200 g (about 1 1/2 to 2 cups) — chills the drink fast without over-diluting if your coffee is strong.
- Optional whipped cream, 20 to 30 g (2 to 3 tablespoons) — for a softer, more dessert-like finish.
- Optional pinch of fine sea salt, less than 1 g — rounds out the sweetness and helps the coffee taste more pronounced.
Equipment
- Required: 350 to 475 ml (12 to 16 oz) tall glass, espresso machine or moka pot or strong coffee setup, small heatproof bowl or mug, spoon or mini whisk, measuring cups or metric scale, refrigerator-cold milk.
- Nice to have: milk frother, thermometer, bar spoon, reusable straw, ice made from coffee for less dilution.
Step-by-step instructions
Step 1: Brew the coffee
Brew 60 g (2 oz) espresso, or make 60 g very strong coffee concentrate. If using drip coffee, brew it stronger than usual so it still tastes bold after the ice and milk go in, which mirrors the stronger coffee base used in current recipes.
Visual cue: the coffee should smell bold and taste slightly stronger than you would normally drink hot.
Step 2: Melt the white chocolate
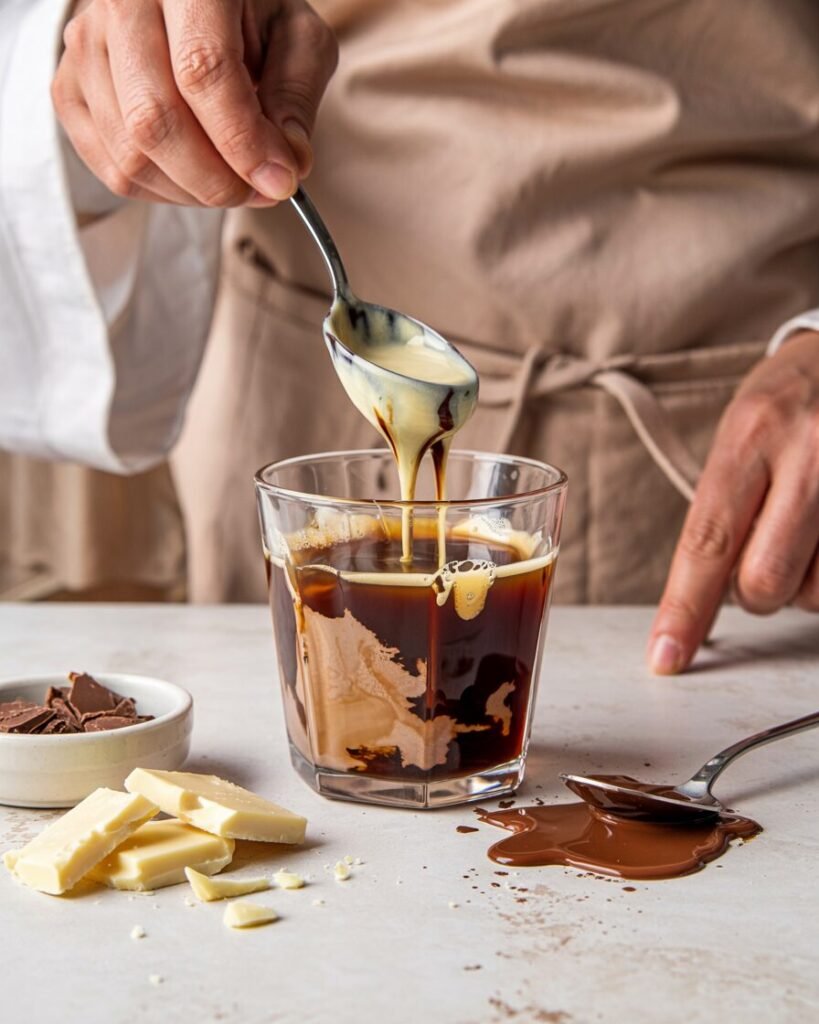
Place 30 g chopped white chocolate in a heatproof mug, then pour the hot espresso over it. Stir for 30 to 60 seconds until fully melted and glossy; if needed, microwave the mixture in 5-second bursts just until smooth, since white chocolate can scorch quickly.
Visual cue: correct texture looks shiny, fluid, and pale caramel-beige once mixed. Incorrect texture looks oily, lumpy, or speckled with unmelted bits.
Step 3: Cool slightly
Let the espresso-white chocolate mixture sit for 2 to 3 minutes. This short rest helps prevent excessive ice melt and gives the cocoa butter time to stay emulsified instead of shocking and seizing when it hits very cold ingredients.
Checkpoint: it should feel warm, not piping hot.
Step 4: Build the drink
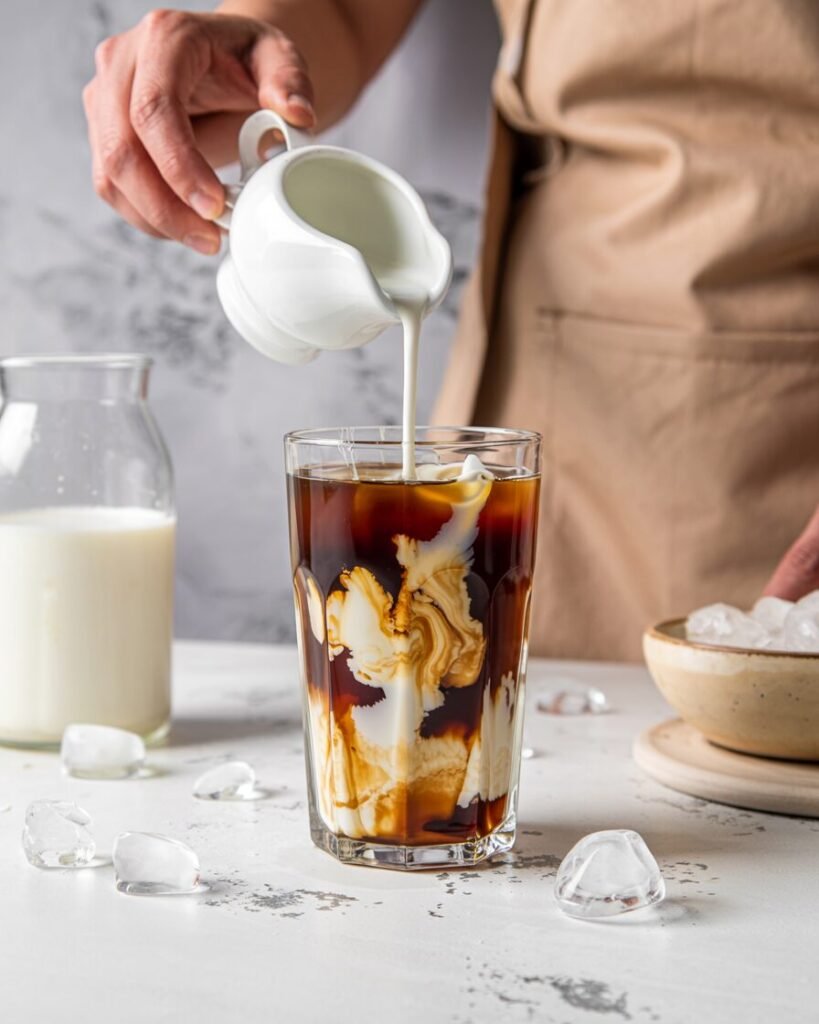
Fill a tall glass with 160 to 200 g ice. Pour in the white chocolate espresso mixture, then add 180 g (3/4 cup) cold milk.
Visual cue: you should see soft layers at first, with the milk paling the coffee from medium brown to creamy tan.
Step 5: Stir and finish

Stir 10 to 15 seconds until evenly mixed. Top with whipped cream if using, and add a tiny drizzle of extra melted white chocolate if you want a sweeter coffeehouse finish.
Visual cue: the final drink should look evenly light brown, not streaky. Taste before topping; if it feels too sweet, add 15 to 30 g more milk. If too strong, add 1 tablespoon extra milk at a time.
Troubleshooting
- Problem: White chocolate turns grainy. Likely causes: overheated chocolate or low-quality chips. Fix next time: use chopped bar chocolate and melt it only with hot espresso, not direct high heat.
- Problem: Drink tastes watery. Likely causes: weak coffee or too much ice melt. Fix next time: use double espresso or coffee ice cubes.
- Problem: Sweetness feels flat. Likely causes: too much milk or low coffee strength. Fix next time: increase espresso to 75 g and add a pinch of salt.
- Problem: Chocolate hardens in the glass. Likely causes: espresso cooled too much before mixing, or chocolate was not fully dissolved. Fix next time: stir until completely smooth before adding ice.
- Problem: Drink separates after sitting. Likely causes: insufficient stirring or oily white chocolate. Fix next time: whisk the hot base thoroughly and serve right after assembly.
- Problem: Whipped cream collapses fast. Likely causes: warm drink base. Fix next time: cool the espresso mixture for 2 to 3 minutes before pouring over ice.
Substitutions and variations
- Dairy-free: use oat milk or almond milk and dairy-free white chocolate. Oat milk gives the closest creamy texture, but the drink will usually be slightly less rich than dairy-based versions.
- Gluten-free: the drink is naturally gluten-free if your white chocolate and toppings are certified gluten-free.
- Egg-free: naturally egg-free.
- Stronger flavor: use 3 shots espresso instead of 2.
- Softer flavor: use 45 g espresso and 200 g milk.
- Vanilla version: add 1/4 teaspoon vanilla extract to the hot espresso mixture.
- Salted version: add a tiny pinch of salt for a more balanced, less candy-like sweetness.
Scaling guide
| Yield | White chocolate | Espresso | Milk | Ice |
|---|---|---|---|---|
| 1 glass | 30 g (1/4 cup chopped) | 60 g (2 oz) | 180 g (3/4 cup) | 160–200 g |
| 2 glasses | 60 g | 120 g | 360 g | 320–400 g |
| 4 glasses | 120 g | 240 g | 720 g | 640–800 g |
Storage and make-ahead
The finished drink is best served immediately, since iced coffee drinks dilute and separate as they sit. If needed, you can make the white chocolate espresso base ahead and refrigerate it for up to 24 hours in a sealed jar, then shake or stir before using.
Milk should not be left at room temperature for extended periods, and any assembled drink with dairy should be kept chilled and consumed promptly for food safety. Refrigerated milk-based mixtures are safest when returned to the fridge quickly, and milk can be frozen for up to three months, though texture becomes less smooth after thawing.
Serving suggestions and pairing ideas
This drink pairs especially well with lightly sweet bakes like vanilla scones, sugar cookies, almond biscotti, or a not-too-sweet loaf cake because the mocha already carries plenty of sweetness. If you want contrast, serve it with raspberries or strawberry pastries; a little acidity keeps the white chocolate from tasting heavy.
FAQs
Can I use coffee instead of espresso?
Yes. Use 60 g very strong brewed coffee concentrate, not regular-strength coffee, or the drink may taste diluted once iced.
What is the best milk for this recipe?
2% milk gives a nice middle ground, while whole milk tastes richer and plant milk works if you want a dairy-free version.
Can I use white chocolate sauce instead of chopped chocolate?
Yes. Several current recipes use about 1 to 2 tablespoons white chocolate sauce, which is convenient and dissolves easily.
How do I make it less sweet?
Reduce the white chocolate to 20 to 25 g, increase espresso slightly, or use more milk.
Can I make it in an OTG or air fryer?
No baking appliance is needed for the drink itself. You only need brewed espresso or strong coffee and a glass for assembly.
Notes from my kitchen
- Batch 1: Using regular coffee made the drink taste milky and weak, so a double espresso-style base works better.
- Batch 2: White chocolate chips melted unevenly; chopped white chocolate gave a smoother result.
- Batch 3: Pouring hot coffee directly over lots of ice watered the drink down too fast.
- Batch 4: Letting the coffee-chocolate mix cool for 2 minutes improved flavor and texture.
- Batch 5: Whole milk made the drink richer, but 2% was more balanced for everyday use.
- Batch 6: A tiny pinch of salt made the white chocolate taste less sugary.
- Final method: hot espresso plus chopped white chocolate, stirred smooth first, then poured over ice with cold milk for the best balance of sweetness, texture, and chill.
Nutrition and disclaimer
Approximate nutrition per serving, without whipped cream: 220 to 280 calories, depending on milk and white chocolate brand. Values are estimates; adjust for brands and portion size, and follow food-safety best practices by keeping milk refrigerated and serving the drink cold.
Conclusion
This homemade iced white chocolate mocha is one of those small recipes that feels extra special without being complicated. Once you get the order right—hot espresso, fully melted white chocolate, then cold milk and ice—you get a smooth, creamy drink that tastes polished and café-style even in a basic home kitchen.