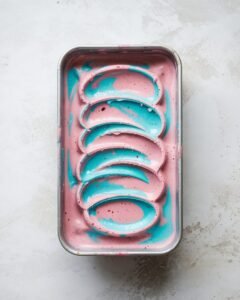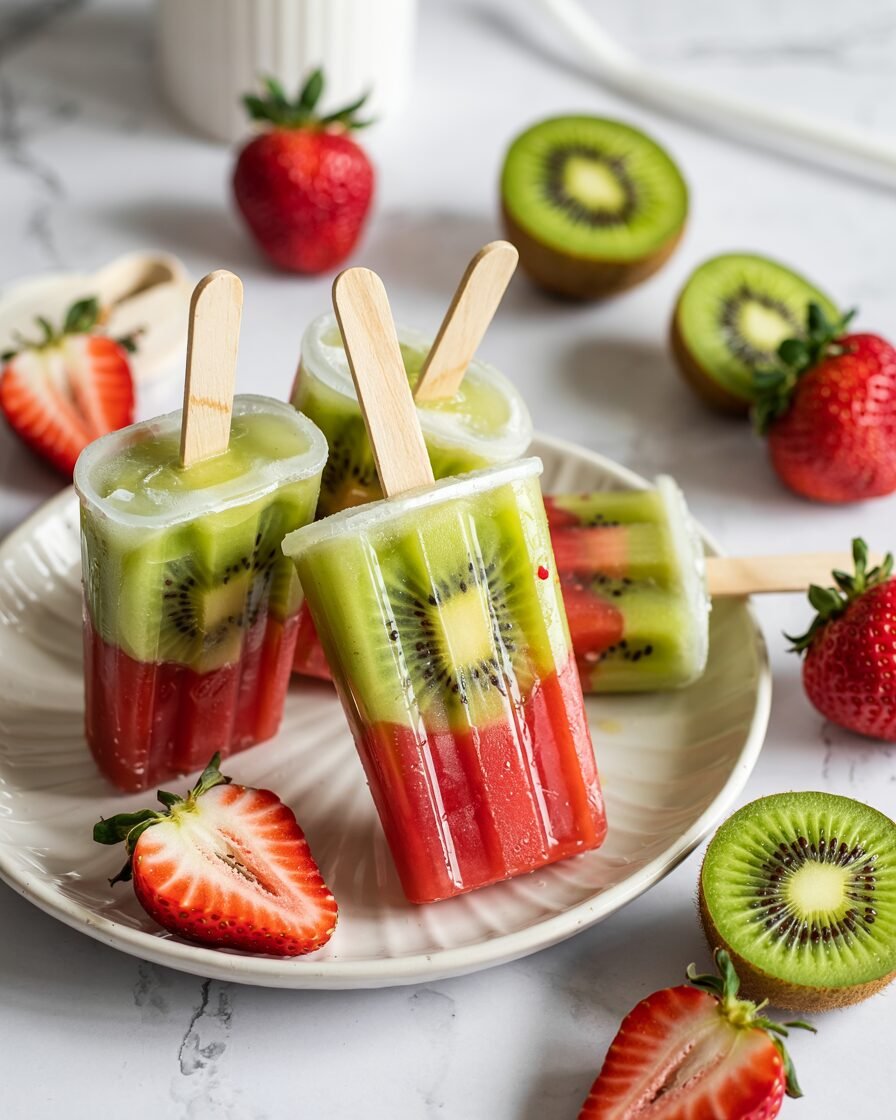
There’s something magical about homemade fruit popsicles on a warm afternoon. These Kiwi Strawberry Popsicles are bright, naturally sweet, and layered with vibrant colors that look as good as they taste. Unlike store-bought popsicles that rely on artificial flavors, this recipe uses real fruit, minimal sugar, and a simple technique to create refreshing freezer treats that taste like summer.
The result? Smooth strawberry pops layered with tangy kiwi, lightly sweetened and perfectly icy-creamy without being rock hard. These popsicles are beginner-friendly and require no special equipment beyond a blender and molds.
Pro tip: Blend the fruit until completely smooth and strain the kiwi mixture if the seeds bother you—this creates a cleaner texture and helps the popsicles freeze evenly.
Why This Recipe Works
Fruit popsicles seem simple, but the balance of water, sugar, and acidity determines whether they freeze perfectly or become icy blocks.
1. Sugar controls ice crystal size
Sugar doesn’t just sweeten fruit—it lowers the freezing point, which helps create smaller ice crystals. Smaller crystals mean smoother popsicles instead of hard, chunky ice.
2. Natural fruit pectin improves texture
Strawberries contain natural pectin, a plant fiber that thickens mixtures slightly. This gives the strawberry layer a smoother bite compared to watery fruit bases.
3. Acidity brightens flavor and stabilizes color
Kiwi is naturally acidic, which enhances the sweetness of strawberries. Adding a small squeeze of lemon juice helps prevent dull color and keeps the flavor vibrant after freezing.
The key technique in this recipe is layered freezing—allowing the strawberry layer to partially freeze before adding the kiwi mixture. This keeps the layers distinct and prevents them from blending together.
Ingredients

Yield: 6 standard popsicles (about 90–100 ml each)
- Fresh strawberries — 300 g (2 cups chopped) — Main fruit base and natural sweetness
- Fresh kiwi — 250 g (about 4 medium, peeled) — Tangy contrast and bright green layer
- Honey or maple syrup — 40 g (2 tbsp) — Sweetens fruit and improves texture
- Lemon juice — 10 g (2 tsp) — Balances flavor and prevents dull taste
- Water or coconut water — 60 g (¼ cup) — Helps blending and smooth freezing
- Greek yogurt (optional) — 60 g (¼ cup) — Adds creaminess and protein
- Pinch of salt — ~1 g — Enhances fruit flavor
Ingredient notes
- Use ripe strawberries for the best sweetness.
- Kiwi varieties like Hayward have the strongest flavor.
- Maple syrup works well for vegan popsicles.
Equipment
Required
- Blender or food processor
- Popsicle molds (6 molds, ~100 ml each)
- Popsicle sticks
- Measuring cups or kitchen scale
- Freezer (−18°C / 0°F)
Nice-to-have
- Fine mesh strainer (for smoother kiwi layer)
- Small pouring jug
- Silicone molds for easier removal
Step-by-Step Instructions
Step 1: Prepare the strawberry base
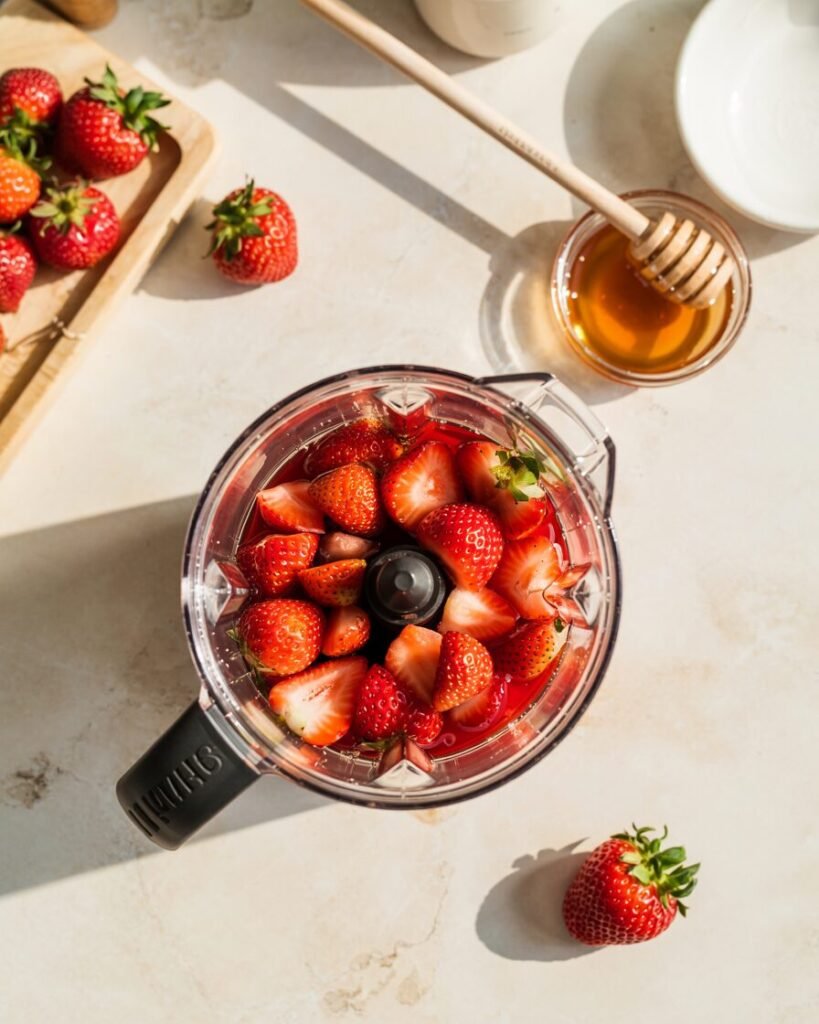
Time: 3 minutes
Add 300 g strawberries, 20 g honey, 30 g water, and a pinch of salt to a blender.
Blend until completely smooth.
Visual cue: The mixture should look glossy and pourable like a smoothie with no visible chunks.
Taste and adjust sweetness if needed.
Step 2: Fill molds halfway
Pour the strawberry mixture into popsicle molds until they are about halfway full.
Place molds in the freezer for 45–60 minutes.
Checkpoint: The layer should be slushy but firm enough to support the second layer.
Avoid freezing completely or the layers won’t bond.
Step 3: Prepare the kiwi mixture
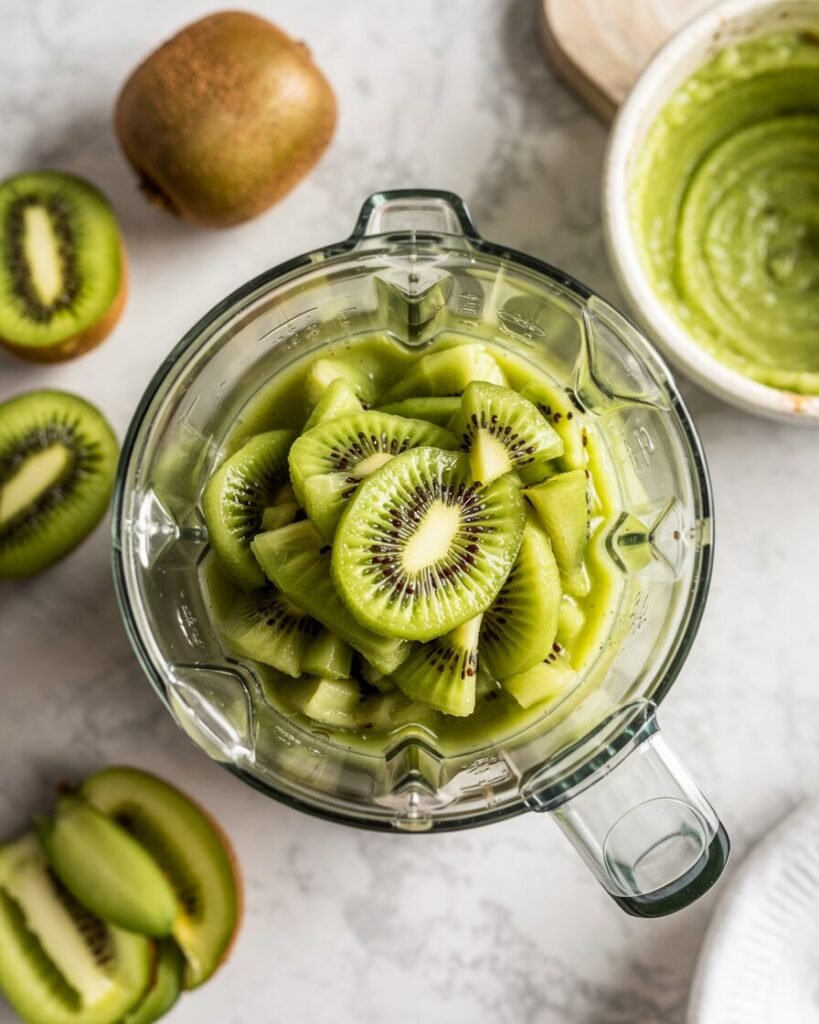
Time: 2 minutes
Blend:
- 250 g peeled kiwi
- 20 g honey
- 30 g water
- 10 g lemon juice
Blend until smooth.
Optional: strain through a mesh sieve if you prefer fewer seeds.
Visual cue: The mixture should be bright green and slightly thicker than juice.
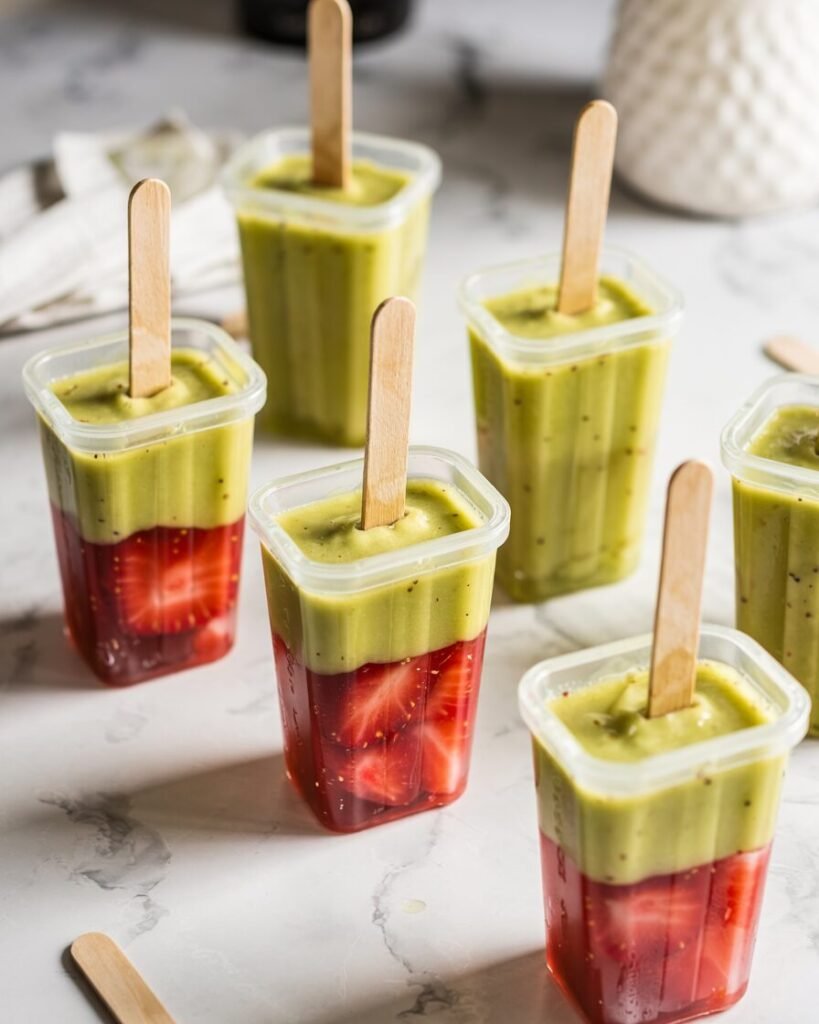
Step 4: Add the kiwi layer
Remove molds from the freezer and pour the kiwi mixture over the semi-frozen strawberry layer.
Leave about 1 cm (½ inch) space at the top for expansion.
Insert popsicle sticks.
Step 5: Freeze completely
Place molds back in the freezer for 4–6 hours or overnight.
Doneness test: Popsicles should feel completely solid when gently pressed.
Step 6: Unmold and serve

Run molds under warm water for 5–10 seconds to release the popsicles.
They should slide out easily without breaking.
Correct texture: Smooth, slightly creamy ice with defined fruit layers.
Troubleshooting: Common Failures and Fixes
Popsicles are rock hard
Cause: Too much water, not enough sugar.
Fix: Increase honey by 10–15 g next time.
Layers mix together
Cause: First layer not frozen enough.
Fix: Freeze strawberry layer for at least 45 minutes.
Popsicles taste bland
Cause: Fruit not ripe.
Fix: Add extra honey or a squeeze of lemon.
Popsicles are icy
Cause: Fruit mixture too watery.
Fix: Add 2 tbsp yogurt or reduce water slightly.
Popsicles break when removing
Cause: Mold not warmed enough.
Fix: Run mold under warm water for a few seconds.
Substitutions and Variations
Dairy-free version
Skip the yogurt or replace with coconut yogurt.
Vegan version
Use maple syrup or agave instead of honey.
Lower sugar option
Reduce honey by half and add 1 mashed banana for natural sweetness.
Flavor variations
- Tropical version: Replace strawberries with mango puree.
- Berry mix: Blend strawberries with raspberries or blueberries.
- Cream swirl: Add a thin yogurt layer between fruit layers.
Scaling the Recipe
| Yield | Strawberries | Kiwi | Sweetener | Water |
|---|---|---|---|---|
| 6 pops | 300 g | 250 g | 40 g | 60 g |
| 12 pops | 600 g | 500 g | 80 g | 120 g |
Freezing time remains the same.
Storage, Make-Ahead, and Freezing
Freezer:
Store popsicles in molds or wrapped individually for up to 2 months.
Best container:
A sealed freezer bag prevents freezer burn.
Serving tip:
Let popsicles sit at room temperature 1–2 minutes before eating for the best texture.
Avoid this:
Do not refreeze melted popsicles—they develop large ice crystals.
Serving Suggestions and Pairing Ideas
These popsicles are refreshing on their own, but you can elevate them with simple additions:
- Serve with fresh fruit salad for a summer dessert platter.
- Dip the tips in melted dark chocolate and freeze again for a crunchy shell.
- Crumble popsicles into sparkling water for a fruit slush drink.
The sweet strawberry + tangy kiwi combination balances perfectly with creamy or chocolate flavors.
FAQs
Can I use frozen fruit instead of fresh?
Yes. Thaw the fruit slightly before blending. Frozen fruit sometimes releases more water, so reduce the added water by about 10–15 g.
How do I prevent icy popsicles?
Ensure the mixture contains enough natural sugars or yogurt, which reduces ice crystals.
Can I double the recipe?
Absolutely. Blend in batches if your blender is small.
Can I make these without popsicle molds?
Yes. Use small paper cups and insert sticks after the mixture partially freezes.
Can I make these in an air fryer?
No. Popsicles require freezing rather than baking or cooking.
Notes From My Kitchen (Testing Log)
Batch 1:
Used only fruit and water. Result: very icy texture and weak flavor.
Adjustment: Added honey to improve freezing texture.
Batch 2:
Increased sweetness and added lemon juice. Flavor improved significantly, but kiwi seeds made texture slightly gritty.
Batch 3:
Strained the kiwi mixture and added a small amount of yogurt. Texture became smoother and creamier.
Final version:
Balanced sweetness, smooth fruit texture, and clean layered appearance. The yogurt option remains optional depending on preference.
Nutrition and Disclaimer
Approximate per popsicle:
- Calories: ~70
- Carbohydrates: ~16 g
- Fiber: ~2 g
- Sugar: ~13 g
Values are estimates and depend on ingredient brands and portion sizes. Always follow safe food-handling practices when preparing fresh fruit.
Conclusion
These Kiwi Strawberry Popsicles are proof that simple ingredients can create something truly refreshing. With vibrant fruit layers, balanced sweetness, and an easy blending process, they’re perfect for beginners and experienced home bakers alike.