Last Updated: September 5, 2025
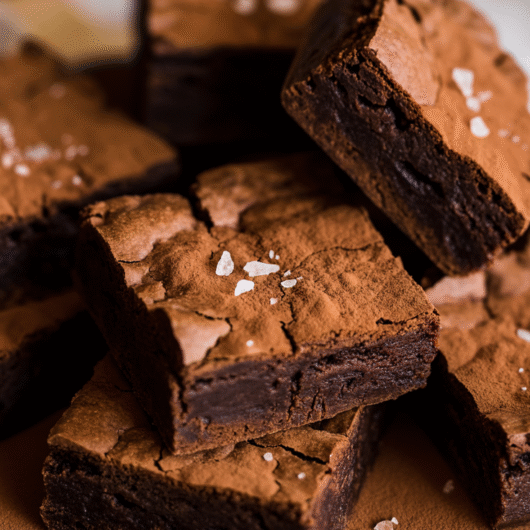
If you love brownies but crave something with a little kick, my Mexican Brownies bring together classic fudgy texture, deep cocoa, and a warm, complex spice blend. These are not your usual chocolate squares; cinnamon, a touch of cayenne, and optional espresso powder create layers of flavor that surprise and delight. This recipe is designed for home bakers who want to impress without stress, using bowls and a whisk (no stand mixer needed) and standard 8-inch (20 cm) square pans. Promise: You’ll get dense, moist brownies with a crackly top, a hint of heat, and no sinking or dryness. Pro tip: Don’t overmix the batter after adding flour; stop as soon as streaks disappear for the best chew.
Why This Recipe Works
Mexican Brownies achieve their signature texture and flavor through a balance of science and tradition. Quality cocoa (preferably natural, not Dutch-process) and dark chocolate (60–70%) form a rich base, while a generous amount of fat (both oil and butter) keeps the crumb tender and moist, even after a day or two. Cinnamon and cayenne are not just for heat—they enhance the chocolate’s depth and add a subtle warmth that lingers. Espresso powder (optional) brightens the cocoa notes without tasting like coffee.
Baking science notes:
- Oil + Butter Combo: Oil ensures moisture, while butter contributes flavor and a slightly crisp edge. This hybrid approach avoids the greasiness of all-oil brownies and the dryness of all-butter versions.
- Sugar’s Role: A mix of white and brown sugar balances sweetness and chew. Brown sugar’s molasses adds just enough acidity to react with baking powder, giving a subtle rise and tender crumb.
- Egg Function: Eggs bind the batter and add structure. Room-temperature eggs incorporate more air, helping to create that shiny, crackled top.
Ingredients with Grams and Purpose
Dry Ingredients
- All-purpose flour: 85g (⅔ cup) — structure for the crumb
- Natural cocoa powder: 55g (½ cup) — deep chocolate flavor (not Dutch-process; if you must substitute, reduce leavening slightly)
- Baking powder: ½ tsp (2g) — gentle rise
- Fine sea salt: ½ tsp (3g) — enhances all flavors
- Ground cinnamon: 2 tsp (4g) — warmth and complexity
- Cayenne pepper: ¼ tsp (0.5g) — a whisper of heat (adjust to taste)
- Espresso powder (optional): ½ tsp (1g) — intensifies chocolate
Wet Ingredients
- Unsalted butter: 75g (⅓ cup) — richness and flavor
- Neutral oil (vegetable, sunflower): 75g (⅓ cup) — moisture
- Granulated sugar: 125g (⅔ cup) — sweetness, structure, crisp top
- Brown sugar, packed: 75g (⅓ cup) — moist chew, caramel notes
- Large eggs, room temp: 2 (about 100g) — binding and rise
- Pure vanilla extract: 1 tsp (5 ml)
Mix-ins
- Chopped dark chocolate (60–70%): 85g (¾ cup)—extra fudginess
- Chopped toasted pecans or walnuts (optional): 50g (½ cup)
Equipment
Required
- 8-inch (20 cm) square metal baking pan — glass or ceramic pans bake differently; adjust time
- Whisk and rubber spatula — no stand mixer needed
- Digital scale (preferred) or dry measuring cups
- OTG/conventional oven
- Parchment paper — for easy removal
- Oven thermometer — to confirm actual temperature
- Cooling rack
Nice to have
- Small sieve for cocoa and flour
- Instant-read thermometer (for checking doneness)
Step-by-Step Instructions
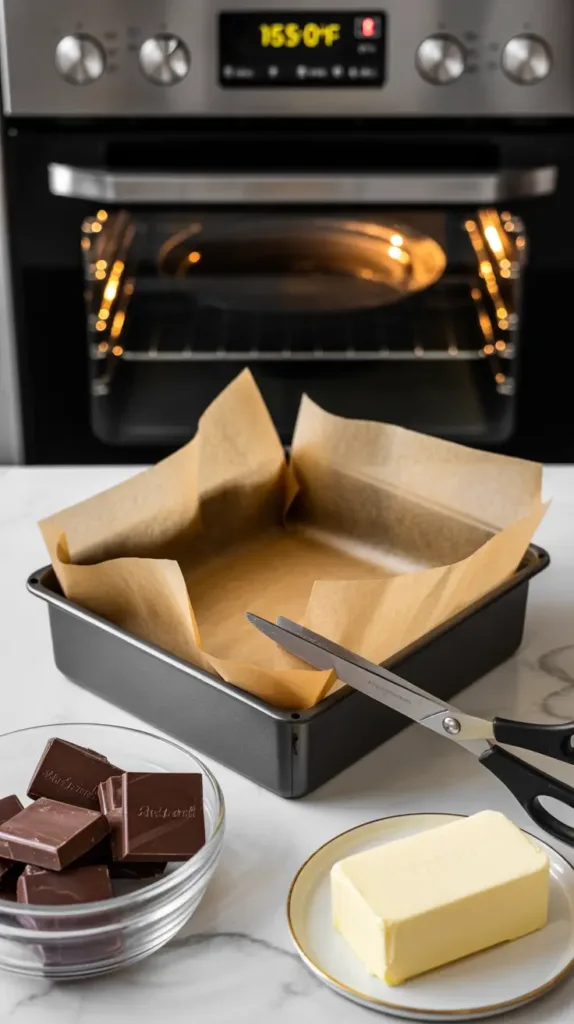
Step 1: Prep and Preheat
- Line pan: Cut parchment paper to fit your 8-inch pan, leaving an overhang for easy removal.
- Oven rack: Center position—brownies bake evenly here.
- Preheat at 165°C (325°F): 30 minutes in advance—hot oven, no cold spots.
- Melt butter and chop chocolate: Set aside.
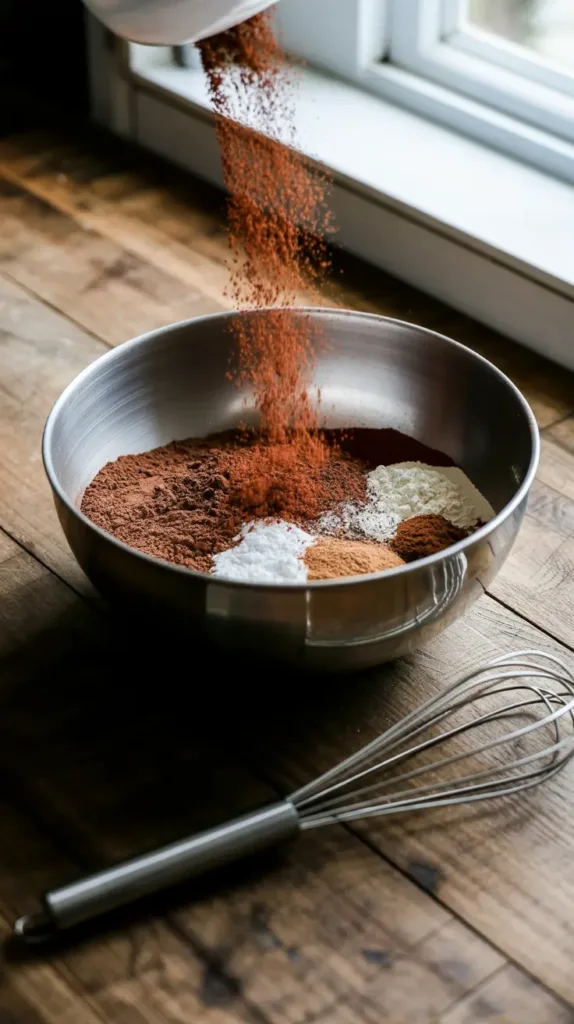
Step 2: Mix Dry Ingredients
- Whisk together: Flour, cocoa powder, baking powder, salt, cinnamon, cayenne, espresso powder. Sift if lumpy.
- Visual cue: Mixture should have no cocoa lumps and look uniform in color.
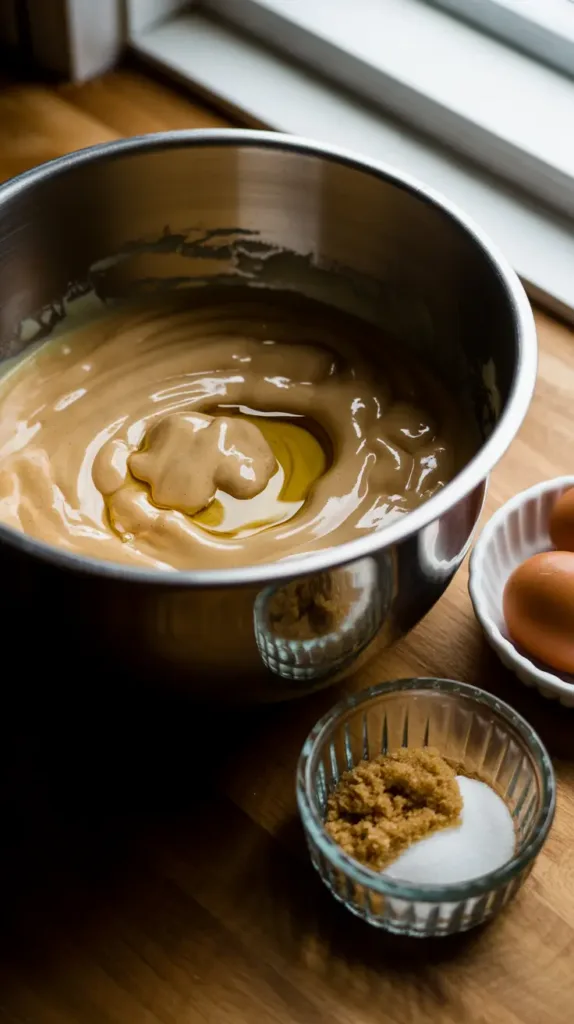
Step 3: Combine Wet Ingredients
- Melt butter: Mix with oil, both sugars, and vanilla in a large bowl.
- Add eggs: One at a time, whisking until just incorporated.
- Visual cue: Batter should become glossy and slightly thickened—streaks may remain; don’t overmix now.
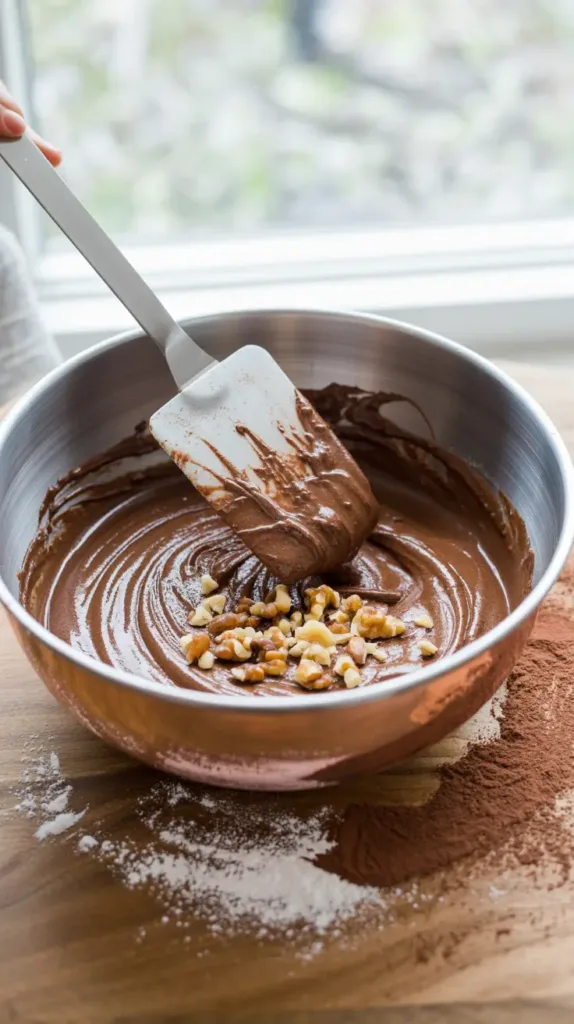
Step 4: Fold Dry into Wet
- Add dry ingredients: Sprinkle over the wet mix. Use a spatula to gently fold just until a few streaks remain.
- Add chopped chocolate and nuts (if using): Fold until almost blended.
- Visual cue: Batter is thick, shiny, and streaks disappear with minimal stirring. Overmixing = tough brownies.
Step 5: Bake
- Pour batter into prepared pan; spread evenly to corners.
- Bake at 165°C (325°F): 25–30 minutes until the top is set and a toothpick in the center comes out with moist crumbs (not wet batter). Internal temp: 88–91°C (190–195°F).
- Rotate pan at 15 minutes for even baking.
- Visual cue: The center should rise slightly and crack; edges pull from sides.

Step 6: Cool
- Rest in pan 10 minutes, then lift out with parchment to cool completely on a rack.
- Cut: Use a hot, wet knife for clean slices.

Troubleshooting: Common Failures and Fixes
| Problem | Likely Cause | Fix Next Time |
|---|---|---|
| Sunken center | Overmixing, underbaking, opened oven early | Fold gently, bake until temp 88–91°C, avoid opening oven before 20 min |
| Dry or crumbly | Overbaked, too much flour | Stick to recipe grams, check at 25 min |
| Gummy streaks | Undermixed, raw flour pockets | Fold evenly, scrape bowl |
| Bitter taste | Too much cocoa, Dutch-process + baking powder | Use natural cocoa, measure leavening carefully |
| Too thin/spread out | Pan too large, not enough batter | Double recipe for 9×13” pan or stick to 8” square |
| Cracked, dry top | Over-whisked eggs, oven too hot | Mix eggs just to blend, check oven calibration |
| Dense, heavy crumb | Packed flour, too much sugar | Spoon-fluff flour, measure sugars correctly |
| Stuck to pan | No parchment, greasing only | Use parchment for foolproof removal |
Substitutions and Variations
Dietary Swaps
- Egg-free: Substitute ½ cup (120g) applesauce or ⅓ cup (80g) yogurt per egg. Expect slightly cakier, less shiny texture.
- Dairy-free: Use coconut oil or non-dairy butter (75g each). Cocoa and chocolate must be dairy-free if needed.
- Gluten-free: Swap all-purpose flour for 85g 1:1 GF blend (we tested Bob’s Red Mill in India). Check batter consistency; add 5–10g more if too loose.
Flavor Variations
- Spice play: Add a pinch of ground cardamom or smoked paprika.
- Nut lovers: Swap walnuts for pecans, or omit for a pure chocolate experience.
- Zest it up: Fold in 1 tsp (2g) orange or lime zest for brightness.
Scaling
- 6-inch pan: Halve all ingredients; bake 20–25 min.
- Double batch: Use a 9×13-inch pan; bake 30–35 min. Rotate every 15 min.
Storage, Make-Ahead, and Freezing
Counter: Up to 2 days in an airtight container—these stay moist.
Fridge: Up to 5 days; return to room temperature for best texture and flavor.
Freezer: Wrap tightly in parchment and foil; keeps 2 months. Thaw at room temp 1–2 hours.
Do not freeze: Brownies with whipped cream or fresh fruit toppings; texture suffers.
Reheat/Refresh: Microwave single pieces 10 sec or warm in a 150°C oven for 5 min.
Serving Suggestions and Pairings
Serve these brownies slightly warm with a dusting of cinnamon and a scoop of vanilla or cinnamon ice cream. For a grown-up twist, offer a shot of coffee or spiced rum alongside. The brownies pair beautifully with mint chocolate ganache or a spiced caramel sauce—try my Cinnamon-Caramel Swirl from Bake My Sweet for an extra layer of warmth.
Internal Links:
- Spiced Chocolate Cake (similar spice profile)
- Dark Chocolate Ganache (for frosting or drizzle)
- Cinnamon-Caramel Sauce (perfect topping)
- How to Toast Nuts for Baking (crunchy add-ins)
FAQs
1. Can I use Dutch-process cocoa instead of natural?
Yes, but skip the baking powder (use only ¼ tsp baking soda) to avoid a soapy taste from excess alkalinity.
2. How do I prevent dry, cake-like brownies?
Weigh your flour and don’t overbake. These are ready when a few moist crumbs cling to the tester.
3. Can I make these without cayenne?
Absolutely—leave it out for milder brownies, or add a pinch of smoked paprika for depth without heat.
4. How do I double the recipe?
Double all ingredients and use a 9×13-inch pan. Start checking at 28–30 minutes.
5. Will yogurt work as an egg substitute in this recipe?
Yes, ⅓ cup per egg. Expect a slightly cakier, less shiny result—still delicious!
6. Can I bake these in an OTG or air fryer?
OTG works perfectly. For air fryer, bake a half batch in a 7-inch pan at 160°C for 18–22 min—watch closely.
Notes from My Kitchen
Batch 1: Used only oil—brownies were moist but lacked depth. Added butter in next test for better flavor.
Batch 2: Increased cinnamon, used Dutch-process cocoa by accident—turned out bitter and flat. Returned to natural cocoa.
Batch 3: Overmixed after adding flour—texture was tough. Folded gently next time for perfect chew.
Batch 4: Added espresso powder and toasted pecans—depth and crunch were just right.
Final: The current hybrid fat, careful mixing, and spice balance give the best combination of flavor, moisture, and structure.
Nutrition and Disclaimer
Per serving (1/16th):
~210 kcal, 12g fat, 25g carbs, 3g protein, 18g sugar.
Values are estimates; adjust for your brands and portion size. No medical claims. Follow food-safety guidelines for ingredients and storage.
Easy Mexican Brownies: Fudgy and Irresistible
Course: DessertCuisine: MexicanDifficulty: Easy15
servings20
minutes30
minutes210
kcal55
minutesFudgy, spicy, and richly chocolatey, these Mexican Brownies combine deep cocoa, warming cinnamon, and a whisper of cayenne for a treat that’s at once familiar and surprising. Made with a mix of butter and oil for moistness, and studded with chunks of dark chocolate, these brownies are simple to whip up with just a bowl and a whisk. Finish them with a scoop of vanilla ice cream or a dusting of cinnamon for a crowd-pleasing dessert.
Ingredients
All-purpose flour: 85g (⅔ cup)
Natural cocoa powder (not Dutch-process): 55g (½ cup)
Baking powder: 2g (½ teaspoon)
Fine sea salt: 3g (½ teaspoon)
Ground cinnamon: 4g (2 teaspoons)
Cayenne pepper: 0.5g (¼ teaspoon)
Espresso powder (optional): 1g (½ teaspoon)
Unsalted butter: 75g (⅓ cup), melted
Neutral oil (vegetable, sunflower): 75g (⅓ cup)
Granulated sugar: 125g (⅔ cup)
Light brown sugar, packed: 75g (⅓ cup)
Large eggs, at room temperature: 2 (about 100g)
Pure vanilla extract: 5ml (1 teaspoon)
Dark chocolate (60–70% cocoa), roughly chopped: 85g (¾ cup)
Toasted pecans or walnuts (optional): 50g (½ cup)
Directions
- Prep:
Preheat oven to 165°C (325°F). Line the pan with parchment, leaving overhang for easy removal. Melt butter; set aside.
Pro tip: Center rack for even baking. Confirm oven temp with a thermometer for best results. - Dry Mix:
Whisk flour, cocoa, baking powder, salt, cinnamon, cayenne, and espresso powder (if using) in a bowl. Sift if lumpy. Set aside. - Wet Mix:
In a large bowl, whisk melted butter, oil, both sugars, and vanilla. Add eggs one at a time, mixing just until smooth and glossy (do not overbeat).
Combine: - Combine:
Fold dry ingredients into wet with a spatula until just a few streaks remain. Add chopped chocolate and nuts (if using), mixing lightly. Do not overmix. - Bake:
Pour batter into pan, smooth top. Bake 25–30 minutes, rotating pan at 15 minutes. Bake until the top is set and a toothpick comes out with moist crumbs—not wet batter. Internal temp should be 88–91°C (190–195°F). - Cool:
Cool in pan 10 minutes, then lift out with parchment to cool completely on a rack. Slice with a hot, wet knife for clean edges.
Notes
- Dietary Notes
Gluten-free: Use 1:1 GF flour (85g).
Egg-free: Substitute ½ cup applesauce or ⅓ cup yogurt per egg.
Dairy-free: Use non-dairy butter and dairy-free chocolate.
Nut-free: Omit nuts (or use seeds if preferred). - Storage & Serving
Airtight room temp: 2 days
Fridge: Up to 5 days (bring to room temp before serving)
Freezer: 2 months (thaw at room temp, refresh in a warm oven if desired)
Serving: Pair with cinnamon ice cream, a dusting of cocoa, or a drizzle of caramel. Avoid freezing brownies with perishable toppings.