If you want a holiday dessert that tastes like Christmas in a slice and doesn’t require turning on the oven, this Eggnog Pie is your new tradition. It’s silky, lightly spiced, perfectly sliceable, and sets up beautifully without gelatin lumps or a soupy center. After testing multiple ratios, I finally landed on a filling that stays creamy while holding its shape—even when you cut it straight from the fridge. My secret? A precise combination of stabilized whipped cream and stovetop-thickened custard. If you’ve ever had a pie that slumped into sadness, this one won’t. Follow the visual cues and you’ll nail it on the first try.
Why This Eggnog Pie Works
Eggnog is naturally rich, but it’s also high in water content. That means if you pour it into a crust with only whipped cream or instant pudding, you risk a loose, melting filling. Here, I thicken the base on the stovetop using cornstarch + egg yolks. The cornstarch gelatinizes at 95–96°C (203–205°F), giving the pie its sliceable body, while the yolks add creaminess without making the texture overly dense.
I also stabilize the whipped cream with a touch of powdered sugar (which contains cornstarch). This lets the whipped cream fold into the warm custard without deflating instantly. The result: a mousse-like filling that stays airy, holds structure, and tastes like actual eggnog—not pudding mix. A cold crust + warm custard combination also prevents sogginess and keeps the texture clean at the edges when slicing.
Ingredients With Weights & Purpose
For the Crust
- Graham cracker crumbs — 180g (1 ½ cups) — base structure; lightly sweet.
- Unsalted butter — 85g (6 tbsp), melted — binds crumbs, adds richness.
- Granulated sugar — 25g (2 tbsp) — helps crust crisp slightly.
For the Filling
- Eggnog — 360g (1 ½ cups) — the star flavor; full-fat preferred for best body.
- Heavy cream — 240g (1 cup) — for stabilizing whipped cream.
- Egg yolks — 2 (36–40g) — custard thickening + richness.
- Cream cheese — 170g (6 oz), softened — adds tang and improves slice stability.
- Cornstarch — 18g (2 tbsp) — primary thickener.
- Granulated sugar — 75g (⅓ cup) — sweetness + helps yolks emulsify.
- Nutmeg — 1g (¼ tsp) — classic eggnog warmth.
- Vanilla extract — 5g (1 tsp) — rounds out flavor.
- Powdered sugar — 20g (2 tbsp) — stabilizes whipped cream.
Equipment
Required: 9-inch (23 cm) pie pan, whisk, silicone spatula, saucepan, large bowl, hand mixer or electric whisk, kitchen scale, fine sieve, instant-read thermometer.
Nice-to-have: Offset spatula, food processor (for crust), pie weight or chilled flat pan for pressing crust evenly.
Step-by-Step Instructions With Timing & Visual Cues
Step 1: Prepare the Crust (10 minutes total)
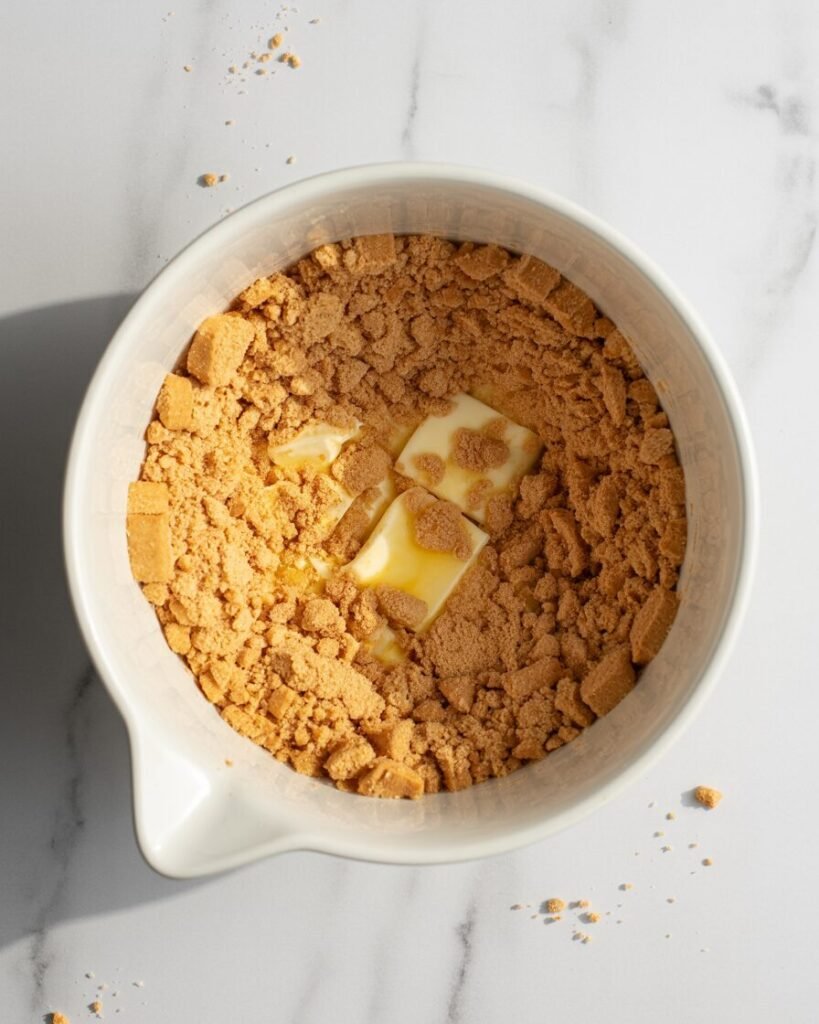
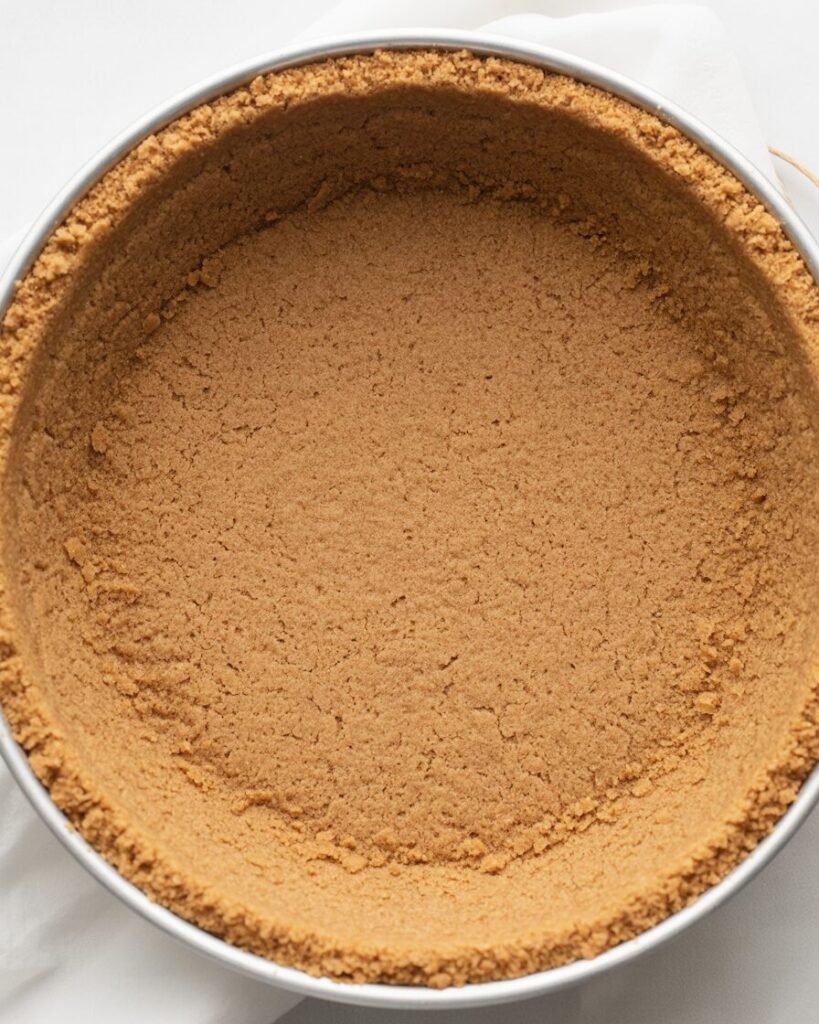
- Mix graham crumbs, melted butter, and sugar until evenly moistened.
Visual cue: The mixture should clump when squeezed but not drip butter. - Press firmly into the pie pan, pushing up the sides.
- Chill 20 minutes to set.
Pro tip: The crust should feel firm and cool before filling; a warm crust will absorb moisture.
Step 2: Make the Eggnog Custard Base (8–10 minutes)
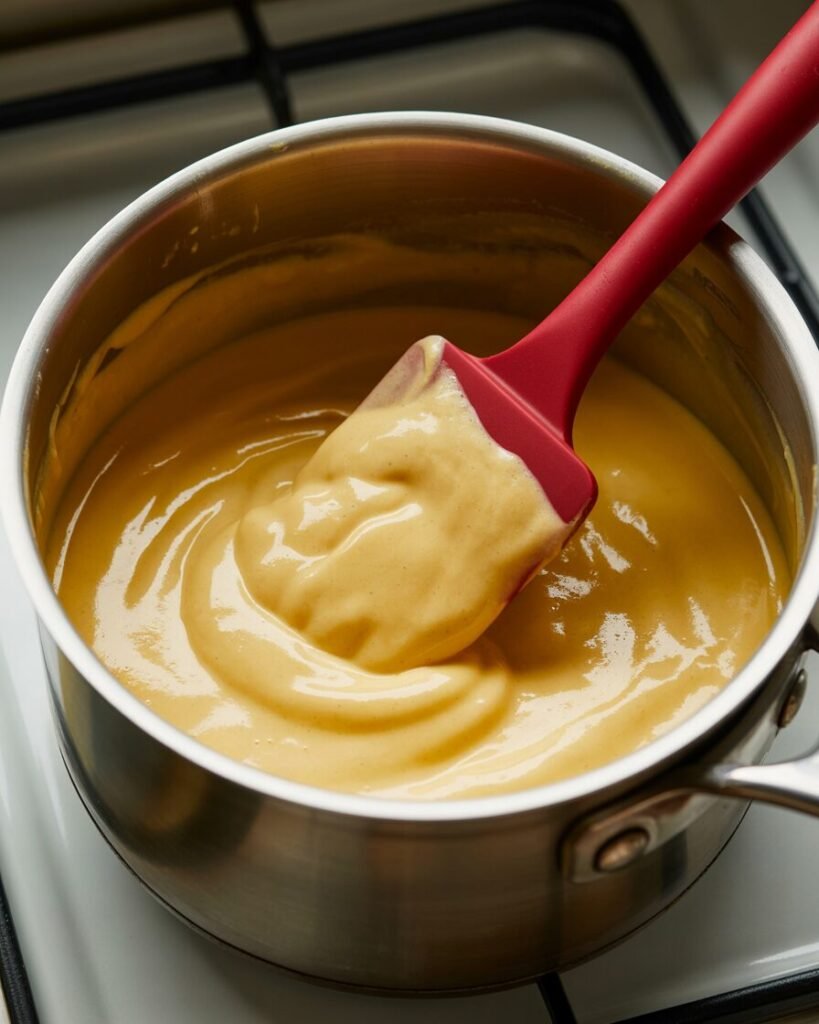
- In a saucepan, whisk eggnog, sugar, cornstarch, nutmeg, and yolks until smooth.
- Cook over medium heat, whisking constantly, until thickened.
Temperature: 95–96°C (203–205°F).
Visual cue: Mixture should coat a spoon and leave a visible line when you run your finger across it. - Remove from heat and push through a fine sieve into a bowl.
- Whisk in softened cream cheese and vanilla until perfectly smooth.
Visual cue: No visible lumps, glossy surface.
Let cool 10 minutes (warm, not hot).
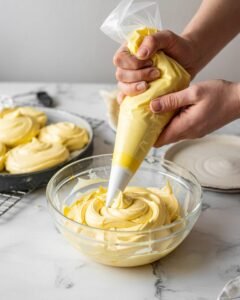
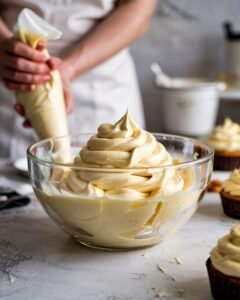
Step 3: Whip and Fold (5 minutes)

- Whip heavy cream + powdered sugar to medium peaks.
Visual cue: Peaks stand but curl at the tip—no stiff, dry texture. - Fold one-third into the warm custard to lighten it.
- Fold in the rest gently.
Avoid this: Over-folding will deflate the cream and give you a dense pie.
Step 4: Assemble and Chill (at least 4 hours)
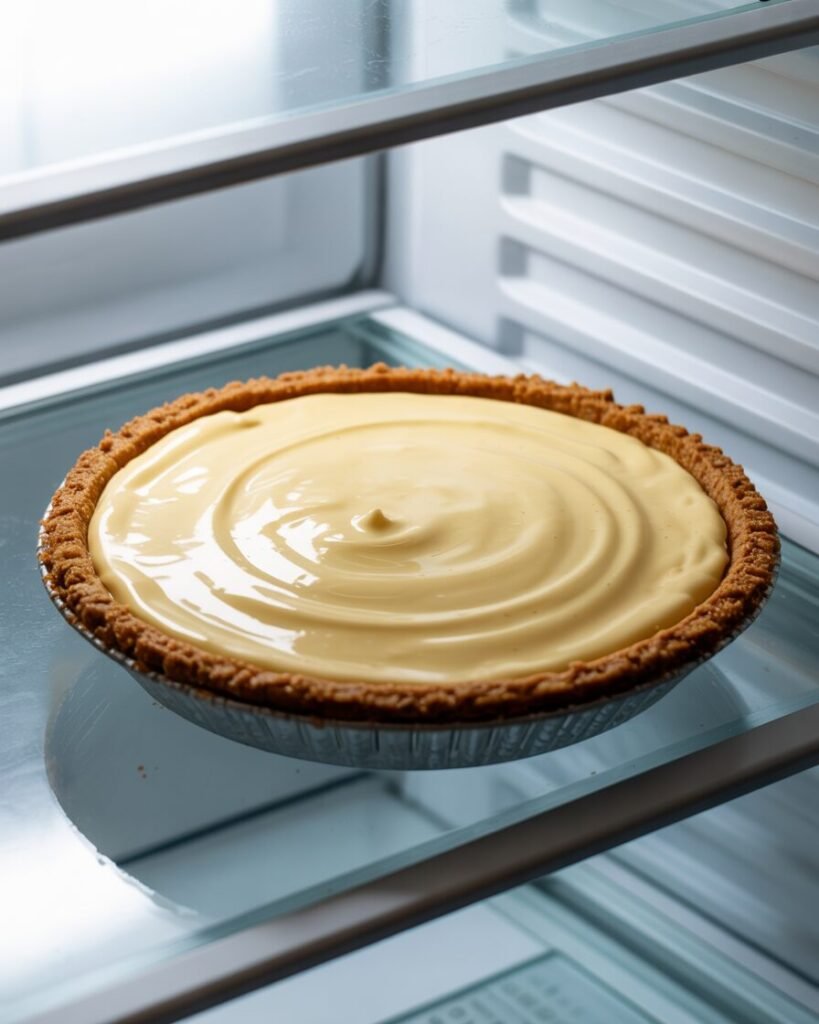
- Pour filling into the chilled crust.
- Smooth the top.
- Refrigerate 4–6 hours until fully set.
Visual cue when set: The center jiggles slightly but does not ripple.
Troubleshooting: Fixes for Common Issues
Problem: Pie doesn’t set.
- Causes: Under-cooked custard, too little cornstarch, under-whipped cream.
- Fix: Cook custard to 95–96°C; ensure medium peaks; chill at least 4 hours.
Problem: Filling separates or becomes grainy.
- Causes: Cream cheese added to hot custard, overcooked yolks.
- Fix: Cool custard 10 minutes; whisk constantly during cooking.
Problem: Crust turns soggy.
- Causes: Warm filling in warm crust.
- Fix: Always chill crust fully; let custard cool slightly.
Problem: Pie tastes too sweet.
- Cause: Sweetened store-bought eggnog varies.
- Fix: Reduce sugar in custard to 50g next time.
Problem: Pie cracks after chilling.
- Cause: Over-thickened custard.
- Fix: Reduce cornstarch by 3–4g.
Substitutions & Variations
Egg-Free Version
Replace yolks with an additional 10g (1 tbsp) cornstarch + 40g extra eggnog.
Note: Texture becomes slightly less rich but still sliceable.
Dairy-Free Version
Use:
- Dairy-free eggnog (almond or oat), 360g
- Coconut cream (not milk), 200g whipped
- Dairy-free cream cheese, 170g
Caution: Coconut flavor will be noticeable.
Gluten-Free Crust
Use GF graham crumbs 1:1. Add 10g extra butter because GF crumbs are drier.
Flavor Variations
- Gingerbread Eggnog Pie: Add 1 tsp gingerbread spice to custard.
- Bourbon Eggnog Pie: Add 1 tbsp bourbon after removing custard from heat.
- Chocolate Eggnog Pie: Add 60g melted white chocolate to warm custard.
Scaling
For mini pies (12):
- Use ⅔ crust amount.
- Filling stays the same; fill 12 mini shells.
Storage, Make-Ahead & Freezing
- Fridge: Keeps 3–4 days in a covered container.
- Freezer: Freeze slices on a tray first, then wrap tightly. Lasts 1 month.
To thaw: Refrigerate 4–6 hours. - Do not freeze: Whipped cream topping (if added on top). It separates after thawing.
Serving Suggestions
- Freshly grated nutmeg
- Lightly sweetened whipped cream
- Cinnamon caramel drizzle
- Crushed gingersnaps for extra crunch
Pair with hot coffee, chai, or mulled cider to balance sweetness.
FAQs
1. Can I use low-fat eggnog?
Yes, but increase cornstarch to 22g (2½ tbsp). Low-fat versions thicken less efficiently.
2. How do I prevent a lumpy custard?
Whisk constantly and strain while hot. Lumps usually come from rushed heating.
3. Can I make this in an OTG?
Yes—no baking required. Just chill.
4. Can I reduce the sugar?
Yes, by up to 25% without affecting structure.
5. How do I double the recipe?
Use a 9×13 inch (23×33 cm) pan and increase everything by 2×. Chill 6–8 hours.
Notes From My Kitchen (Testing Log)
Batch 1: Custard too loose—cooked only to 90°C. Upped the temperature and tested again.
Batch 2: Cream cheese added too early caused graininess. Solution: cool custard 10 minutes.
Batch 3: Tried unsweetened eggnog. Needed +10g sugar for balance.
Final Batch: Combination of warm custard + stabilized whipped cream gave the cleanest slice and best texture. This is the version published.
Nutrition (Estimate)
Per slice (1/8 pie): approx. 320 calories.
Values vary by brand; follow standard food-safety guidelines.
Final Thoughts
This Eggnog Pie brings all the flavor of holiday eggnog into a creamy, no-bake dessert that even beginners can master with the right cues. The combination of stovetop custard and stabilized whipped cream gives structure without heaviness, and the graham crust adds the perfect sweet crunch. Whether you’re bringing this to a holiday party or making it for a cozy night in, it’s easy, reliable, and always crowd-pleasing.