Let’s talk about that moment when you open the freezer, craving something cold and creamy… and realize you don’t own an ice cream maker. Good news: you don’t need one.
This No-Churn Caramel Ice Cream is built for real home kitchens — no fancy equipment, no tempering eggs, no complicated custard base. Just five core ingredients and a saucepan. What makes this version different is the deep, homemade caramel layer folded into a light whipped cream base, giving you ribbons of buttery sweetness with a slight toasted edge — not just sugary, but balanced.
You’ll end up with a smooth, scoopable ice cream that holds its shape, melts slowly, and tastes like something from a small artisan scoop shop.
Pro tip: Stop cooking the caramel at a medium amber color — that’s where you get bold flavor without bitterness.
Why This Recipe Works (Ice Cream Science in Simple Terms)
No-churn ice cream relies on two key ideas: fat for creaminess and sugar for softness.
- Sweetened condensed milk contains sugar and milk solids. Sugar lowers the freezing point, which keeps the ice cream scoopable instead of icy.
- Whipped cream (35% fat minimum) traps air. That air mimics the churned texture you’d get from a machine.
- Caramelization changes sugar’s structure. Heating sugar to 170–175°C (338–347°F) creates complex flavor compounds and slight bitterness that balances the sweetness.
Did you know? Over-whipping cream makes fat clump, leading to a greasy mouthfeel once frozen. Soft-to-medium peaks are perfect.
Ingredients (Exact Weights + Purpose)
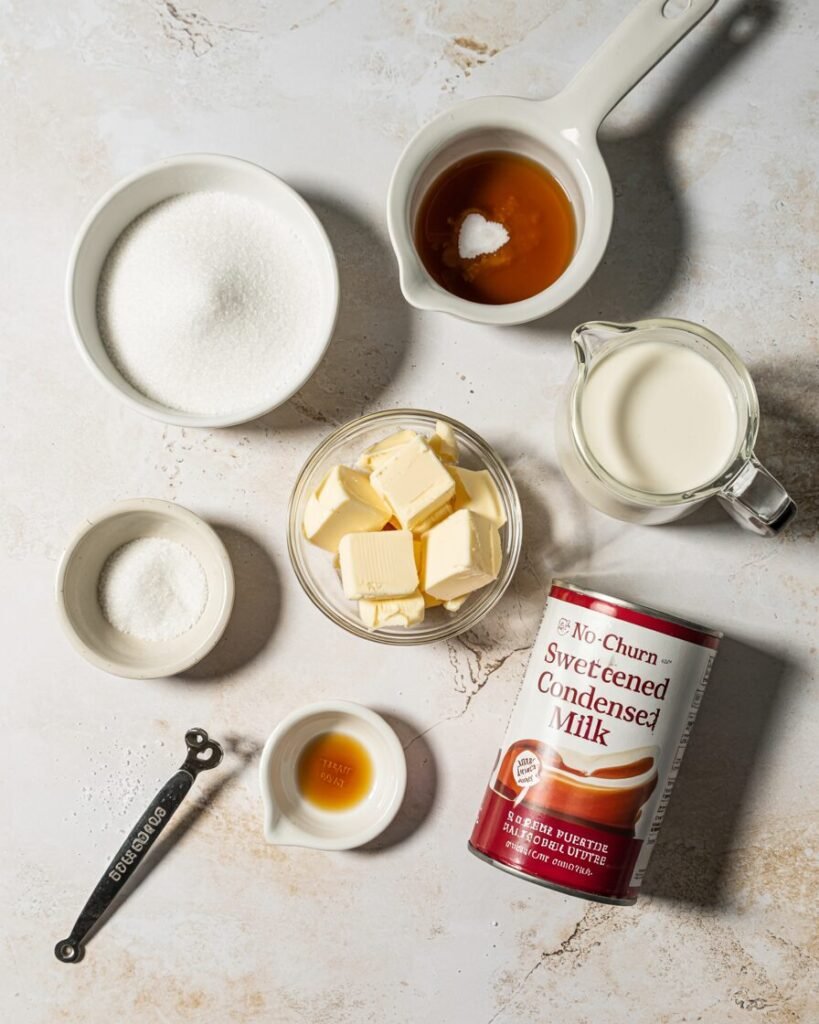
- Granulated sugar — 150 g (¾ cup) — for caramel base
- Heavy cream (35% fat) — 480 g (2 cups total) — divided: 120 g for caramel, 360 g for whipping
- Sweetened condensed milk — 397 g (1 standard can / 1⅓ cups) — sweetness + smooth texture
- Unsalted butter — 20 g (1½ tbsp) — richness in caramel
- Fine sea salt — 2 g (¼ tsp) — enhances caramel flavor
- Vanilla extract — 5 g (1 tsp) — rounds flavor
Ingredient note: Use full-fat condensed milk. Low-fat versions produce icier texture.
Equipment
Required
- Heavy-bottom saucepan (2–3 L)
- Heatproof spatula
- Electric hand mixer or sturdy whisk
- 1 L (8×4-inch) loaf pan
- Parchment paper
- Kitchen scale (recommended)
- Freezer (–18°C / 0°F)
Nice-to-have
- Instant thermometer
- Offset spatula
Step-by-Step Instructions
[Process photo: sugar melting in pan]
Step 1: Make the Dry Caramel (8–10 minutes)
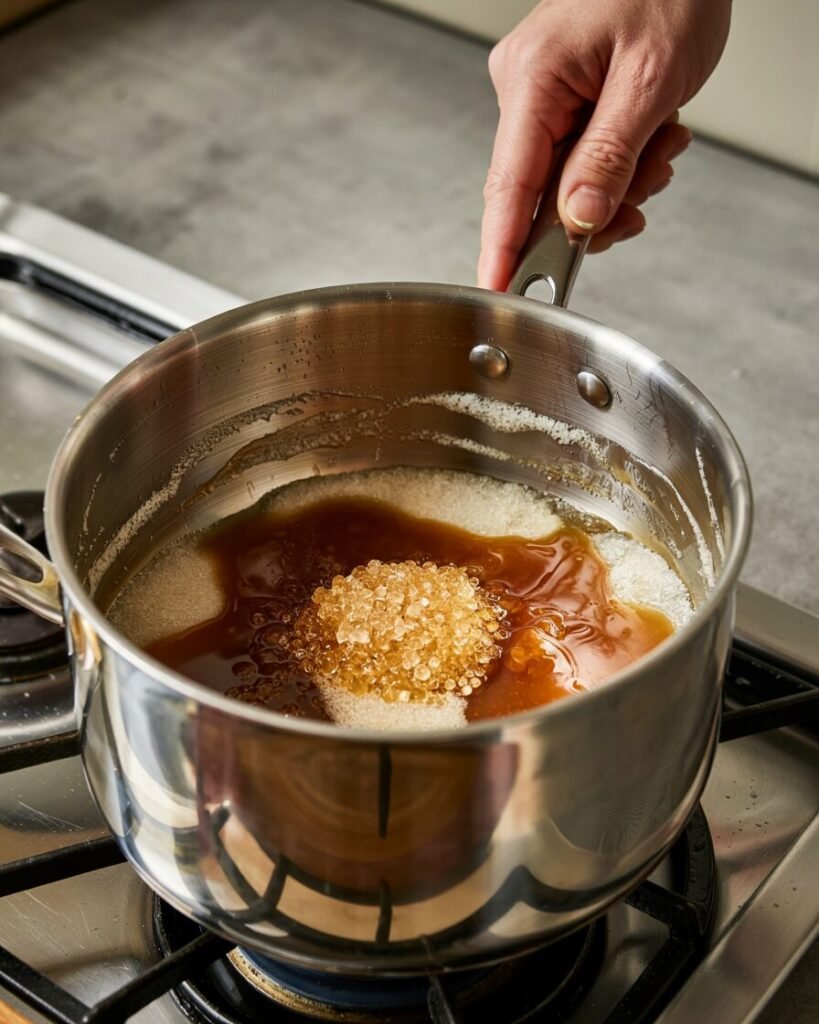
Place 150 g sugar in a dry saucepan over medium heat. Do not stir initially.
Visual cue: Sugar melts at edges first, turning clear, then pale gold. Swirl pan gently once 50% melted.
When fully liquid and amber (170–175°C / 338–347°F), remove from heat.
Avoid this: If it smells sharply burnt or looks very dark brown, it’s too far — start over.
Step 2: Add Cream and Butter (2 minutes)
Warm 120 g cream slightly (microwave 20–30 seconds). Slowly pour into caramel while stirring.
It will bubble aggressively — that’s normal.
Add butter and salt. Stir until smooth. If lumpy, return to low heat 30–60 seconds.
Cool to lukewarm (about 35–40°C / 95–104°F).
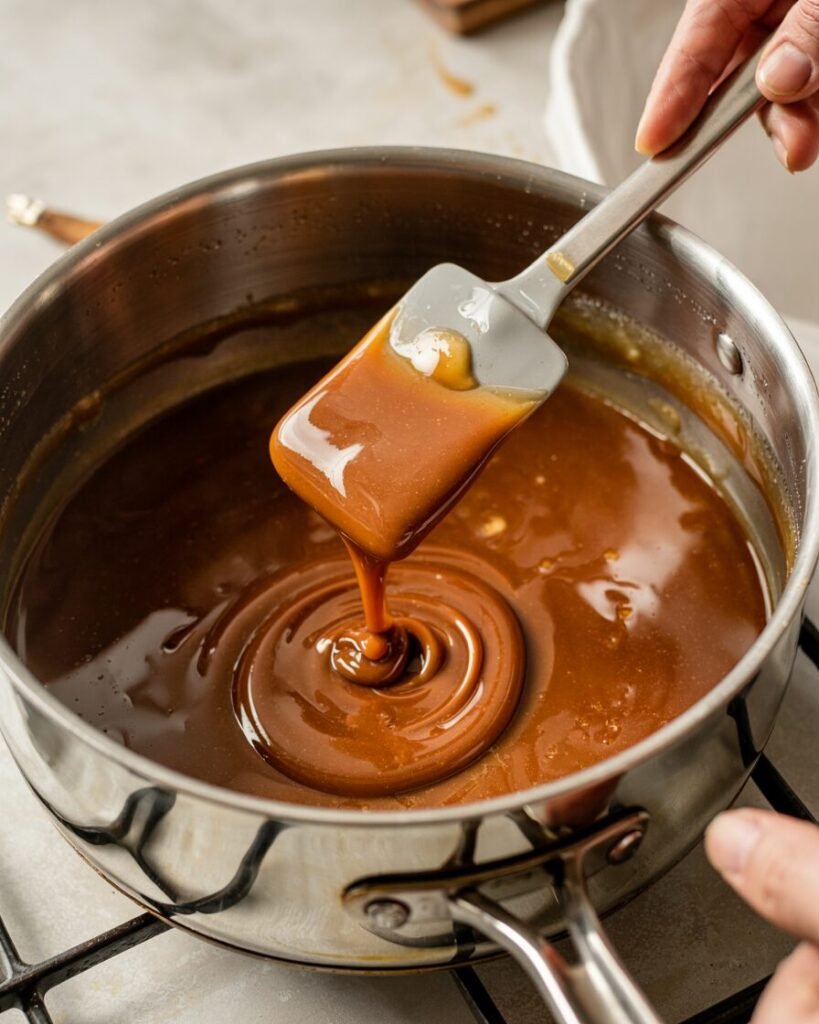
Visual cue: Sauce should flow like maple syrup, not thick like fudge.
[Process photo: caramel sauce consistency]
Step 3: Whip the Cream (3–4 minutes)
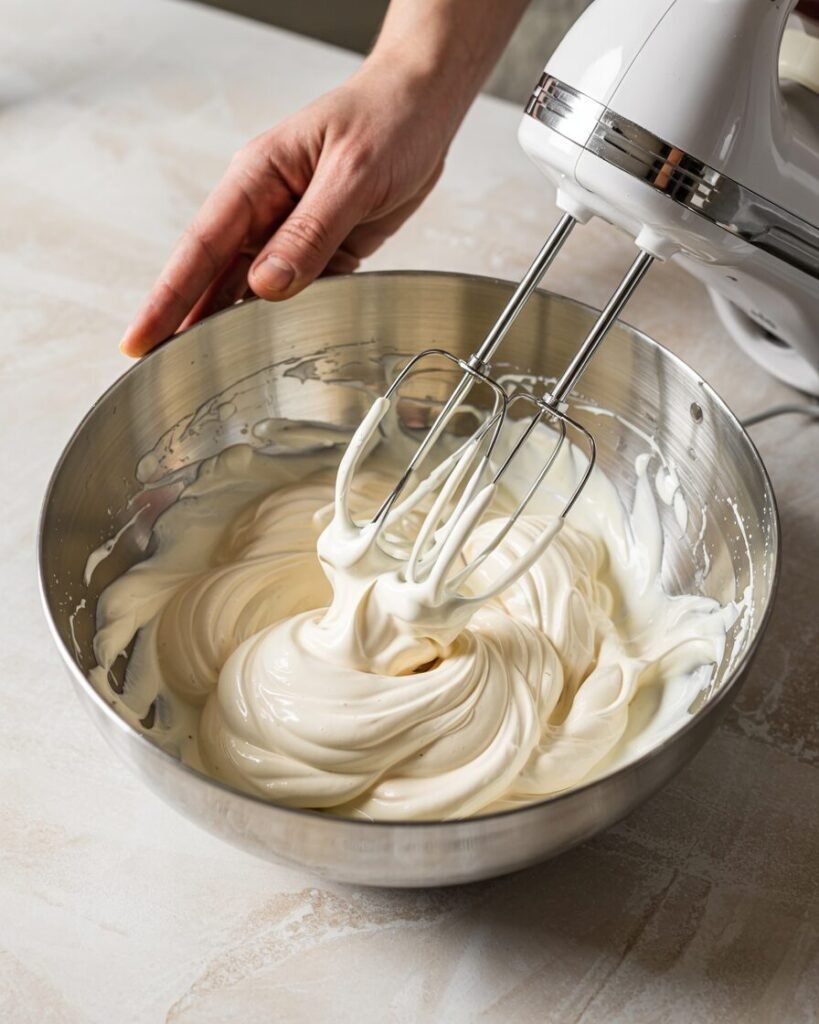
In a chilled bowl, whip 360 g cold cream to soft-medium peaks.
Checkpoint: Lift whisk — peaks should curl slightly at the tip (like a hook), not stand stiff.
Step 4: Fold the Base (2–3 minutes)
In another bowl, combine condensed milk and vanilla.
Fold whipped cream into condensed milk in 2 additions.
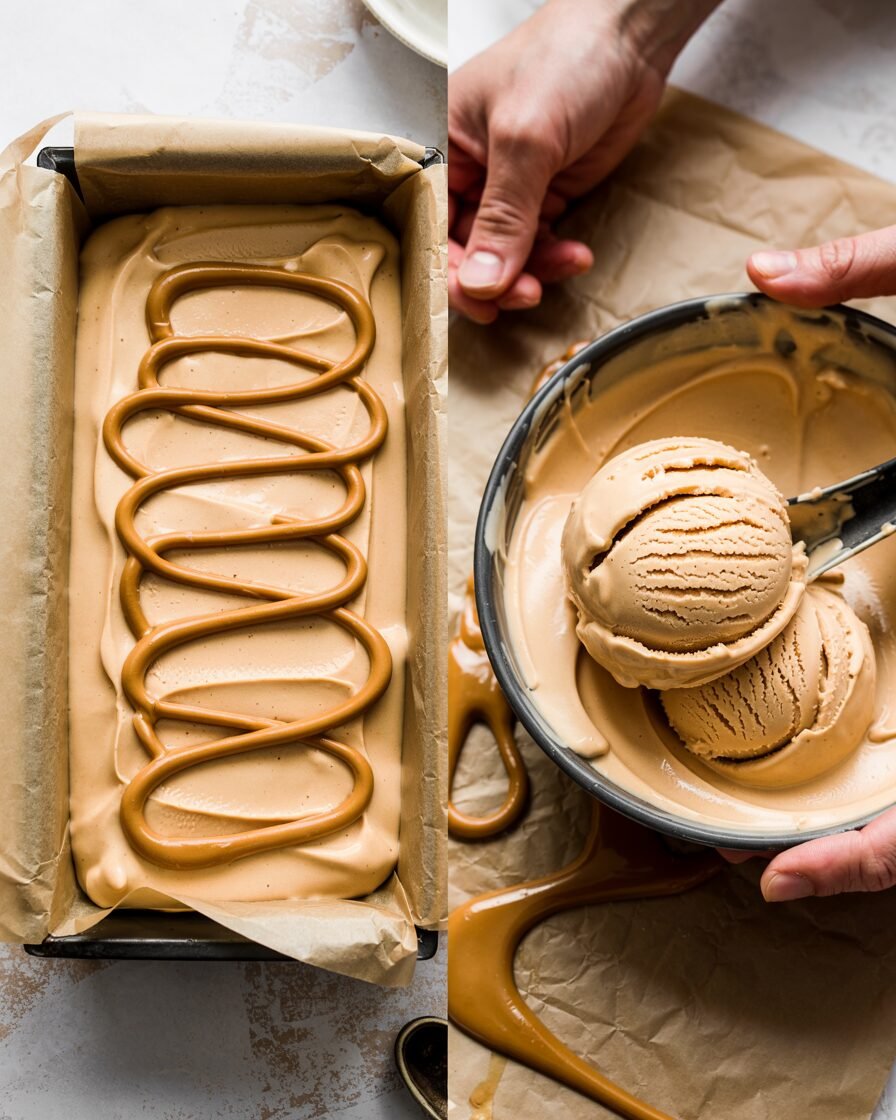
Then fold in ¾ of cooled caramel. Swirl remaining caramel on top.
Visual cue: Mixture should look airy and mousse-like. If runny, cream was under-whipped. If dense and greasy, it was over-whipped.
[Process photo: folding stage texture]
Step 5: Freeze (6–8 hours)

Line loaf pan with parchment. Spread mixture evenly. Cover tightly.
Freeze at –18°C / 0°F for at least 6 hours.
Best texture: 8 hours minimum, overnight ideal.
Before scooping, rest at room temp 5–8 minutes.
[Process photo: frozen texture close-up]
Troubleshooting (Real Fixes)
Problem: Ice cream too hard
Likely cause: Not enough sugar or freezer too cold.
Fix: Add 1–2 tbsp glucose syrup next time.
Problem: Icy texture
Cause: Low-fat cream or excess water.
Fix: Use 35% cream only.
Problem: Caramel hardened in streaks
Cause: Too cool before folding.
Fix: Fold at lukewarm stage.
Problem: Greasy mouthfeel
Cause: Over-whipped cream.
Fix: Stop at soft peaks.
Problem: Bitter taste
Cause: Overcooked caramel.
Fix: Remove at medium amber, not dark brown.
Problem: Mixture deflated
Cause: Caramel too hot.
Fix: Cool properly before folding.
Substitutions & Variations
Dairy-Free
- Use 400 g coconut condensed milk
- Replace cream with 400 g coconut cream (chilled overnight)
Texture slightly firmer but creamy.
Egg-Free
Naturally egg-free — no changes needed.
Salted Caramel
Increase salt to 4 g (½ tsp).
Coffee Caramel
Add 5 g instant espresso powder to caramel.
Scaling Guide
| Pan Size | Ingredient Multiplier |
|---|---|
| 6-inch round (1 qt) | 1x recipe |
| 8-inch round (2 qt) | 1.5x recipe |
| 12 cupcakes molds | 1x recipe |
For doubling: Use 300 g sugar, 960 g cream total, 2 cans condensed milk.
Storage & Make-Ahead
Freezer: Up to 2 months, tightly wrapped.
Best quality: Within 3 weeks.
Do not refreeze after full melting — texture becomes icy.
To refresh slightly icy texture: Let soften, re-whip lightly, refreeze quickly.
Serving Suggestions
- Warm brownie pairing (sweet + bitter contrast)
- Drizzle with extra salted caramel
- Serve with toasted pecans
- Sandwich between cookies
Caramel loves salt and crunch — balance is key.
FAQs
Can I use store-bought caramel?
Yes, use 200 g thick caramel sauce. Reduce sugar slightly for balance.
Can I halve the recipe?
Yes. Use a smaller container; freeze time reduces to 4–5 hours.
Can I make this without an electric mixer?
Yes, whisk vigorously in a chilled bowl (5–7 minutes).
Best sugar type?
White granulated works best. Brown sugar burns faster and alters texture.
Can I use an OTG?
No baking required — just freezer needed.
Notes From My Kitchen (Testing Log)
Batch 1: Used brown sugar. Result: muddy flavor, too soft.
Batch 2: Over-whipped cream. Texture slightly buttery when frozen.
Batch 3: Added caramel while hot — mixture deflated.
Batch 4: Used low-fat cream — icy finish.
Batch 5 (Final): Medium amber caramel, soft peaks, folded at 38°C — perfect balance: creamy, scoopable, deep caramel tone without bitterness.
I tested three caramel shades and two cream fat percentages. Medium amber gave best flavor depth without harshness.
Nutrition (Approximate)
Per ½ cup serving (based on 10 servings):
~320 kcal | 24 g fat | 26 g carbs | 4 g protein
Values are estimates; adjust for brands and portion size. Store below –18°C (0°F) and follow safe dairy handling practices.
Conclusion: Why You’ll Love This Recipe
This No-Churn Caramel Ice Cream proves you don’t need special equipment for bakery-style results. With just five core ingredients and careful caramel timing, you get a rich, scoopable dessert that tastes far more complex than it is to make.
The key takeaway? Control the caramel color and don’t over-whip the cream. That’s it.