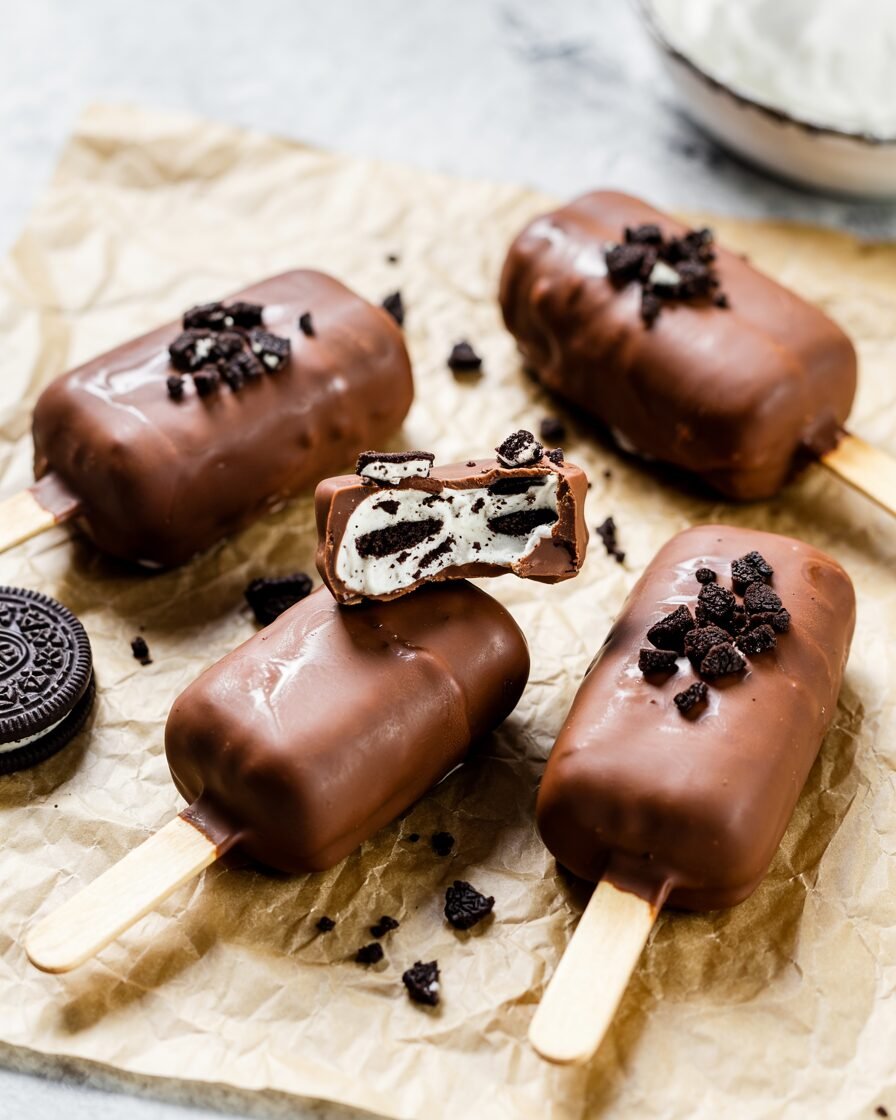
If you love cookies-and-cream desserts but want something ridiculously easy and freezer-friendly, these Oreo Ice Cream Pops will become a go-to treat. They’re creamy, crunchy, and perfectly sweet, with chunks of Oreo cookies in every bite.
Unlike complicated homemade ice cream recipes, this version requires no ice cream machine, no eggs, and no baking. You simply mix, mold, freeze, and enjoy.
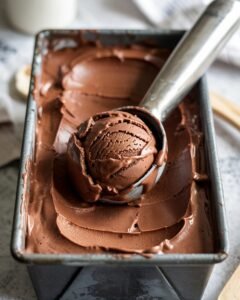
The result? Smooth, creamy pops with a soft cookies-and-cream texture and a chocolate shell crunch if you add the optional coating.
Pro Tip: Crush the Oreos into two different sizes—fine crumbs and chunky pieces. The crumbs flavor the cream base while the chunks give those classic cookies-and-cream bites.
These pops are ideal for beginner home bakers with minimal equipment—just a bowl, whisk, and freezer molds.
Why This Recipe Works
Great frozen desserts rely on balancing fat, sugar, and air to prevent icy textures. This recipe keeps things simple but uses a few smart tricks.
1. Heavy Cream Creates a Creamy Texture
Heavy cream (around 35–40% fat) freezes smoothly because fat prevents large ice crystals from forming. That’s why the pops stay creamy instead of icy.
2. Sweetened Condensed Milk Adds Stability
Condensed milk acts as both sweetener and stabilizer. Because it already contains dissolved sugar and milk solids, it lowers the freezing point slightly and keeps the texture scoopable even when frozen solid.
3. Cookie Crumbs Absorb Moisture
Finely crushed Oreos absorb some moisture from the cream mixture, which slightly thickens the base. This helps keep cookie chunks suspended rather than sinking to the bottom of the molds.
Did you know? Sugar molecules bind with water, preventing it from forming large ice crystals—one of the main reasons ice cream tastes creamy instead of crunchy.
Ingredients
- Oreo cookies — 200 g (about 20 cookies) — 2 cups crushed — cookies-and-cream flavor and texture
- Heavy whipping cream — 480 g (2 cups) — whipped base for creamy structure
- Sweetened condensed milk — 395 g (1 can / 1 ¼ cups) — sweetness and smooth texture
- Vanilla extract — 5 g (1 tsp) — enhances cookie flavor
- Salt — 1 g (⅛ tsp) — balances sweetness
Optional chocolate coating
- Dark or semi-sweet chocolate — 200 g (1 cup chopped) — crisp shell
- Neutral oil (coconut or vegetable) — 15 g (1 tbsp) — thins chocolate for dipping
Yield: 8–10 ice cream pops depending on mold size
Equipment
Required
- Mixing bowl
- Whisk or hand mixer
- Rubber spatula
- Ice cream popsicle mold (8–10 cavity)
- Freezer
- Kitchen scale (recommended)
Nice-to-Have
- Cookie scoop
- Silicone spatula
- Thermometer (if tempering chocolate)
Step-by-Step Instructions
Step 1: Prepare the Oreo mixture (5 minutes)
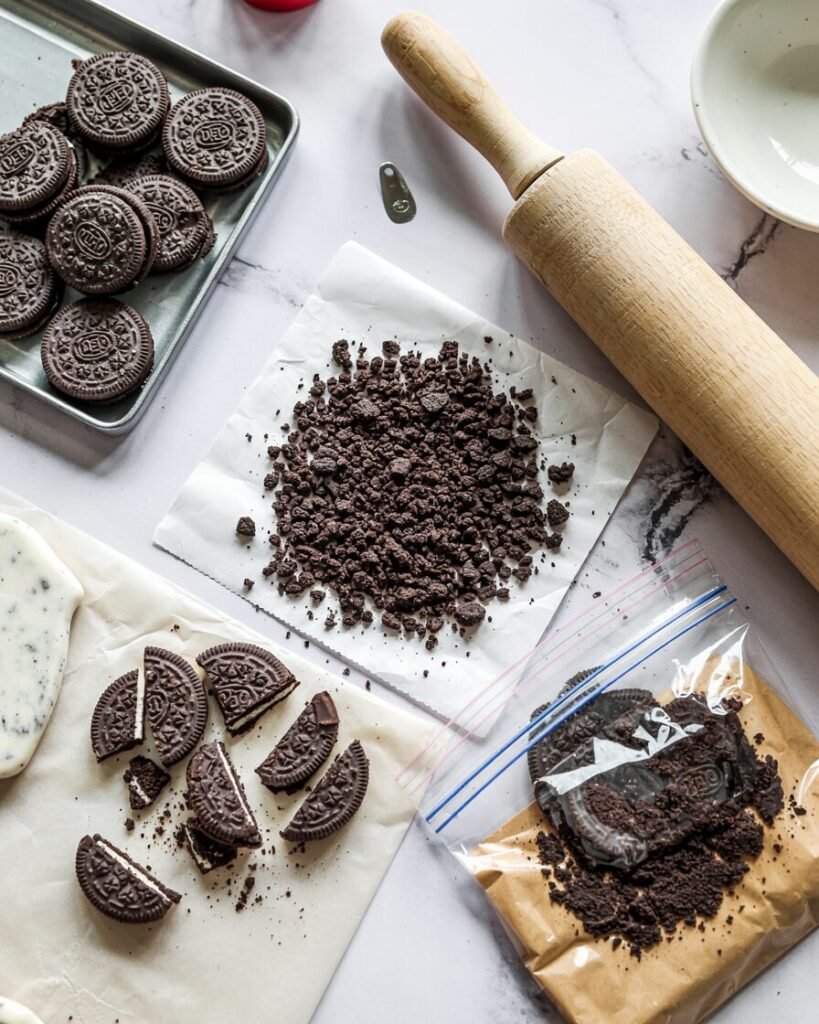
Place Oreo cookies in a zip bag and crush them.
Goal texture:
- Half should be fine crumbs like sand
- Half should be pea-size chunks
Visual cue: If everything looks powdery, you crushed too much. You want visible cookie pieces.
Step 2: Whip the cream (3–4 minutes)
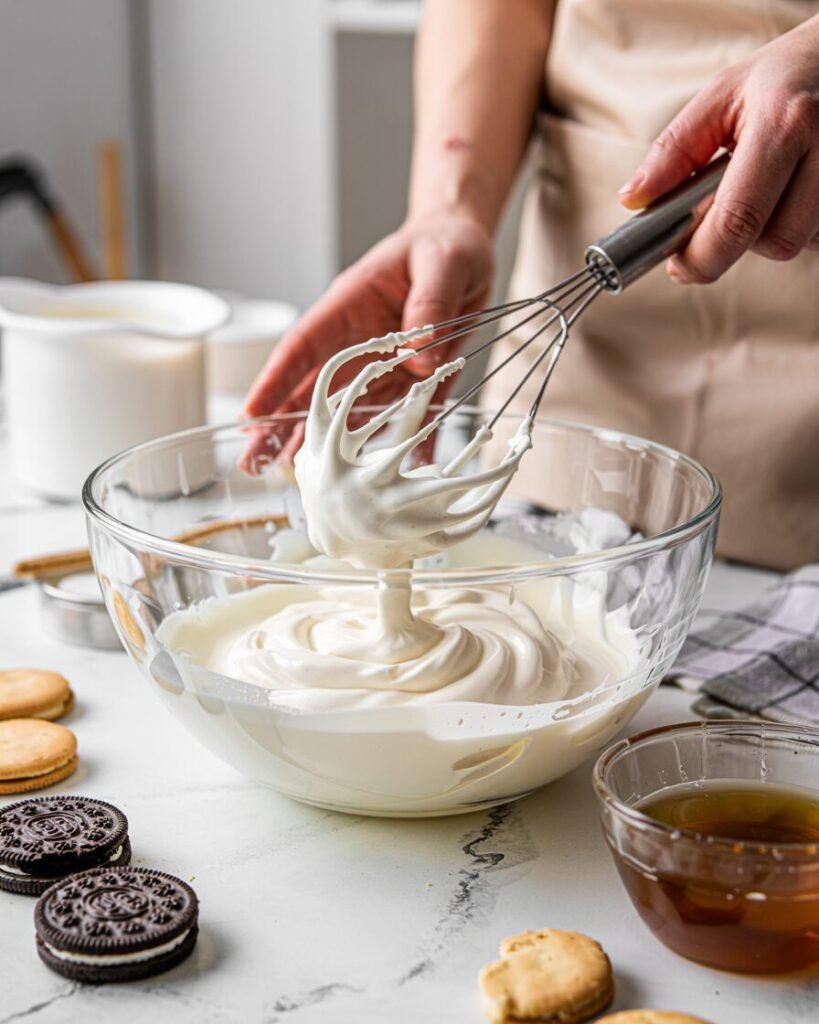
In a chilled bowl, whip the heavy cream until medium peaks form.
Mixer speed: medium-high
Time: 3–4 minutes
Visual cue: When you lift the whisk, the peak should bend slightly like a soft hook but still hold shape.
Avoid this:
If the cream looks grainy or buttery, it’s overwhipped.
Step 3: Add condensed milk and flavor (1 minute)
In another bowl, mix:
- Sweetened condensed milk
- Vanilla extract
- Salt
Whisk until smooth.
Slowly fold this mixture into the whipped cream using a spatula.
Visual cue: The mixture should look thick, glossy, and fluffy, not runny.
Step 4: Fold in Oreos (1 minute)
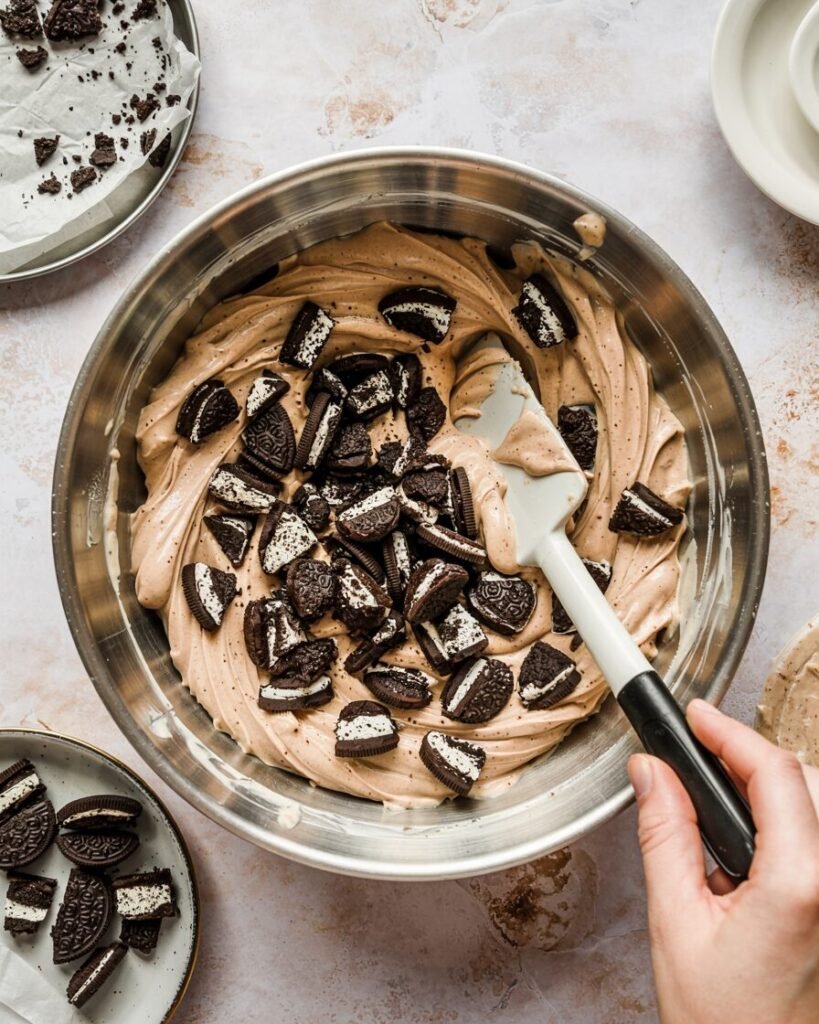
Add the crushed Oreos and gently fold them into the cream mixture.
Visual cue: Cookie pieces should be evenly distributed, with no heavy pockets at the bottom.
Step 5: Fill the molds (3 minutes)
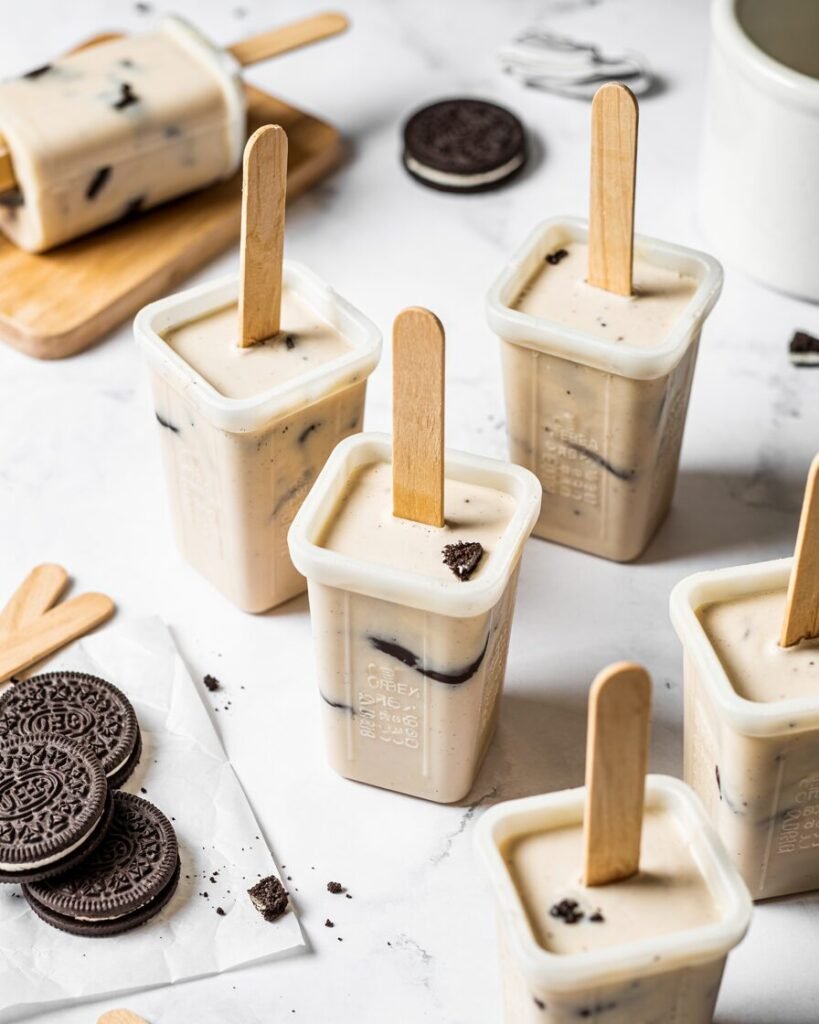
Spoon the mixture into popsicle molds.
Tap the molds lightly on the counter to remove air bubbles.
Insert popsicle sticks.
Fill each cavity leaving 3–5 mm space at the top to allow expansion during freezing.
Step 6: Freeze (6–8 hours)
Place molds in the freezer until fully solid.
Freezer temperature: −18°C (0°F)
Minimum freeze time: 6 hours
Doneness test:
Insert a knife gently. If it slides out clean and the pop feels solid, it’s ready.
Step 7: Optional chocolate coating (5 minutes)

Melt chocolate and oil together in a microwave or double boiler.
Temperature: about 32°C / 90°F for dipping.
Remove pops from molds and dip into melted chocolate.
Place on parchment paper.
Visual cue: Chocolate should harden within 20–30 seconds.
Troubleshooting Common Problems
Pops are icy
Likely causes:
- Low-fat cream
- Too much freezer time before mixing
Fix: Use cream with at least 35% fat.
Cookies sink to the bottom
Likely causes:
- Base mixture too thin
- Cream under-whipped
Fix: Whip cream to medium peaks before folding.
Pops stick to mold
Likely causes:
- Mold too cold
- No release step
Fix: Run warm water over mold for 5–10 seconds.
Pops taste overly sweet
Likely causes:
- Extra condensed milk
- Using double-stuff Oreos
Fix: Add a small pinch of salt or use dark chocolate coating.
Pops break when removing
Likely causes:
- Not fully frozen
- Mold pulled too hard
Fix: Freeze at least 6–8 hours.
Substitutions and Variations
Egg-Free
This recipe is naturally egg-free.
Dairy-Free Version
Replace:
- Heavy cream → coconut cream (full-fat)
- Condensed milk → sweetened coconut condensed milk
Flavor will have a mild coconut note.
Gluten-Free
Use gluten-free chocolate sandwich cookies instead of Oreos.
Flavor Variations
Peanut Butter Oreo Pops
Add 40 g (2 tbsp) peanut butter to the base.
Mint Cookies & Cream
Add ½ tsp peppermint extract.
Birthday Cake Pops
Add 2 tbsp rainbow sprinkles.
Scaling the Recipe
| Yield | Heavy Cream | Condensed Milk | Oreos |
|---|---|---|---|
| 6 pops | 300 g | 250 g | 120 g |
| 10 pops | 480 g | 395 g | 200 g |
| 16 pops | 750 g | 600 g | 320 g |
Storage, Make-Ahead, and Freezing
Freezer:
Store pops in an airtight container for up to 2 months.
Best texture window:
Within 3–4 weeks.
Prevent freezer burn:
Wrap each pop in parchment or plastic wrap.
Do not thaw completely before serving—this can cause melting and refreezing ice crystals.
Serving Suggestions
Serve these Oreo ice cream pops with:
- Warm chocolate fudge sauce
- Crushed Oreos sprinkled on top
- Caramel drizzle
- A dusting of cocoa powder
For parties, place pops in a bowl filled with crushed ice to keep them cold.
FAQs
Can I make these without popsicle molds?
Yes. Use small paper cups and insert wooden sticks once partially frozen.
Can I replace Oreos with another cookie?
Absolutely. Chocolate wafers, digestive biscuits, or sandwich cookies work well.
How do I prevent ice crystals?
Whip the cream properly and ensure the freezer temperature stays at −18°C (0°F).
Can I double the recipe?
Yes. Simply double all ingredients and use additional molds.
Can I make these in an air fryer?
No—air fryers cannot freeze. These require a freezer.
Notes From My Kitchen (Testing Log)
Batch 1:
Used only crushed Oreo crumbs. Result: smooth flavor but missing crunchy cookie texture.
Batch 2:
Added larger cookie chunks. Texture improved significantly.
Batch 3:
Tested with lower-fat cream (30%). Pops became icy after freezing.
Batch 4:
Whipped cream slightly longer. Result: cookies stayed evenly distributed.
Batch 5:
Tried chocolate coating without oil. Chocolate layer was too thick and cracked.
Final Version:
Added 1 tbsp oil to melted chocolate. Coating became thin and crisp with perfect snap.
Nutrition and Disclaimer
Approximate per serving (1 pop):
- Calories: ~210
- Fat: 12 g
- Carbohydrates: 23 g
- Protein: 3 g
Values are estimates and vary depending on brands and portion size. Always follow safe food-handling practices and keep frozen desserts properly stored.
Conclusion
These Oreo Ice Cream Pops prove that homemade frozen treats don’t need complicated equipment or techniques. With just a few ingredients and a simple mixing method, you can create a creamy cookies-and-cream dessert that rivals store-bought ice cream bars.
The combination of whipped cream, condensed milk, and crushed Oreos produces a texture that’s smooth, rich, and packed with cookie flavor.