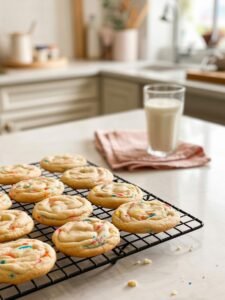
As a working mother of two energetic children, aged 8 and 12, and a food blogger with four years of sharing family recipes, I often find myself navigating hectic evenings. Last Tuesday exemplified this perfectly. After a demanding day filled with professional obligations, helping with homework, and preparing a makeshift dinner from pantry staples, it was already 9 PM by the time the house settled. My children were finally asleep following their usual requests for extra bedtime stories, and I realized I had committed to providing treats for the next day’s school bake sale. Rather than succumbing to stress, I turned to my kitchen, still cluttered from dinner, and prepared a batch of peanut butter chocolate chip cookies. With a favorite show playing softly in the background, the inviting aroma soon transformed my fatigue into a sense of warmth and accomplishment. By 10:30 PM, the cookies were cooling, and enjoying one fresh from the oven provided a moment of well-deserved indulgence. This recipe has become my go-to for such occasions, offering simplicity and satisfaction when time is limited.

Origins and Adaptations: How This Recipe Evolved
My journey with this recipe began approximately three years ago, during the early days of my blogging adventure. Frustrated with repetitive weeknight meals, I sought inspiration online late one evening and discovered a straightforward peanut butter cookie formula. However, the initial version lacked the appeal needed for my family’s tastes. I began refining it by incorporating chocolate chips to enhance flavor and texture, reducing the sugar content to prevent energy spikes in my children, and increasing the vanilla extract for a more comforting essence. For an elevated touch, I occasionally add a sprinkle of sea salt. These adjustments stem from practical experimentation in my home kitchen, transforming a basic idea into a reliable favorite that aligns with the demands of everyday family life.
Learning from Errors: Common Mistakes and Solutions
In my repeated preparations of this recipe, I’ve encountered several setbacks that have informed my approach. On my first attempt, I neglected to soften the butter adequately, resulting in a dough that was difficult to mix and cookies that crumbled easily upon baking. This experience underscored the importance of allowing the butter to reach room temperature for at least 30 minutes or using brief microwave intervals if time is short. Another instance involved overbaking due to a distraction, yielding overly firm results; I now rely on multiple timers to ensure precision. Additionally, substituting salted butter once led to an imbalance in flavor, prompting me to omit added salt in such cases. These lessons have refined my technique, emphasizing that even minor oversights can be corrected with attentiveness.
Ingredient Choices and Substitutions: Tested Recommendations
Through extensive trials, I’ve identified preferred ingredients that yield consistent results. I recommend Skippy creamy peanut butter for its smooth consistency and balanced oil content, avoiding natural varieties that separate and complicate the dough. Ghirardelli semi-sweet chocolate chips provide superior melt and richness without overpowering the peanut butter base. For substitutions, almond butter serves as an effective alternative in cases of peanut allergies, offering a comparable texture with a distinct nutty profile. To incorporate more nutrition, replacing half the all-purpose flour with whole wheat maintains tenderness while adding fiber. On particularly demanding days, I’ve successfully integrated additional peanut butter into store-bought cookie dough as a time-saving shortcut, ensuring the treats remain homemade in spirit.
Expert Tips for Success: Insights from Frequent Baking
Having prepared this recipe countless times, I’ve gathered practical advice to optimize outcomes. Chilling the dough for 15-20 minutes prevents excessive spreading during baking. Using an ice cream scoop ensures uniform portions, promoting even cooking. For ovens that tend to run hot, reduce the temperature to 350°F. Avoid overmixing after adding flour to preserve a tender crumb, and remove the cookies when the edges are just golden—the centers will firm as they cool. For storage, place them in an airtight container with a slice of bread to maintain moisture. Freezing pre-portioned dough balls allows for convenient baking on demand, with a slight extension of cooking time.
The Recipe: Step-by-Step Preparation
Ingredients (Yields Approximately 24-30 Cookies)
- 1 cup Skippy creamy peanut butter
- 1/2 cup unsalted butter, softened
- 1/2 cup granulated sugar
- 1/2 cup packed brown sugar
- 1 large egg
- 1 teaspoon pure vanilla extract
- 1 1/4 cups all-purpose flour (or a blend with whole wheat)
- 1/2 teaspoon baking soda
- 1/4 teaspoon salt
- 1 cup Ghirardelli semi-sweet chocolate chips
- Optional: Flaky sea salt for garnish or rolled oats for added texture
Instructions
- Preheat the oven to 375°F (adjust to 350°F if needed). Line baking sheets with parchment paper for easy release and cleanup.
- In a large mixing bowl, cream together the peanut butter, softened butter, granulated sugar, and brown sugar until light and fluffy, approximately 2 minutes.
- Incorporate the egg and vanilla extract, mixing until fully combined.
- In a separate bowl, whisk the flour, baking soda, and salt. Gradually add to the wet mixture, stirring just until incorporated.
- Fold in the chocolate chips (and oats, if desired). If the dough is sticky, refrigerate briefly.
- Portion tablespoon-sized scoops onto the prepared sheets, spacing evenly. Optionally, flatten slightly with a fork.
- Bake for 8-10 minutes, until edges are golden and centers remain soft. Allow to cool on the sheet for 5 minutes before transferring to a wire rack.
Family Feedback and Customizations: Personal Touches
This recipe consistently delights my family. My 8-year-old enjoys them warm, often with chocolate remnants on his face, and frequently requests extras for school lunches. My 12-year-old prefers a version with fewer chocolate chips to moderate sweetness, sometimes using mini varieties instead. My husband appreciates added crunch, such as chopped peanuts, which I incorporate when time allows. Holiday adaptations, like colorful candies, add festive appeal. While batches may occasionally vary, such as uneven spreading if chilling is overlooked, the flavor remains exceptional, embracing the realities of a busy household.
Final Thoughts: A Recipe Worth Trying
This peanut butter chocolate chip cookie recipe embodies practicality and warmth, ideal for families on the go. I encourage you to experiment and adapt it to your preferences. If you try it, I’d love to hear your results. Feel free to share your experiences. From my kitchen to yours, happy baking!
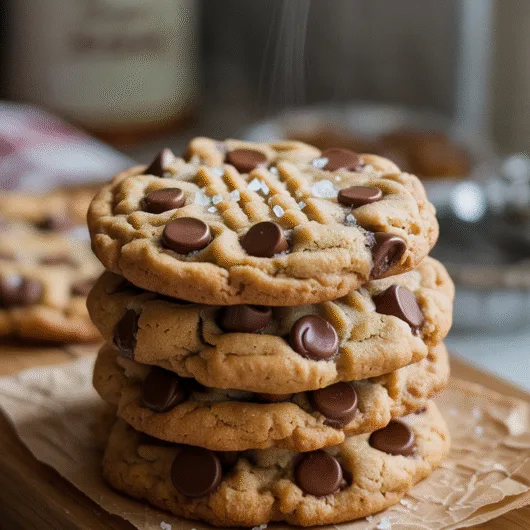
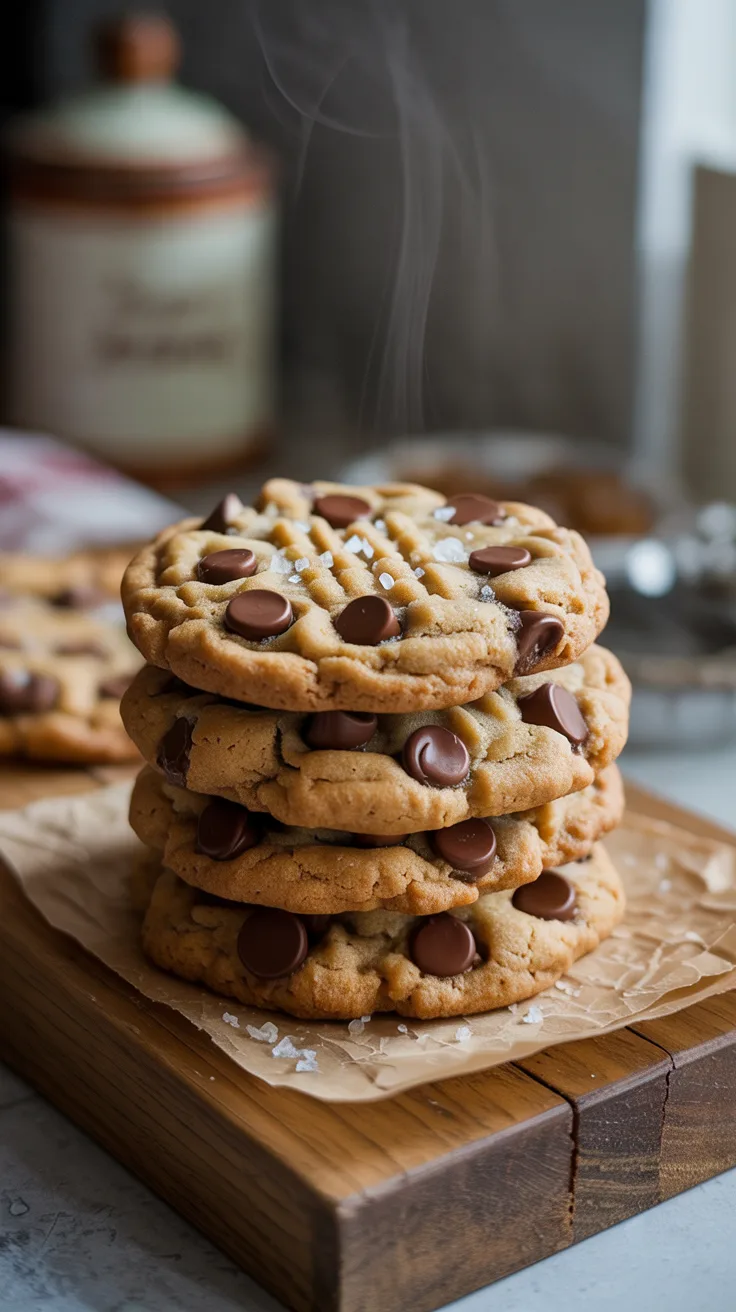
Peanut Butter Chocolate Chip Cookies
Course: Snacks, DessertCuisine: AmericanDifficulty: Easy25
servings15
minutes10
minutes170
kcal30
minutesA comforting, easy-to-make treat combining creamy peanut butter with rich semi-sweet chocolate chips. Perfect for late-night baking emergencies or school bake sales, these cookies are a family favorite that I’ve adapted over years of trial and error in my busy mom kitchen. They’re soft, chewy, and guaranteed to bring smiles, even on the most chaotic days.
Ingredients
1 cup Skippy creamy peanut butter (smooth texture is key; crunchy works for added bite)
1/2 cup unsalted butter, softened (room temperature, critical for proper mixing)
1/2 cup granulated sugar
1/2 cup brown sugar, packed (dark for deeper flavor, light if that’s what you have)
1 large egg (room temperature preferred, cold if in a rush)
1 teaspoon pure vanilla extract (avoid imitation for best flavor)
1 1/4 cups all-purpose flour (or substitute half with whole wheat for a nutritional boost)
1/2 teaspoon baking soda
1/4 teaspoon salt (omit if using salted butter)
1 cup Ghirardelli semi-sweet chocolate chips (or milk chocolate for sweeter taste)
Optional: Flaky sea salt for topping (for a gourmet touch) or 1/4 cup rolled oats (for extra chewiness)
Directions
- Preheat and Prepare: Set your oven to 375°F (or 350°F if your oven runs hot, as mine often does). Line two baking sheets with parchment paper to prevent sticking and make cleanup a breeze—trust me, after a long day, this matters.
- Cream Wet Ingredients: In a large mixing bowl, combine 1 cup Skippy creamy peanut butter, 1/2 cup softened unsalted butter, 1/2 cup granulated sugar, and 1/2 cup packed brown sugar. Beat with an electric mixer on medium speed for about 2 minutes until light and fluffy. (If mixing by hand, it’ll take a bit longer—great arm workout!)
- Add Egg and Vanilla: Beat in 1 large egg and 1 teaspoon pure vanilla extract until fully incorporated and smooth. Scrape down the sides of the bowl if needed to ensure everything mixes evenly.
- Combine Dry Ingredients: In a separate medium bowl, whisk together 1 1/4 cups all-purpose flour, 1/2 teaspoon baking soda, and 1/4 teaspoon salt. This prevents clumps and ensures even distribution.
- Mix Wet and Dry: Gradually add the dry mixture to the wet ingredients, mixing on low speed or stirring by hand just until combined. Don’t overmix here—it can make the cookies tough, and we want them tender.
- Add Chocolate Chips: Fold in 1 cup Ghirardelli semi-sweet chocolate chips (and 1/4 cup rolled oats if using) with a spatula. If the dough feels too sticky or soft, chill it in the refrigerator for 15-20 minutes to prevent spreading during baking.
- Scoop Dough: Using an ice cream scoop or tablespoon, portion the dough into balls (about 1-1.5 tablespoons each) and place them on the prepared baking sheets, spacing 2 inches apart. Optionally, flatten slightly with a fork for a classic crisscross pattern—I often skip this when I’m rushed.
- Bake: Bake in the preheated oven for 8-10 minutes, or until the edges are just golden but the centers still look slightly underdone. They’ll continue to set as they cool, keeping that soft, chewy texture I’ve perfected over countless batches. Rotate the sheets halfway if your oven bakes unevenly.
- Cool: Let the cookies cool on the baking sheet for 5 minutes before transferring them to a wire rack to cool completely. This prevents breaking—learned that the hard way.
- Optional Garnish: Sprinkle a pinch of flaky sea salt on top right after baking for a pro-level finish, if you’re feeling fancy like I do on rare calm evenings.
Notes
- Always soften butter ahead of time (30 minutes out, or microwave in 10-second bursts); hard butter ruined my first batch with crumbly results.
Chill dough if your kitchen’s warm or you notice spreading—15 minutes makes a huge difference.
Don’t overbake—pull them out early for that chewy center my family craves.
If your oven’s quirky like mine, check at 8 minutes and adjust. Burnt edges happen if I’m distracted by a work call.
Small imperfections are okay—sometimes mine spread unevenly or brown too much, but the taste always wins.