You know those Saturday mornings when you wake up with the best intentions to make something special, but then real life hits? Last weekend was one of those days. Emma had a soccer tournament, Jake needed help with his science project that was somehow due Monday (why do they always remember these things at the last minute?), and I had promised to bring dessert to my sister-in-law’s birthday dinner that evening.
At 2 PM, standing in my kitchen still in my soccer mom uniform (you know the look), I realized I had exactly three hours to pull off something impressive. That’s when this strawberry cheesecake recipe saved my life. Again.
How This Recipe Found Me (And Why It Stuck)
This recipe actually came from my mom, believe it or not. I’d been struggling for months trying to nail a decent cheesecake, you know, the kind that doesn’t crack down the middle or taste like sweetened cardboard. I was complaining to her over coffee one afternoon about another Pinterest fail when she just rolled her eyes and pulled out this old index card from her recipe box.
“Honey, you’re overthinking this,” she said, sliding the card across the table. “I’ve been making this since before you were born.”
The card was stained with decades of use (classic mom recipe card vibes), and half the writing was faded. But there was something about those ingredients – simple, straightforward, no fancy techniques or hard-to-find items. It felt… doable. Even for someone whose biggest kitchen victory that month had been not burning frozen pizza.
I went home and tried it that very night. And you guys? It was perfect. Like, restaurant-quality perfect. I may have done a little victory dance in my kitchen while the kids looked at me like I’d lost my mind.
Learn from my mistakes
Let me tell you about the first time I made this. Such a disaster. I thought I was being smart by doubling the recipe for a potluck (because go big or go home, right?). Well, I learned the hard way that my springform pan was apparently not as “spring” as advertised.
Picture this: me, opening the oven to check on my masterpiece, only to find cheesecake filling slowly oozing out the bottom and creating this abstract art piece on my oven floor. The smell of burning cream cheese is… not pleasant. I may have cried a little. Okay, a lot.
Now I always wrap the bottom of my springform pan with heavy-duty aluminum foil. Even if I’m not doing a water bath. Trust me on this one.

My Ingredient Swaps and Brand Preferences
Here’s the thing about cooking with kids: you work with what you have. I’ve made this cheesecake so many times now that I’ve accidentally tested pretty much every possible substitution.
Cream cheese: I’m team Philadelphia all the way. I tried the store brand once (don’t judge, it was a Target run and I was trying to save money), and while it worked, the texture wasn’t quite as smooth. Sometimes the extra two dollars is worth it.
Strawberries: Fresh is obviously ideal, but frozen works too! Just thaw them completely and drain off that extra liquid. I learned this the hard way when I was too impatient and ended up with a soggy topping situation.
Graham crackers: Honey Maid is my go-to, but honestly? I’ve used whatever’s in the pantry. Vanilla wafers, even crushed up Nilla wafers from the kids’ lunch boxes. The crust police aren’t coming for you.
The Little Tricks That Make All the Difference
After making this probably 15 times (I counted because my kids started requesting it for birthdays), here are the secrets I’ve learned:
Room temperature ingredients are non-negotiable. I know everyone says this, but seriously. Cold cream cheese creates lumps that no amount of mixing will fix. If you forget to take it out early (story of my life), cut it into smaller pieces and it’ll soften faster.
Don’t overbeat the filling. I used to think more mixing = smoother cheesecake. Wrong. Too much air creates cracks. Mix just until smooth and stop.
The toothpick test doesn’t work here. The center should still have a slight jiggle when you shake the pan gently. It’ll finish setting as it cools. I used to overcook mine trying to get that clean toothpick, and ended up with cheesecake that was more like rubber.
Cool it gradually. Turn off the oven, crack the door, and let it sit for an hour. Then room temperature for another hour before the fridge. I know it’s torture to wait, but sudden temperature changes = cracks.
How My Family Really Feels About This Recipe
Jake (my 12-year-old) says it’s “better than restaurant cheesecake,” which might be the highest compliment he’s ever given any of my cooking. Emma prefers hers without the strawberry topping (typical 8-year-old), so I usually make the topping on the side.
My husband? He’s the real test. This man will eat anything I put in front of him and claim it’s delicious (bless him), but I know when he’s being genuine because he goes back for seconds without me asking if he wants more. This cheesecake gets the genuine second, helping treatment every single time.
The best part? It actually gets better after sitting in the fridge overnight. So you can make it Saturday for Sunday dinner and feel like a planning genius.
When Life Gets Crazy (AKA My Shortcut Version)
Look, sometimes you need cheesecake, but you’re operating on three hours of sleep and someone spilled juice on the homework you just signed. Been there. Here’s my emergency version:
Use a pre-made graham crust (Keebler makes a decent one), skip the homemade strawberry topping, and just use good quality strawberry preserves mixed with fresh berries. Takes literally half the time, and 90% of people won’t know the difference.
Is it as good as the from-scratch version? No. Will it still make you look like the mom who has her life together? Absolutely.
The Recipe That Actually Works
For the crust:
- 1½ cups graham cracker crumbs
- ⅓ cup melted butter
- ¼ cup sugar
For the filling:
- 24 oz cream cheese, room temperature (seriously, don’t skip this)
- ¾ cup sugar
- 3 large eggs
- 1 tsp vanilla extract
- ½ cup sour cream
For the strawberry topping:
- 1 lb fresh strawberries, sliced
- ½ cup sugar
- 2 tbsp cornstarch
- 2 tbsp water
Instructions:
- Preheat oven to 325°F. Wrap your springform pan in foil (learn from my mistakes).
- Mix crust ingredients, press into bottom of pan. Bake 10 minutes.
- Beat cream cheese until smooth. Add sugar, then eggs one at a time, then vanilla and sour cream. Don’t overdo it.
- Pour over crust. Bake 45-50 minutes until center barely jiggles.
- Cool gradually (oven off, door cracked, then room temp, then fridge).
- For topping: cook strawberries, sugar, cornstarch, and water until thickened. Cool before adding to cheesecake.
This recipe has gotten me through birthday parties, potluck dinners, and those moments when I need to prove to myself that I can still make something beautiful in the middle of the beautiful chaos that is motherhood.
And the best part? Even when it’s not perfect – maybe the top cracked a little or the strawberries are slightly lopsided – it still tastes amazing. Kind of like parenthood, really. Perfectly imperfect and absolutely worth it.

Classic Strawberry Cheesecake Recipe with Real-Life Tips and Shortcuts
Course: DessertCuisine: AmericanDifficulty: Intermediate12
servings25
minutes50
minutes420
kcal5
hours15
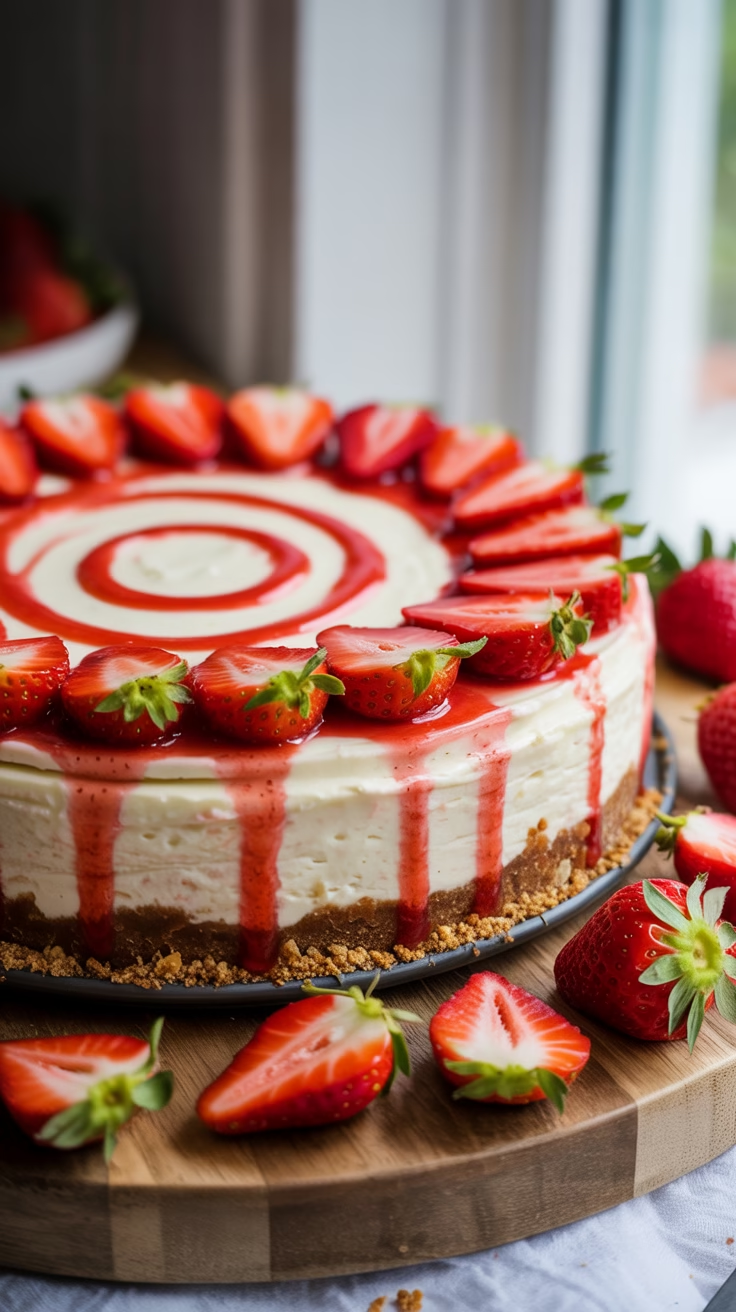
minutesA rich, creamy New York-style cheesecake with a buttery graham cracker crust, topped with fresh strawberry sauce. This make-ahead dessert is perfect for special occasions and feeds a crowd.
Ingredients
For the Crust:
1½ cups graham cracker crumbs
⅓ cup melted butter
¼ cup granulated sugar
- For the Cheesecake Filling:
24 oz (3 packages) cream cheese, room temperature
¾ cup granulated sugar
3 large eggs, room temperature
1 teaspoon vanilla extract
½ cup sour cream
- For the Strawberry Topping:
1 pound fresh strawberries, hulled and sliced
½ cup granulated sugar
2 tablespoons cornstarch
2 tablespoons water
Directions
Prepare the Crust (10 minutes):
- Preheat oven to 325°F (163°C).
- Wrap the bottom and sides of a 9-inch springform pan tightly with heavy-duty aluminum foil.
- In a medium bowl, combine graham cracker crumbs, melted butter, and ¼ cup sugar until evenly moistened.
- Press mixture firmly into the bottom of prepared pan.
- Bake for 10 minutes. Remove and set aside.
- Make the Filling (15 minutes):
- In a large bowl, beat cream cheese with electric mixer until smooth and creamy (2-3 minutes).
- Gradually add ¾ cup sugar, beating until combined.
- Add eggs one at a time, beating on low speed after each addition until just combined.
- Add eggs one at a time, beating on low speed after each addition until just combined.
- Pour filling over the pre-baked crust.
- Bake the Cheesecake (50 minutes):
- Bake at 325°F for 45-50 minutes, until center is almost set but still slightly jiggly.
- Turn off oven, crack door open, and let cheesecake cool in oven for 1 hour.
- Remove from oven and cool at room temperature for 1 hour.
- Refrigerate for at least 4 hours or overnight.
- Prepare Strawberry Topping (15 minutes):
- In a medium saucepan, combine sliced strawberries, ½ cup sugar, cornstarch, and water.
- Cook over medium heat, stirring frequently, until mixture thickens and becomes glossy (8-10 minutes).
- Remove from heat and cool completely before topping the cheesecake.
Notes
- Room temperature ingredients are crucial for a smooth, lump-free filling
Don’t overbeat the filling to avoid incorporating too much air, which causes cracks
Cool gradually to prevent cracking from temperature shock
Make ahead: This cheesecake tastes even better the next day