Strawberry icebox cake is the kind of dessert that feels elegant with almost no effort. This version is no‑bake, layered with soft ladyfingers, sweetened cream cheese, and fresh strawberries, then chilled until set so it slices like a dream. It’s perfect for summer parties, last‑minute guests, or when you want a cool dessert without turning on the oven.
What makes this recipe unique is that it uses lightly sweetened cream cheese instead of whipped cream alone, which gives a richer, tangier flavor and more stable structure. The result is a cake that holds its layers overnight without weeping, slices cleanly, and tastes fresh, not overly sweet.
Pro tip: Toss the strawberries in a little sugar and let them sit 10–15 minutes first; this draws out juice that mingles with the cream and keeps every bite juicy.
Why this recipe works
This icebox cake works because it balances structure, moisture, and flavor in three simple ways:
- Cream cheese + whipped cream combo
Using cream cheese along with whipped cream adds body and stability. The cake won’t collapse or “melt” in a warm room, and it slices cleanly instead of collapsing under the strawberries. - Lightly sweetened layers
The cream is sweetened just enough so the strawberries stay the star. Over‑sweet cream can mute the berry flavor, especially with juicy strawberries. - Short chilling time for best texture
Chilling 4–6 hours minimum sets the structure, but we don’t recommend longer than 24 hours because the ladyfingers can get soggy and the bottom layer may turn mushy. If you need to prep farther ahead, keep the components separate and assemble close to serving.
Ingredients
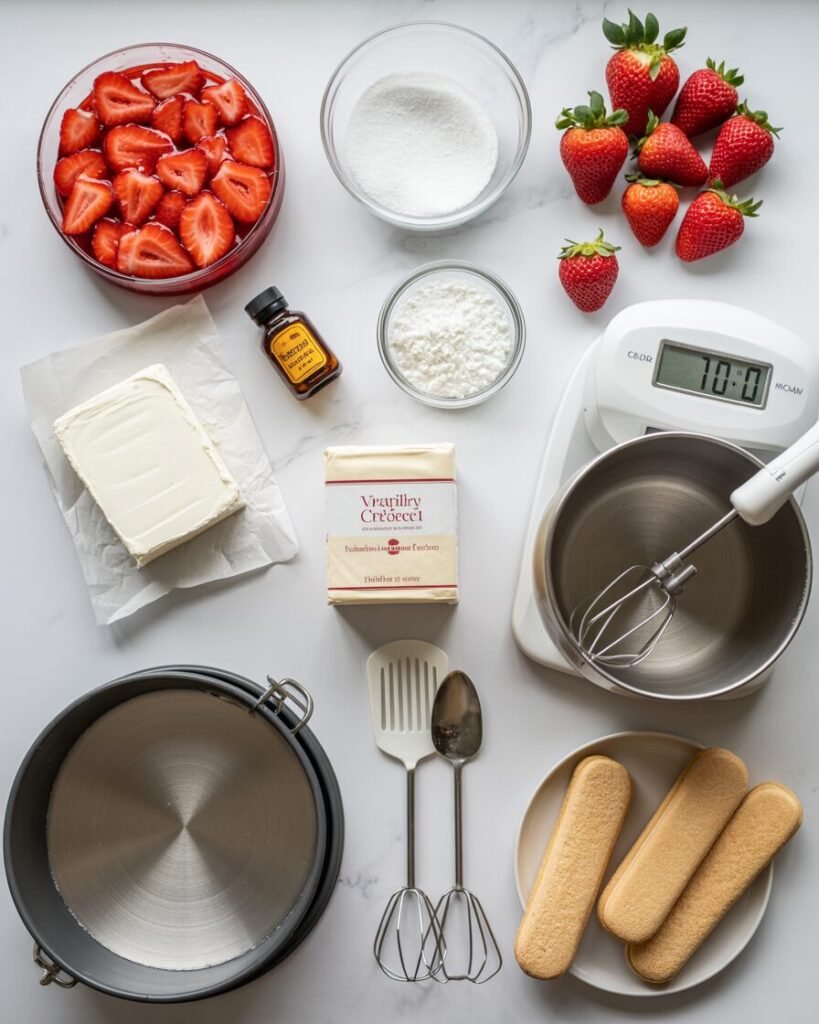
All measurements are by weight where possible; cups are approximate.
- Strawberries – 400 g (about 3 cups sliced) – Fresh, juicy base flavor.
- Granulated sugar – 30 g (2–3 tbsp) – Lightly sweetens the berries and draws out juice.
- Cream cheese – 250 g (about 1 cup, full‑fat) – Adds body, tang, and stability to the cream.
- Heavy cream (or whipping cream) – 300 ml (1¼ cups) – Whips to light, airy layers that still hold shape.
- Powdered sugar – 30 g (about 2 tbsp) – Sweetens the cream with a finer texture than granulated.
- Vanilla extract – 1 tsp (5 ml) – Enhances overall sweetness and aroma.
- Ladyfingers (sponge fingers) – 12–16 pieces (about 150–180 g) – Soft, absorbent base that softens in the fridge into a cake‑like texture.
- Optional garnish – strawberry slices, mint leaves, or extra powdered sugar – For visual appeal.
Note on brands/variety: Use full‑fat cream cheese and whipping cream (30–35% fat) for best stability. Lower‑fat versions can curdle or deflate the whipped cream.
Equipment
Required:
- 8‑inch round springform or cake pan (about 20 cm)
- Electric hand mixer or whisk attachment (a stand mixer works but is not needed)
- Kitchen scale (highly recommended for accuracy)
- Measuring spoons and cups
- Mixing bowls (2 medium)
- Spatula or rubber scraper
- Parchment paper (optional, to line the base)
Nice‑to‑have:
- Offset spatula for smoothing layers
- Fine‑mesh sieve (to dust top with powdered sugar)
- Rimmed tray or plate to chill the cake (to catch any seepage)
Step‑by‑step instructions (with timing and visual cues)
Step 1: Prep the strawberries (5–10 minutes)
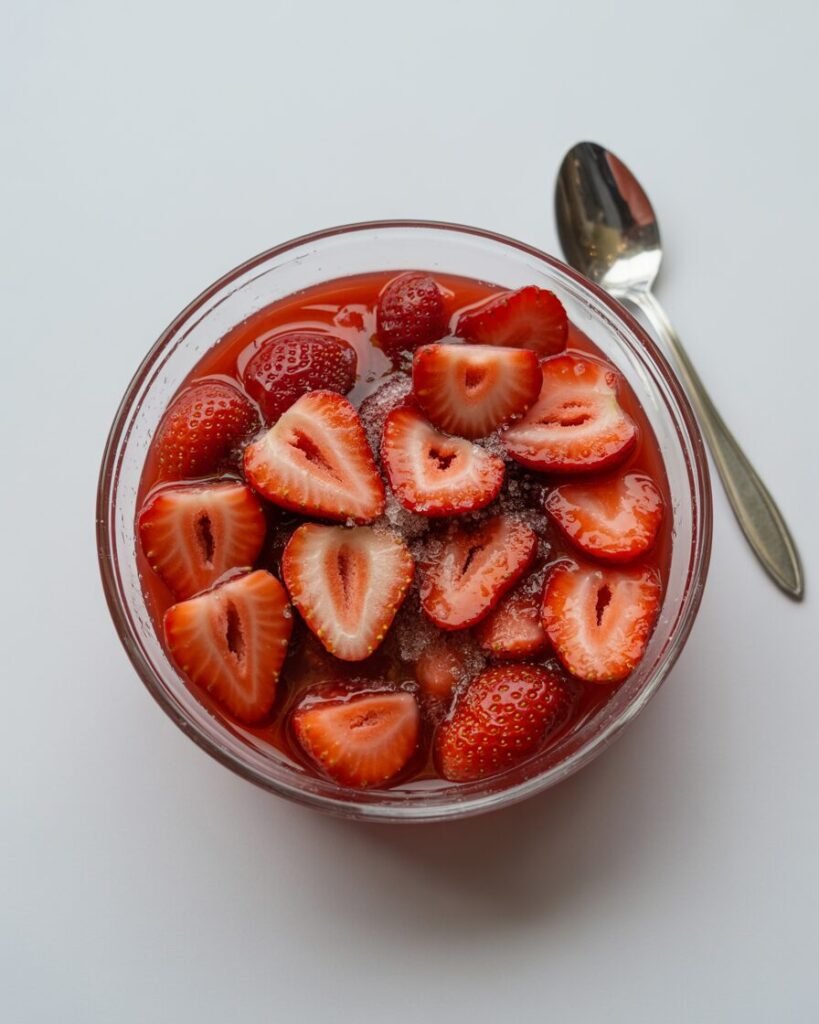
- Wash and hull the strawberries.
- Slice them 41 inch thick.
- In a medium bowl, toss strawberries with 30 g granulated sugar.
- Let sit 10–15 minutes at room temperature.
Visual cue: The strawberries will look shiny and wet with a small pool of reddish juice at the bottom. That juice is flavor gold—don’t drain it.
Step 2: Whip the cream cheese mixture (5–7 minutes)
- In a medium bowl, beat the cream cheese with an electric mixer on medium until smooth and creamy (about 1–2 minutes).
- Add powdered sugar and vanilla; beat until combined.
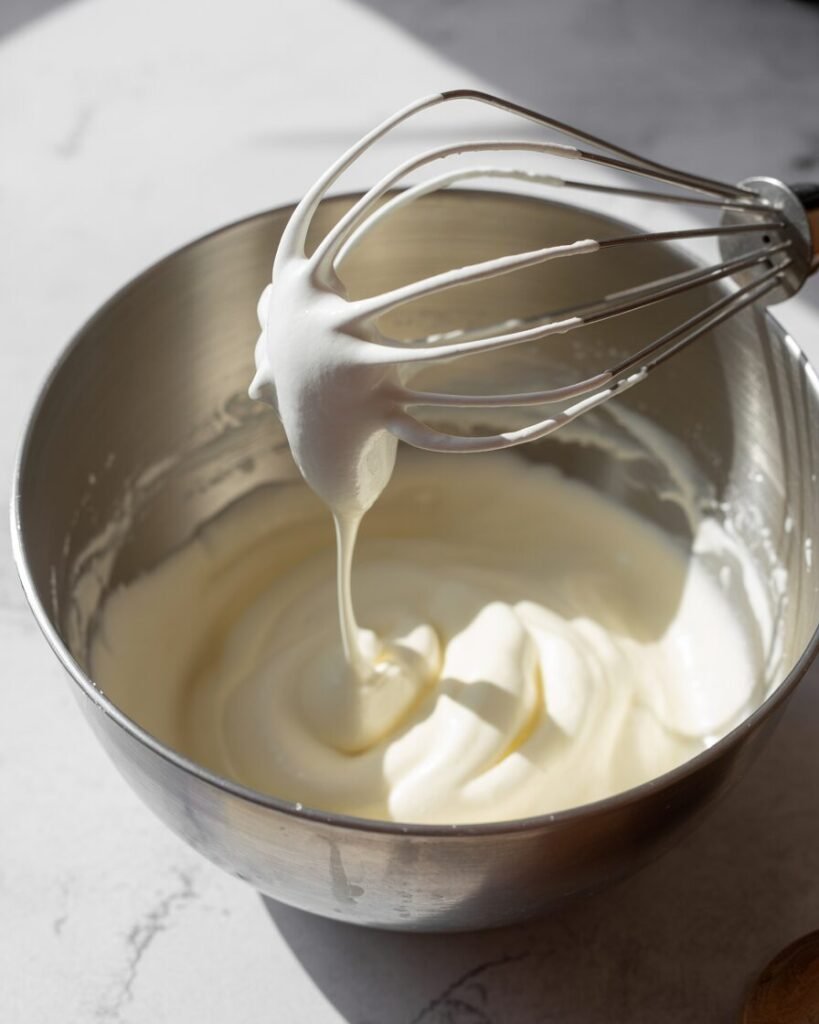
- Switch to a clean bowl. Whip the heavy cream on medium‑high until soft peaks form (when you lift the beaters, peaks form and slowly droop).
Visual cue: The cream should look fluffy and hold shape but still be soft, not stiff and grainy. Over‑whipping can make the cream grainy.
- Gently fold the whipped cream into the cream cheese mixture until smooth and uniform. Avoid over‑mixing so the cream stays airy.
Step 3: Assemble the first layer (5 minutes)
- Line the bottom of the springform or cake pan with parchment (optional, for easier release).
- Arrange ladyfingers in a single layer over the base, breaking a few if needed to fit snugly.
Visual cue: The bottom should be fully covered with no gaps, but pieces can overlap slightly.
- Spoon about one‑third of the strawberry mixture (berries + juice) over the ladyfingers and spread gently.
- Top with about one‑third of the cream cheese mixture, spreading level with a spatula.
Visual cue: The layer should be smooth and even, not lumpy or thin‑spotted.
Step 4: Repeat layers (5–7 minutes)
- Add a second layer of ladyfingers, pressing them lightly into the cream.
- Add another one‑third of the strawberries and cream cheese mixture.
- Add a final layer of ladyfingers.
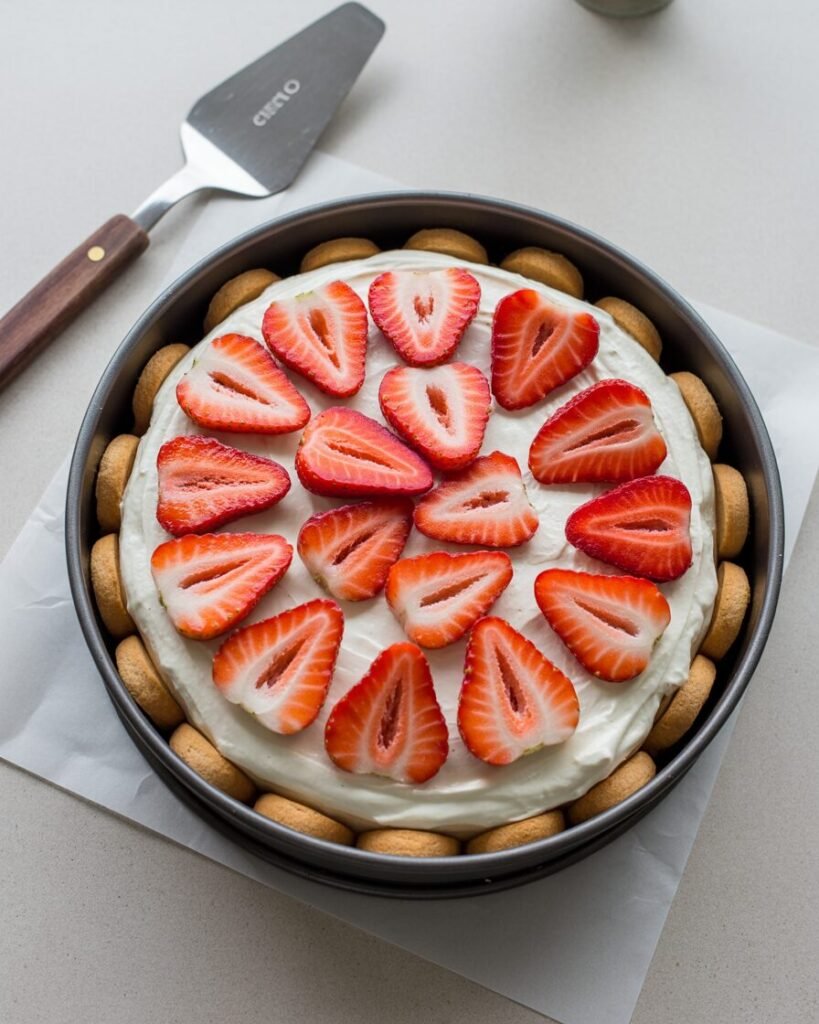
- Spread the remaining cream cheese mixture over the top, smoothing the surface.
Visual cue: The top should be smooth and slightly domed in the center to help drainage. If the cream is too thick, gently fold in a teaspoon of the reserved strawberry juice to loosen it.
Step 5: Chill and set (4–24 hours)
- Cover the pan loosely with plastic wrap or place it in an airtight cake box.
- Chill in the refrigerator for at least 4–6 hours, or up to 24 hours.
Visual cue: The cake should feel firm to the touch all over, and the cream should no longer jiggle. The sides of the cake may feel slightly cool and set, similar to chilled mousse.
Step 6: Decorate and serve (5 minutes)
- Run a thin knife around the inside edge of the pan if using a springform.
- Release the sides and smooth the top if needed.
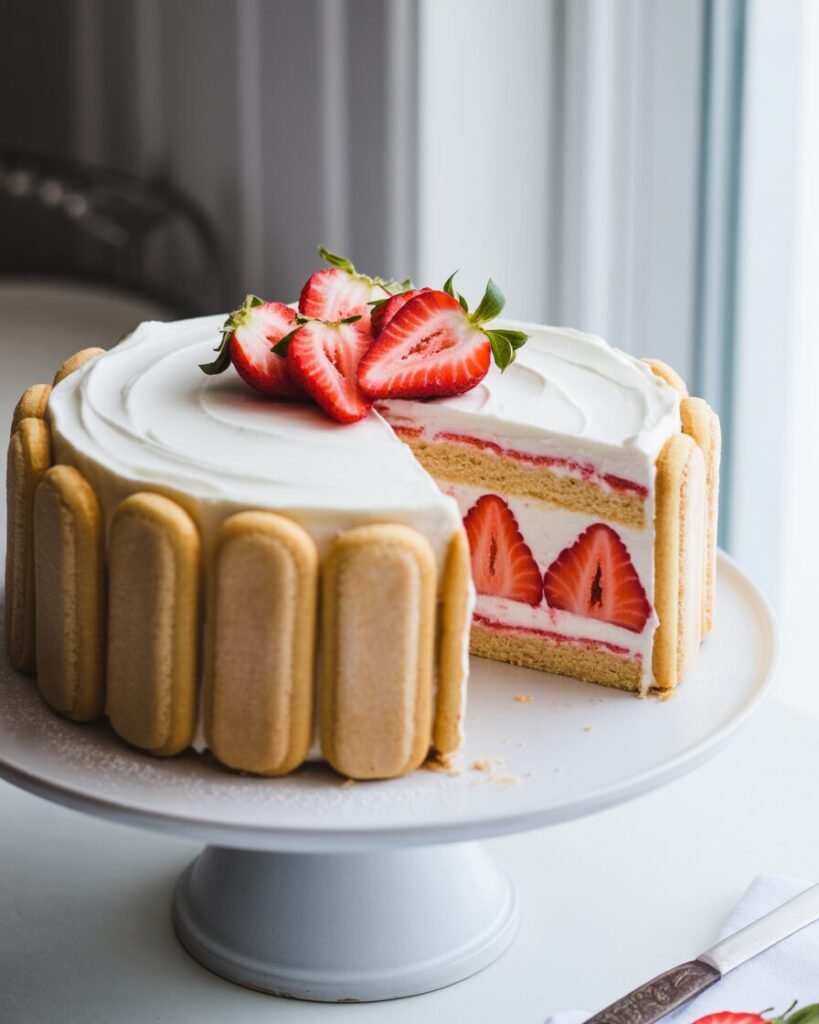
- Garnish with fresh strawberry slices, a dusting of powdered sugar, or a few mint leaves.
Serve directly from the fridge, cutting into slices. Let each slice sit for 5–10 minutes at room temperature before serving for the softest texture.
Troubleshooting: common failures and fixes
Problem: Cake feels too soft or “floppy” after chilling.
Likely causes: Not enough cream cheese, over‑liquidy berries, or under‑chilled time.
Fix next time: Increase cream cheese slightly, drain excess juice if berries are very juicy, and chill at least 6 hours.
Problem: Strawberry juice leaks out of the sides.
Likely causes: Too much liquid from berries, or cream too soft.
Fix: Drain a little juice if needed, pack ladyfingers tightly, and chill for full 6 hours.
Problem: Cake slices fall apart.
Likely causes: Too few layers of cream cheese, or over‑soaked ladyfingers.
Fix: Use the full cream cheese quantity and reduce the number of ladyfinger layers if you notice mushiness.
Problem: Cream tastes too thick or heavy.
Likely causes: Cream cheese over‑beaten or too much cream cheese.
Fix: Whip cream to softer peaks next time and reduce cream cheese by 20–30 g if desired.
Problem: Cake tastes too sweet.
Likely causes: Too much sugar in berries or cream.
Fix: Reduce granulated sugar in berries to 15–20 g and omit powdered sugar in cream if using very sweet strawberries.
Substitutions and variations
Dietary swaps
- Dairy‑free:
Use dairy‑free cream cheese and dairy‑free whipping cream (or coconut cream). Texture will be slightly softer, so chill at least 6 hours. - Gluten‑free:
Swap ladyfingers with gluten‑free sponge fingers or gluten‑free sponge cake slices (about 180–200 g total). - Egg‑free:
This recipe is naturally egg‑free; just ensure your ladyfingers or sponge base are egg‑free if needed.
Flavor swaps
- Berry mix: Replace half the strawberries with raspberries or blueberries for a mixed‑berry version.
- Citrus twist: Add a teaspoon of lemon or lime zest to the cream cheese mixture for brightness.
- Chocolate twist: Add a thin layer of chocolate sauce between one set of layers, or dip ladyfingers lightly in melted chocolate before assembling.
Storage, make‑ahead, and freezing
- Counter: Not recommended unrefrigerated for more than 2–3 hours due to dairy and cream.
- Fridge: Stores well covered for 2 days. For best texture, serve within 24 hours. Beyond that, ladyfingers get very soft.
- Freezer: Freezing is not recommended because the cream will separate and ladyfingers become mushy when thawed.
- What not to freeze: Do not freeze assembled icebox cake. If you must prep ahead, freeze un‑assembled ladyfingers in an airtight bag and thaw at room temperature before using.
Serving suggestions and pairing ideas
- With fruit: Add a drizzle of reduced strawberry coulis or a spoonful of fresh berry compote on the side.
- With creams: A light dusting of powdered sugar or a dollop of plain whipped cream on the plate keeps it elegant.
- With desserts: This pairs beautifully with a light lemon sorbet or a simple vanilla ice cream, balancing richness and sweetness.
Because the cake is lightly sweetened, it goes well with tart fruit sides or beverages like iced tea or sparkling water with lemon.
Notes from my kitchen (first‑hand testing log)
Batch 1:
Used only whipped cream (no cream cheese). The cake was very light and fluffy, but after 6 hours it started to sag and leaked juice. Texture was too soft to slice neatly.
Batch 2:
Added cream cheese at a 50:50 ratio with whipped cream. The cake held shape much better, but the cream was a bit too thick. Sliced well, but the center felt dense.
Final chosen method:
Used the full cream cheese quantity with softly whipped cream. This gave clean slices, stable layers, and a light but creamy texture. The 4–6 hour chill time was ideal—no leakage, no mushiness.
Nutrition and disclaimer
Approximate per serving (assuming 8 slices):
- Calories: about 350
- Fat: about 25g
- Carbohydrates: about 28g
- Protein: about 5g
Values are estimates; adjust for brands and portion size. Follow food‑safety best practices: keep the cake refrigerated, consume within 2 days, and discard if it smells sour or looks off.
Final thoughts and how to enjoy this cake
Strawberry icebox cake is one of those desserts that looks impressive but comes together in under 30 minutes of active time. The combination of cream cheese, whipped cream, and juicy strawberries makes it feel indulgent without being overly heavy, and the no‑bake nature means you can serve it straight from the fridge on even the hottest days.