Okay, friend. Let me tell you about the time these strawberry tarts saved my sanity. It was one of those mornings—you know the kind. My 8-year-old couldn’t find his shoes (they were literally by the door), my 12-year-old was convinced she had to bring cupcakes to school that day (no, sweetie, the bake sale is next week), and my husband texted from the airport like, “Forgot to tell you, my boss is coming over for dinner tonight.” Cool.
So while I chugged my lukewarm coffee, I did what any self-respecting food blogger would do—I made tarts. Not because I’m fancy, but because I had a carton of strawberries about to go bad, a half-used package of cream cheese in the fridge, and a desperate need for something to go right. And you know what? These little tarts were the hero of the day. The kids devoured them after school (no, they did not magically find their shoes on their own), and my husband’s boss? Well, let’s just say he asked for the recipe.
How I Discovered This Recipe
I originally found a version of this recipe two years ago during one of those late-night Pinterest sessions when Mike was traveling and the kids were finally asleep. You know how it goes—you start looking for “easy dinner ideas” and somehow end up pinning 47 different dessert recipes at midnight.
The original recipe called for making pastry cream from scratch, which… let’s be real. On a Tuesday afternoon with homework battles looming? Not happening. So I started experimenting with shortcuts that actually work.
The Great Pudding Disaster
Let me tell you about my first attempt at making these “easier.” I thought I was being so clever by using instant vanilla pudding instead of pastry cream. Mixed it according to the box, piped it into my perfectly golden tart shells, and… it turned into soup. Literally, the strawberry juice mixed with the pudding and created this weird, watery mess that looked like something from a horror movie.
Turns out instant pudding needs time to set properly, and fresh strawberries release juice. Who knew? (Everyone except me, apparently.)
Now I always make the filling at least an hour ahead, and I pat those strawberries dry like my life depends on it.

The Recipe That Actually Works
For the tart shells:
- 1 package frozen mini tart shells (I swear by Pepperidge Farm—they’re in the freezer section)
- OR if you’re feeling ambitious, pre-made pie crust cut into circles
For the filling:
- 1 package (3.4 oz) instant vanilla pudding
- 1½ cups cold milk (whole milk works best, but 2% is fine)
- 1 container (8 oz) Cool Whip, thawed
- 2 pounds fresh strawberries, hulled and sliced
- ¼ cup strawberry jam (I use Smucker’s)
- 2 tablespoons water
Here’s how I actually make them:
- Bake the tart shells according to package directions. I usually do this while I’m making coffee because multitasking is life. Let them cool completely—this is important! Hot shells + cold filling = disaster.
- Make the filling by whisking the pudding mix with cold milk for 2 minutes. Let it sit for 5 minutes to thicken, then fold in the Cool Whip. Don’t overmix, or it gets weird and grainy.
- Prep the strawberries by slicing them and laying them on paper towels. Pat them dry—seriously, don’t skip this step. I learned the hard way.
- Make the glaze by heating jam with water in the microwave for 30 seconds, then strain it through a fine mesh strainer. This step makes everything look professional.
- Assembly time: Spoon filling into cooled shells, arrange strawberries on top, and brush with glaze. Done!
Real Talk: My Shortcuts and Substitutions
When I’m really pressed for time, I use those pre-made graham cracker tart shells from the baking aisle. They’re not as fancy, but honestly? The kids can’t tell the difference.
Berry situation: If strawberries look sad at the store, I mix in some blueberries and raspberries. Call them “mixed berry tarts” and suddenly you’re fancy.
Dairy-free option: I’ve successfully used coconut milk and dairy-free whipped topping for my sister-in-law. Just make sure everything is really cold.
The glaze shortcut: Sometimes I skip the straining step if I’m using seedless jam. Life’s too short.
How My Family Really Reacts
Emma (my 8-year-old) picks off all the strawberries first and eats them separately. Then she eats the filling with her finger. The tart shell usually gets left behind. Kids are weird.
Jake (12) inhales them whole and asks if there are more. He’s at that age where he’s basically a garbage disposal with legs.
Mike always says they’re “restaurant quality” which I know means “thanks for not serving cereal for dessert again.”
My neighbors have started asking me to make them for book club meetings, which is honestly the best compliment ever.
The Little Things That Make All the Difference
- Temperature matters: Cold filling, room temperature shells. Trust me on this.
- Don’t fill them too far ahead: Maybe 2-3 hours max, or the shells get soggy.
- The paper towel trick: I line my finished tarts on a paper towel-lined plate. It absorbs any excess moisture.
- Strawberry selection: I look for berries that are red all the way through, not white at the top. Those won’t get sweeter.
- Storage: Cover with plastic wrap but don’t let it touch the strawberries. Little toothpicks work great as spacers.
When Life Gets Real
Look, sometimes I buy pre-made tart shells, sometimes I make them from scratch. Sometimes I arrange the strawberries in perfect little rows, sometimes I just plop them on top. Both versions get devoured, and both versions make me feel like I’ve got this mom thing figured out.
The point is, these tarts work for real life. They’re fancy enough for a dinner party but simple enough for a Thursday morning panic situation. And honestly? That’s exactly the kind of recipe I need in my life right now.
Have you tried this recipe? I'd love to hear how it turned out! And if you have any brilliant shortcuts I haven't discovered yet, please share them in the comments. We're all in this together.
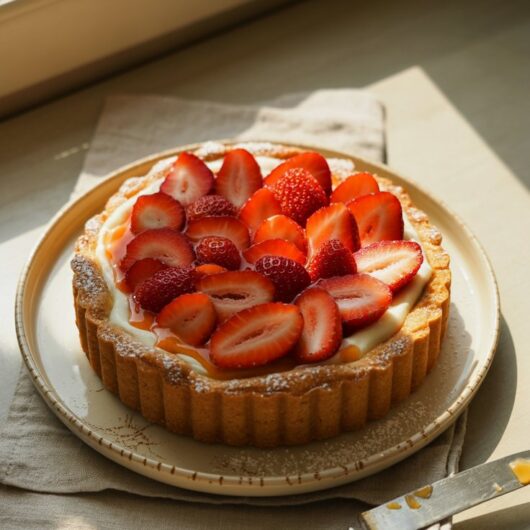
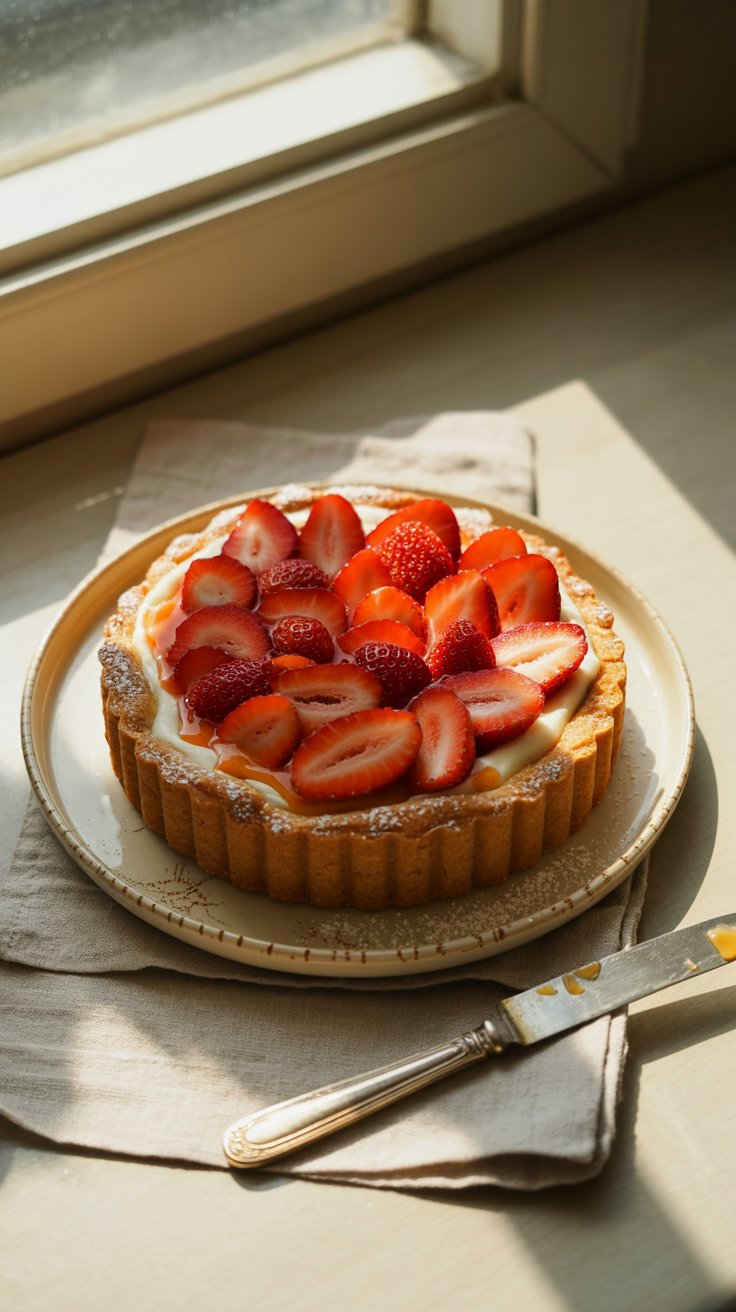
The Easiest Strawberry Tarts That Actually Look Fancy (But Aren’t!)
Course: DessertCuisine: AmericanDifficulty: Easy4
servings20
minutes15
minutes300
kcal35
minutesThese no-fuss strawberry tarts feature a buttery press-in crust, a luscious cream cheese filling, and juicy fresh berries—fancy enough to impress but easy enough for weeknights. With simple shortcuts (store-bought crust works!) and a glossy jam glaze (optional but pretty), they’re perfect for dessert, brunch, or bribing picky eaters. The best part? They look homemade (not perfect) and taste like sunshine.
Ingredients
For the Crust:
1 ¼ cups (160g) all-purpose flour
¼ cup (30g) powdered sugar
½ cup (115g) cold unsalted butter, cubed
1 egg yolk
1-2 tbsp ice water
- For the Filling:
4 oz (115g) cream cheese, softened
¼ cup (30g) powdered sugar
1 tsp vanilla extract
½ cup (120ml) heavy cream (or 1 cup pre-whipped)
- Topping:
1 lb (450g) fresh strawberries, hulled & thinly sliced
2 tbsp apricot jam (for glaze, optional)
Directions
Make the Crust:
- In a food processor, pulse flour, powdered sugar, and butter until crumbly. Add egg yolk and 1 tbsp ice water; pulse until dough clumps.
- Press dough into 6 individual tart pans (or a muffin tin for mini tarts). Freeze 10 mins.
- Bake at 375°F (190°C) for 12-15 mins until golden. Cool completely.
- Whip the Filling:
- Beat cream cheese, powdered sugar, and vanilla until smooth.
- In a separate bowl, whip cream to stiff peaks. Fold into cream cheese mixture.
- Assemble:
- Spoon filling into cooled crusts. Arrange strawberry slices on top.
- Optional: Warm apricot jam with 1 tsp water; brush over berries for shine.
- Serve:
- Chill 30 mins (if you can wait). Store leftovers in the fridge—though good luck having any.
Notes
- Shortcut: Use store-bought pie crust or pre-whipped cream to save time.
Make Ahead: Bake crusts 1 day ahead; fill same day.
Kid-Friendly: Let them arrange the berries—messy is charming!