Indulge in creamy, coffee-infused tiramisu cups with just a few simple steps perfect for birthdays, dinner parties, or weeknight treats. Sarah at Bake My Sweet has tested this recipe for consistent texture and flavor, making it a foolproof dessert for home bakers. Whether you prefer a classic version or want egg-free, dairy-free, or gluten-free options, this recipe covers it all with clear weight measurements and step-by-step guidance.
What Makes This Tiramisu Unique
This recipe skips the fuss of baking ladyfingers from scratch and uses store-bought or homemade versions, letting you focus on the creamy filling. The mascarpone cream is stabilized with whipped cream for a light, airy texture that holds well in the fridge. Each cup is layered for a restaurant-style look, but the entire process comes together in under 30 minutes plus chilling time.
Pro tip: For the creamiest texture, whip the cream and mascarpone separately, then fold them together. This keeps the filling airy and prevents a dense, gloopy result.
Why This Recipe Works: The Science of Tiramisu
Tiramisu is a classic no-bake dessert because its structure relies on the interaction of dairy, eggs (optional), and starch from the ladyfingers. The cream mixture is light thanks to air bubbles trapped in the whipped cream and mascarpone, and the coffee-soaked layers absorb liquid without becoming soggy when handled right.
- Mascarpone provides a rich, velvety base that’s stable at room temperature and holds up well when chilled.
- Whipped cream adds lightness and structure, making the filling more stable than using just mascarpone.
- Ladyfingers are high in starch, which helps them absorb coffee evenly without dissolving. Quick dipping (not soaking) keeps them from turning mushy.
- Cocoa powder adds a bitter note that balances the sweetness and deepens the flavor.
Ingredients
For the Cream Filling
| Ingredient | Weight | US Cups | Purpose |
|---|---|---|---|
| Mascarpone cheese | 250g | 1 cup | Creamy, rich base for the filling |
| Heavy cream | 200g | ¾ cup | Stabilizes and lightens the filling |
| Powdered sugar | 40g | ¼ cup | Sweetens without grains; blends easily |
| Vanilla extract | 1 tsp | 1 tsp | Enhances flavor; not overpowering |
| Optional: 1 egg yolk (or 1 tbsp cornstarch for egg-free) | 15g / 8g | 1 / 1 tsp | Binds cream and stabilizes; adds richness |
For Assembly
| Ingredient | Weight | US Cups | Purpose |
|---|---|---|---|
| Ladyfinger biscuits (Savoiardi) | 12–18 pieces | 12–18 | Soak up coffee, create texture contrast |
| Instant coffee or espresso | 120ml | ½ cup | Flavor and color; soak biscuits |
| Coffee liqueur (optional) | 1 tbsp | 1 tbsp | Adds authentic depth; omit for alcohol-free |
| Cocoa powder (unsweetened) | 2 tbsp | 2 tbsp | Finish and flavor contrast |
Note: For best results, use Italian mascarpone and high-quality cocoa powder. Regular American cream cheese makes a less creamy filling.
Equipment
Required:
- 6–8 individual cups or glasses (120–150ml each)
- Electric hand mixer or whisk
- Medium bowl
- Measuring scale (metric preferred)
- Small bowl (for coffee mix)
- Sieve (for cocoa dusting)
Nice-to-have:
- Piping bag (for neat cream layering)
- Dough scraper (for smoothing layers)
- Kitchen thermometer
Step-by-Step Instructions
Step 1: Prepare the Coffee Mix (2 minutes)
- In a small bowl, combine 120ml coffee (or espresso), 1 tbsp coffee liqueur (optional), and set aside.
Step 2: Make the Cream Filling (8 minutes)
- In a medium bowl, beat the mascarpone and powdered sugar until smooth (about 1 minute).
- In a separate bowl, whip the heavy cream until medium peaks form (2–3 minutes).
- Gently fold ⅓ of the whipped cream into the mascarpone mixture using a spatula. Repeat twice, folding lightly to preserve air.
- Optional: Add 1 egg yolk or 1 tsp cornstarch for extra stability.
- Add vanilla and mix until just combined.
Visual cue: The cream should be fluffy, smooth, and hold its shape when lifted.
Step 3: Dip and Layer (10 minutes)
- Quickly dip each ladyfinger into the coffee mix (1–2 seconds per side). Do not soak.
- Place 2–3 pieces per cup at the bottom.
- Spoon a layer (about 2 heaped tablespoons) of cream over the biscuits.
- Repeat for 2–3 layers, ending with cream.
- Dust with cocoa powder.
Visual cue: The layers should be distinct, not mushy. The cream should mound up, not run over.
Step 4: Chill and Serve (Minimum 2 hours)

- Cover and refrigerate for at least 2 hours before serving.
- Dust with more cocoa powder just before serving.
Oven rack position: No baking needed.
Troubleshooting: Common Failures and Fixes
| Problem | Likely Causes | Fix Next Time |
|---|---|---|
| Cream is runny or splits | Overbeating or warm mascarpone | Use cold cream, fold gently, chill bowl |
| Biscuits are soggy | Too much coffee or too long soaking | Quick dip only, or use less liquid |
| Cream is too thick or grainy | Mascarpone not blended well | Beat until smooth, use room temp |
| Not enough flavor | Weak coffee or not enough cocoa | Use strong espresso, dust well |
| Layers separate or collapse | Not enough cream, too light filling | Add more cream, fold less air out |
| Cream tastes grainy | Powdered sugar not fully blended | Sieve sugar before adding |
Substitutions and Variations
Dietary Swaps
| Ingredient | Substitute | Notes |
|---|---|---|
| Mascarpone | Vegan cream cheese (1:1) | Less creamy, but works well |
| Heavy cream | Coconut cream (chilled) | Dairy-free, lighter texture |
| Ladyfingers | Sponge cake fingers or gluten-free | Ensure no strong-flavored sponge |
| Egg yolk | 1 tsp cornstarch | Egg-free, binds cream |
| Coffee | Decaf or strong tea (no alcohol) | Caffeine-free, omit liqueur |
Flavor Swaps
- Citrus zest: Add grated orange or lemon zest to the cream.
- Spices: Stir in cinnamon or cardamom.
- Cocoa: Use dark cocoa powder for intense chocolate flavor.
Scaling Table
| Cup Size | Ladyfingers | Mascarpone | Cream | Sugar | Cocoa Powder |
|---|---|---|---|---|---|
| 6–8 cups | 12–18 | 250g | 200g | 40g | 2 tbsp |
| 12 cups | 24–36 | 500g | 400g | 80g | 4 tbsp |
Storage, Make-Ahead, and Freezing
- Counter: 4 hours (best if topped with cocoa before serving).
- Fridge: 3–5 days in airtight containers.
- Freezer: Up to 3 months, freeze without the top cocoa. Thaw overnight in the fridge. Do not refreeze after thawing.
Did you know? Freezing works best if you omit the cocoa powder before freezing and add it just before serving to prevent dullness.
Serving Suggestions and Pairing Ideas
- Serve with a drizzle of chocolate sauce or a dollop of whipped cream.
- Pair with a light dessert wine or espresso.
- For a brunch twist, serve with fresh berries.
FAQs
Can I use regular cream cheese instead of mascarpone?
Yes, but it will be less creamy. Use a full-fat cream cheese and add a splash of cream for smoothness.
How to prevent soggy ladyfingers?
Dip quickly—no more than 2 seconds per side.
How to make it dairy-free?
Use vegan cream cheese and coconut cream.
How to double or halve the recipe?
Scale all ingredients proportionally. For 4 cups, halve all amounts.
Can I bake these?
No, this is a no-bake dessert. Baking will curdle the cream.
Best sugar for the cream?
Powdered sugar blends faster and gives a smoother texture.
Notes from My Kitchen: Testing Log
Batch 1: Used American cream cheese—too tangy, cream was dense.
Adjustment made: Switched to mascarpone; added extra cream for lightness.
Batch 2: Ladyfingers soaked too long—mushy.
Adjustment made: Restricted to 1–2 seconds per side.
Final chosen method: Mascarpone + heavy cream, folded gently, quick dip for biscuits. Delivers fluffy, stable layers with a clean coffee flavor.
Nutrition and Disclaimer
Approximate per serving (1 cup, without ladyfingers):
- Calories: 220
- Fat: 18g
- Carbs: 14g
- Protein: 4g
Note: Values are estimates; adjust for brands and portion size. Follow food-safety best practices—do not leave at room temperature for more than 4 hours.
Conclusion
Tiramisu cups are a rewarding, easy dessert for home bakers of all levels. With precise measurements, clear troubleshooting, and tested substitutions, this recipe guarantees a creamy, coffee-infused treat every time. Sarah at Bake My Sweet has made it simple: no fuss, no failures, just delicious results. Try this for your next occasion and enjoy every bite!
Tiramisu Cups Recipe: Easy, Make-Ahead, No Bake
Course: DessertCuisine: ItalianDifficulty: Easy6
servings20
minutes300
kcal2
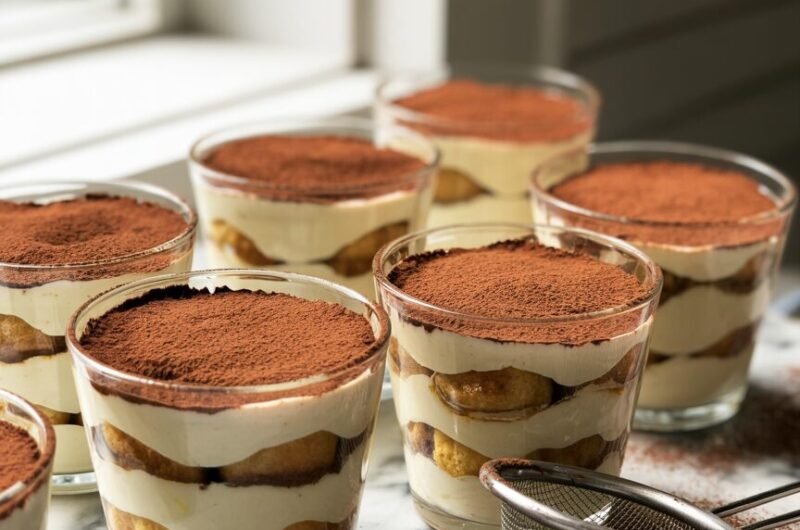
hoursIndividual tiramisu cups with layers of coffee‑dipped ladyfingers and fluffy mascarpone cream, finished with a dusting of cocoa. This no‑bake dessert is perfect for make‑ahead entertaining and is easy enough for beginner home bakers. The mascarpone is lightened with whipped cream for an airy texture that sets beautifully in the fridge.
Ingredients
For the Mascarpone Cream
250 g mascarpone cheese, cold but soft enough to stir (about 1 cup)
200 g heavy cream, cold (about ¾ cup)
40 g powdered sugar (about ¼ cup), sifted
1 teaspoon vanilla extract
Optional richness/stability (choose one):
1 large egg yolk, room temperature
OR 8 g cornstarch (about 1 tablespoon), for an egg‑free version
- For the Coffee Soak & Assembly
120 ml strong brewed coffee or espresso, cooled (about ½ cup)
1 tablespoon coffee liqueur (optional – omit for alcohol‑free)
12–18 ladyfinger biscuits (Savoiardi), depending on cup size
2 tablespoons unsweetened cocoa powder, for dusting
Directions
- Prepare the Coffee Soak (2 minutes)
Brew strong coffee or espresso and let it cool completely.
In a shallow dish, stir together 120 ml cooled coffee and 1 tablespoon coffee liqueur (if using).
Set near your work area for dipping the ladyfingers later.
Visual cue: The coffee should be dark and cool to the touch—warm coffee will melt the cream and make the biscuits too soft. - Whip the Cream (3–4 minutes)
Add the cold heavy cream to a clean mixing bowl.
Using a hand mixer on medium‑high speed, whip the cream until it reaches medium peaks, 2–3 minutes.
Medium peaks: when you lift the beaters, the peaks stand up but softly bend over at the tip.
Do not overbeat; you want it thick but still smooth and slightly soft.
Visual cue: The whipped cream should look smooth and billowy, not chunky or grainy. If it looks rough or starts to clump, you’ve gone too far. - Make the Mascarpone Base (3 minutes)
In a separate bowl, add mascarpone and sifted powdered sugar.
Beat on low‑medium speed just until smooth and combined, 30–60 seconds.
Add vanilla extract and mix briefly.
If using:
Egg yolk: beat it into the mascarpone mixture on low speed for 10–15 seconds, just to blend.
Cornstarch (egg‑free): whisk it in until fully dissolved and smooth.
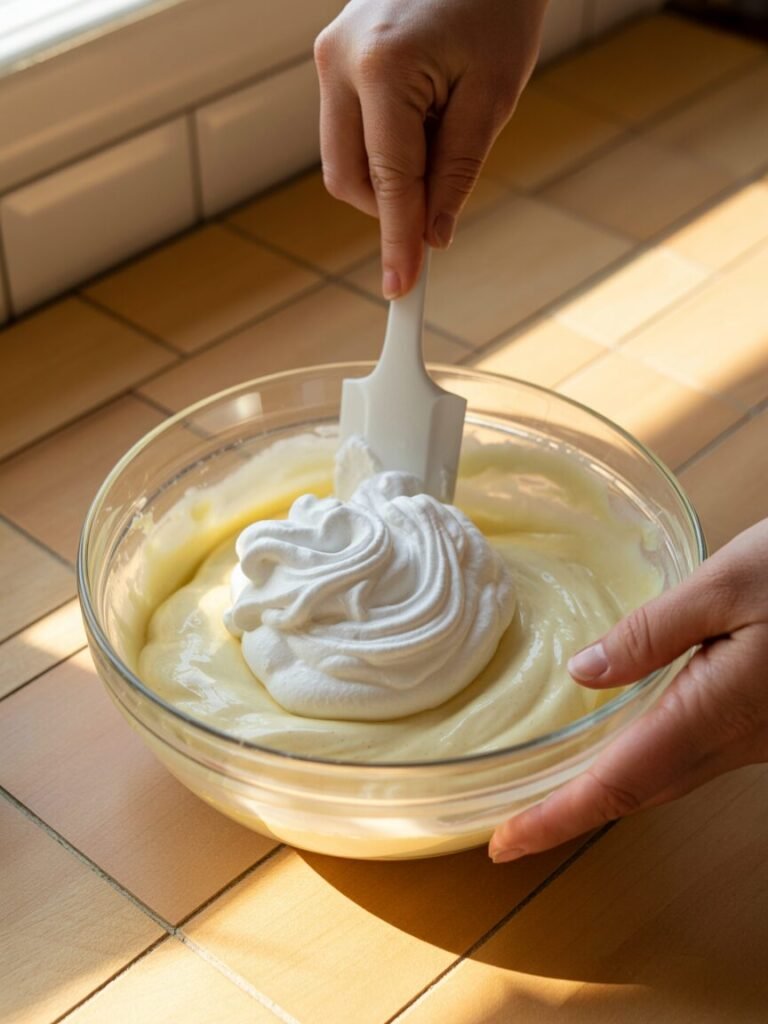
Visual cue: The mascarpone base should be silky and thick, with no visible lumps or streaks of sugar. - Fold Whipped Cream into Mascarpone (3–4 minutes)
Add about one‑third of the whipped cream to the mascarpone bowl.
Gently fold with a spatula—scoop down the side, across the bottom, and over the top—until mostly combined.
Repeat with the remaining whipped cream in two more additions, folding just until the mixture is uniform.
Visual cue: The finished cream should be fluffy, smooth, and able to hold soft peaks. It should mound on a spoon and keep its shape when dolloped into a cup, not run or spread like sauce.
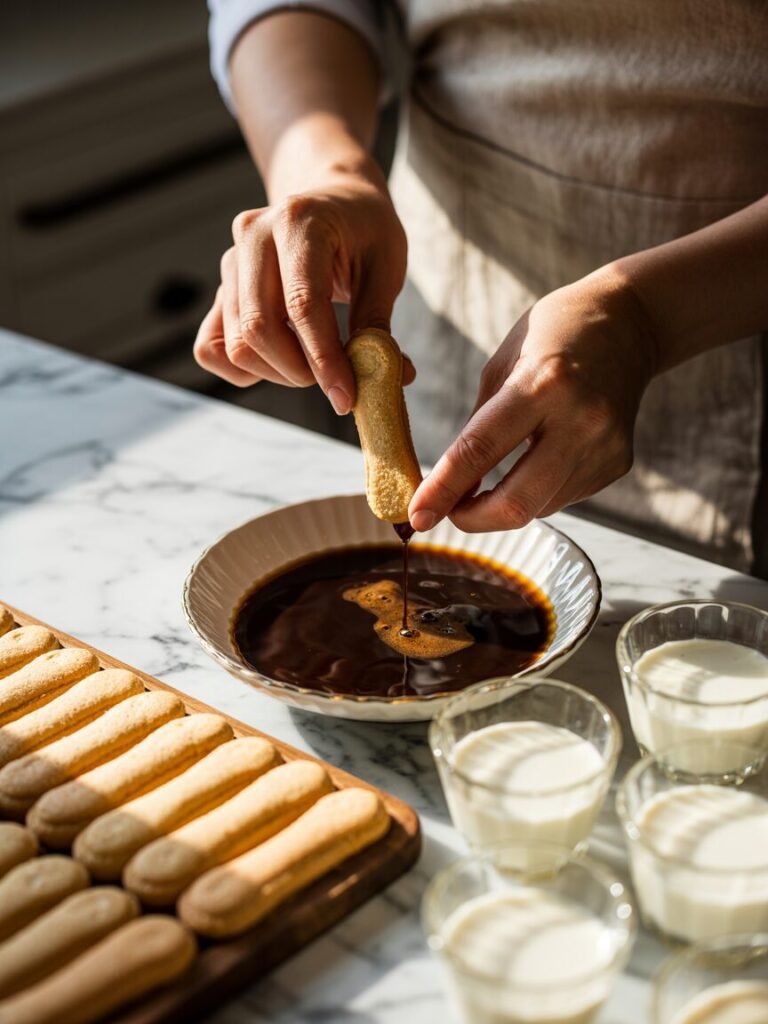
Avoid this: Over‑mixing at this stage can deflate the cream and create a dense or slightly split texture. - Dip Ladyfingers (5 minutes)
Break or cut the ladyfingers into pieces that fit comfortably into your cups (usually halves or thirds).
Working one piece at a time, quickly dip each ladyfinger into the coffee mixture—about 1–2 seconds per side.
Do not soak; you want the outside moist and the inside still slightly firm.
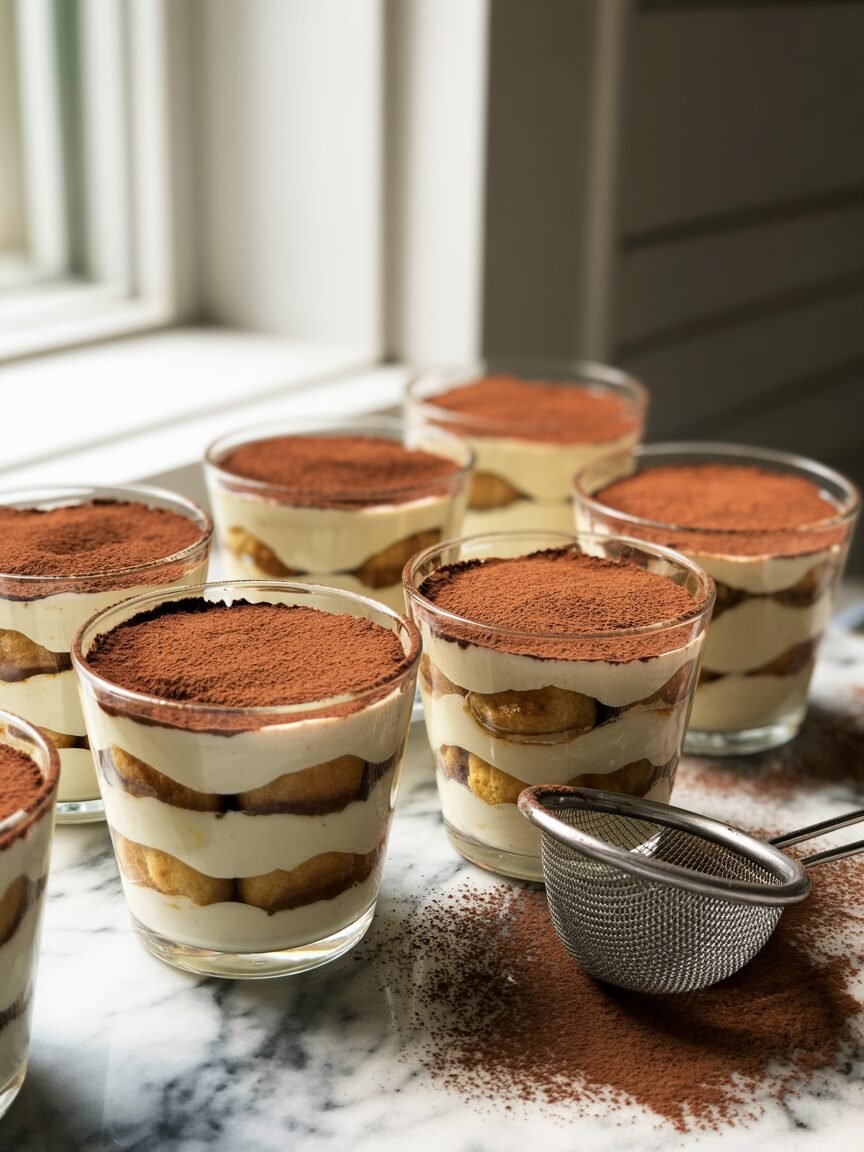
Visual cue: After dipping, the biscuit should look darker on the outside but still hold its shape without sagging or breaking apart in your fingers. - Layer the Tiramisu Cups (10 minutes)
Place 2–3 coffee‑dipped ladyfinger pieces in the bottom of each cup to form a single layer.
Spoon or pipe a layer of mascarpone cream over the biscuits (about 2 heaped tablespoons per cup), smoothing gently.
Repeat with another layer of dipped ladyfingers and another layer of cream.
Depending on your cup size, you’ll have 2–3 total layers of biscuit and cream.
Finish each cup with a final layer of cream, leaving a little space at the top for cocoa powder.
Visual cue: You should see distinct, neat layers from the side—coffee‑tinted biscuit, then pale cream. The cream should sit on top of the biscuits without sinking into a puddle. - Chill to Set (Minimum 2 hours)
Cover each cup with plastic wrap or place them in a covered container.
Refrigerate for at least 2 hours and up to 24 hours before serving.
The texture improves as the biscuits absorb the coffee and the cream firms up.
Visual cue (after chilling): The cream should be softly set and sliceable with a spoon, and the biscuits tender but not mushy. - Finish and Serve (5 minutes)
Just before serving, use a fine‑mesh sieve to dust the tops generously with unsweetened cocoa powder.
Serve straight from the fridge.
Pro tip: Dusting right before serving keeps the cocoa looking fresh and prevents it from darkening or dissolving into the cream.
Notes
- Texture & Doneness Checkpoints
Cream after mixing: Light, smooth, holds gentle peaks. If it’s runny, the cream may be under‑whipped; if grainy, it may be over‑whipped.
Ladyfingers after dipping: Moist on the outside, still slightly firm inside. Soggy or collapsing biscuits will give you a mushy bottom layer.
After chilling: The cups should spoon cleanly with visible layers and no liquid coffee pooling at the bottom. - Storage & Make‑Ahead
At room temperature: Maximum 2 hours for food safety, especially if using egg yolk.
In the fridge:
Best within 24 hours.
Good for up to 3 days in an airtight container or tightly covered cups.
In the freezer:
Freeze assembled cups (without cocoa on top) for up to 2 months.
Wrap each cup tightly in plastic wrap, then place in a freezer‑safe container.
Thaw overnight in the fridge, then dust with fresh cocoa before serving.
What not to freeze: Avoid freezing cups that have already been dusted with cocoa; the cocoa can become damp and spotty after thawing. - Serving Suggestions
Garnish with chocolate shavings, coffee beans, or a small dollop of whipped cream.
Serve with a shot of espresso, cappuccino, or a small glass of dessert wine.
For a lighter finish to a rich meal, add a handful of fresh berries on the side to balance the creamy sweetness.