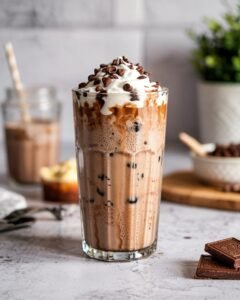
If you love tiramisu but don’t feel like baking, this Tiramisu Iced Latte recipe is your new best friend. It captures the creamy, coffee‑and‑mascarpone magic of classic tiramisu in a glass, without raw eggs or a complicated assembly.
The result is a silky, not‑too‑sweet iced latte with a soft mascarpone layer and a dusting of cocoa that tastes like dessert in a cup. You can make the key components ahead of time, so it comes together in minutes on busy mornings or after a long day.
Pro tip:
Chill the mascarpone layer until it’s thick but still spoonable. If it’s too soft, the drink will muddle and look cloudy; too firm, and it won’t blend into the latte smoothly.
What makes this recipe different
Most “tiramisu latte” recipes online rely heavily on whipped cream, extra sugar, or packaged syrups. This version:
- Uses real espresso and milk for the iced latte, not flavored creamer.
- Features a simple mascarpone layer that’s stabilized with a bit of milk and a touch of coffee, so it stays creamy without curdling.
- Lets you adjust sweetness and strength easily—perfect if you like your tiramisu more coffee‑forward or more dessert‑like.
This is ideal for:
- Breakfast or mid‑afternoon “treat yourself” moments.
- Entertaining with a small, elegant dessert‑style drink.
- Practicing flavored latte skills (espresso, milk, layering) before attempting tiramisu‑style cakes.
Why this tiramisu iced latte works
Three simple principles keep this drink balanced and delicious:
- Coffee + Mascarpone ≠ Curdled Drink
Warm (not hot) espresso and a splash of milk in the mascarpone layer prevent the cheese from splitting when it hits the cold espresso. Cold mascarpone + piping‑hot espresso will turn grainy and unpleasant. - Layering for Texture, Not Just Looks
A slightly thicker mascarpone layer (think soft pudding) sits on top of the espresso‑milk mixture, creating a “pudding‑on‑latte” texture with each sip. If you over‑thin it, the drink will taste like flavored milk instead of tiramisu. - Controlled Sweetness for All‑Day Sipping
Instead of drowning everything in sugar, this recipe uses a gentle sweetener in the milk and a light dusting of cocoa on top. This keeps the drink refreshing instead of cloying, even though it’s dessert‑inspired.
Ingredients
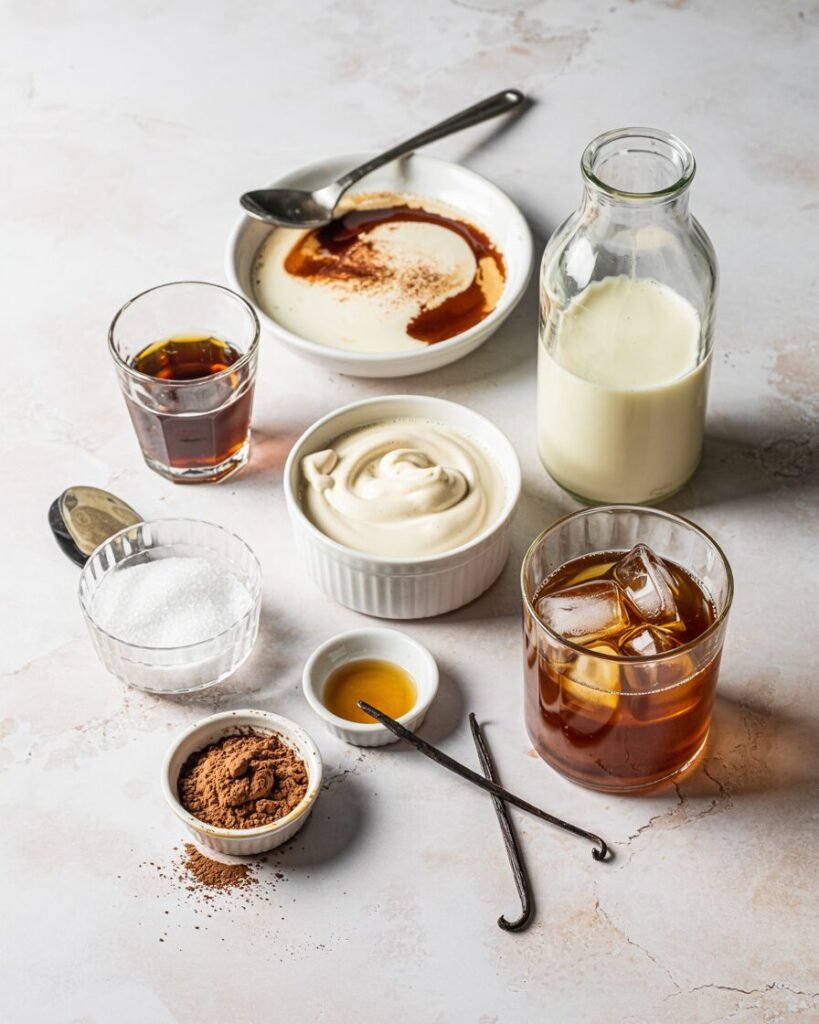
All measurements are in grams first, then cups.
Espresso & Milk Base
- Espresso (strong coffee):
- 60g (about 2oz, 1 shot)
- Purpose: Provides the deep coffee flavor that mimics tiramisu filling. Use freshly brewed espresso or very strong drip coffee.
- Milk (whole milk or full‑fat dairy):
- 180g (about 3/4cup)
- Purpose: Balances the espresso’s bitterness and adds creaminess.
- Note: Lower‑fat milk will still work but will feel thinner.
- Sugar (granulated or caster):
- 15g (about 1tbsp)
- Purpose: Just enough sweetness to cut the coffee bite without making it dessert‑sweet.
Mascarpone Layer
- Mascarpone cheese:
- 60g (about 1/4cup)
- Purpose: Creates the rich, creamy tiramisu‑style layer.
- Note: Use good‑quality, refrigerated mascarpone; avoid whipped or tub‑style “spreads.”
- Milk (same type as above):
- 30g (about 2tbsp)
- Purpose: Thins the mascarpone so it blends smoothly but still stays thick.
- Espresso or coffee (not hot):
- 15g (about 1tbsp)
- Purpose: Enhances the coffee flavor without diluting the mascarpone too much.
- Vanilla extract (optional but recommended):
- 1g (about 1/2tsp)
- Purpose: Adds a hint of warmth and complexity, mimicking tiramisu’s vanilla notes.
Finishing Touches
- Cocoa powder (unsweetened):
- 2–3g (about 1/2tsp to 1tsp)
- Purpose: Classic tiramisu dusting; adds visual appeal and a touch of bitterness.
- Optional garnish – cocoa nibs or dark chocolate shavings:
- For a bit of crunch and extra chocolate flavor.
Equipment
Required:
- Small pitcher or glass (about 300–350 ml capacity)
- Small bowl and whisk (or fork)
- Measuring spoons and cups (or kitchen scale for best accuracy)
- Espresso machine, Moka pot, or very strong drip coffee maker
- Ice cubes (about 100g, or 1/2 cup)
Nice‑to‑have:
- Small mason jar or shaker for mixing the latte base
- Fine‑mesh sieve for dusting cocoa evenly
- Small offset spatula (for gently smoothing the mascarpone layer)
Step‑by‑step instructions (with timing and visual cues)
Step 1: Brew and cool the espresso
- Brew 60g of espresso (about 1 shot).
- Let it sit for 2–3 minutes to cool to warm, not scalding.
- Visual cue: It should feel warm to the touch, not hot.
- Avoid this: Hot espresso added directly to cold mascarpone will make the mixture grainy.
Step 2: Mix the espresso–milk base
- In a pitcher or glass, combine:
- 180g milk
- 15g sugar
- 60g slightly cooled espresso
- Stir or shake until the sugar dissolves.
- How it should look: A smooth, light brown liquid with no visible sugar grains.
- Chill briefly in the fridge while you make the mascarpone layer (5–10 minutes) if you like it extra cold.
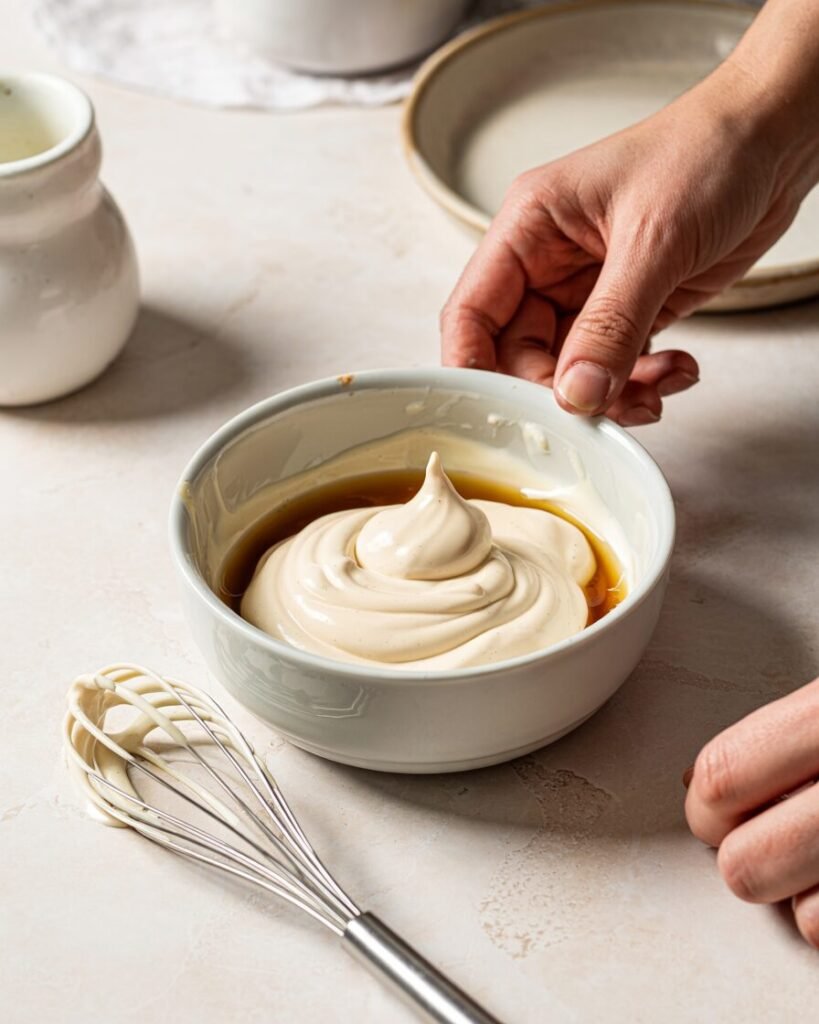
Step 3: Prepare the mascarpone layer
- In a small bowl, combine:
- 60g mascarpone
- 30g milk
- 15g warm (not hot) espresso or coffee
- 1g vanilla (optional)
- Whisk until smooth and pudding‑like, but not runny.
- Visual cue: The mixture should hold soft peaks when you lift the whisk—it should slowly sink back rather than collapse instantly.
- Avoid this: Over‑whisking will make it too thin and watery.
Step 4: Assemble the drink over ice
- Fill your glass with about 100g of ice cubes.
- Pour the espresso–milk mixture over the ice.
- Using a spoon, gently spoon the mascarpone layer on top, letting it rest on the surface.
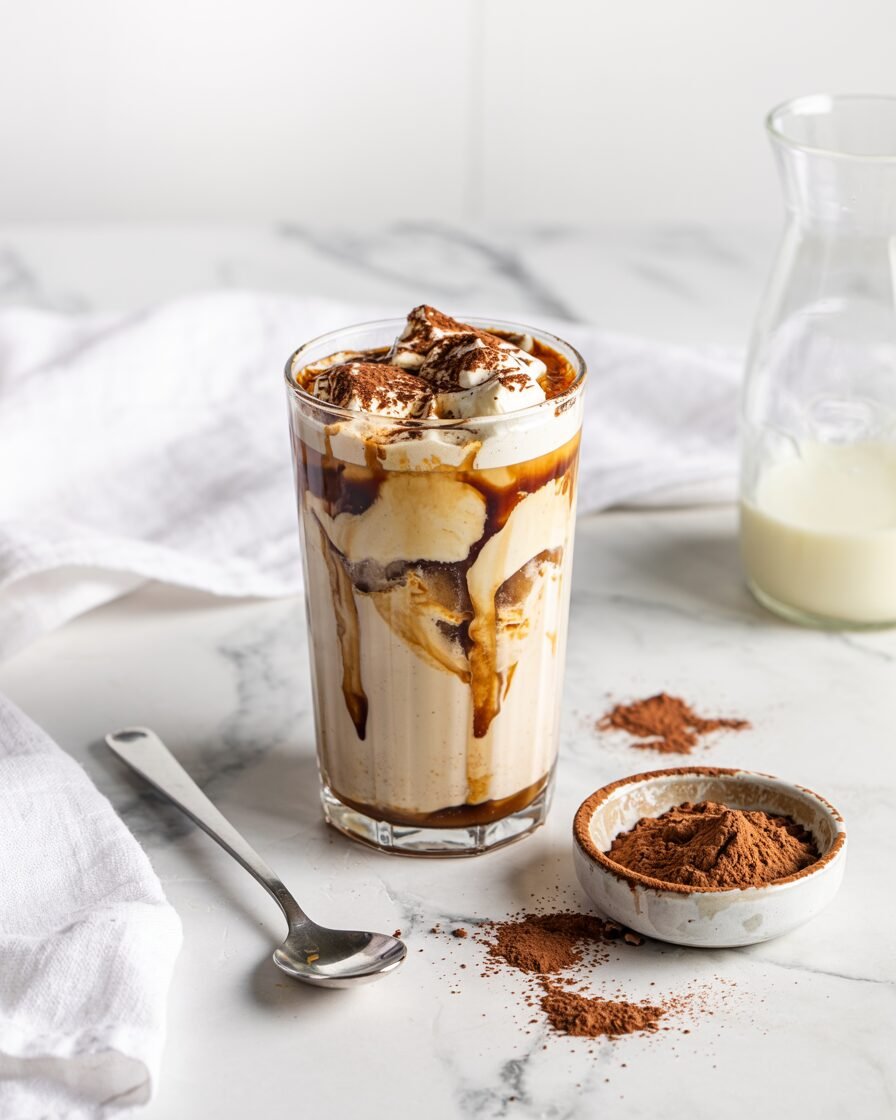
- How it should look: A thick, creamy layer floating on top of the dark coffee‑milk base, with ice visible at the sides.
- Pro tip: Don’t stir immediately; let the layers sit for 1–2 minutes to enjoy the layered effect first.
Step 5: Finish and serve

- Dust the top with 2–3g cocoa powder using a sieve.
- Add a couple of gentle stirs just before drinking to lightly swirl the mascarpone into the latte.
- Serve immediately with a straw and spoon.
Troubleshooting: common issues and fixes
Problem: The mascarpone layer turned grainy or split.
- Likely causes:
- Espresso too hot when mixed with mascarpone.
- Mascarpone straight from the fridge without any warming milk.
- Fix: Warm the espresso slightly, and let the mascarpone sit at room temperature for 5–10 minutes before mixing.
Problem: Drink is too sweet.
- Likely cause: Excess sugar in the espresso–milk base.
- Fix: Start with 10g sugar and taste, then add 5g more if needed.
Problem: Drink is too weak / not tiramisu enough.
- Likely cause: Too much milk or too weak espresso.
- Fix: Use a stronger brew (or an extra shot) and reduce milk by 30g if you like it bolder.
Problem: Mascarpone layer sinks and disappears.
- Likely cause: Mascarpone mix too thin.
- Fix: Use less milk next time (try 20g instead of 30g) and whisk until it thickens.
Problem: Drink tastes too “cheesy.”
- Likely cause: Too much mascarpone or not enough coffee‑milk ratio.
- Fix: Reduce mascarpone to 40g and keep the rest of the recipe the same.
Substitutions and variations
Dairy‑free option:
- Replace mascarpone with:
- 60g dairy‑free cream cheese or coconut cream (thick, full‑fat).
- Use oat milk or almond milk instead of dairy milk.
- Expect a slightly lighter, less rich texture but still delicious.
Egg‑free / safety note:
- This drink does not use raw eggs, so it’s safer for those avoiding them. Always keep mascarpone and milk refrigerated and use within 2 hours at room temperature.
Flavor variations:
- Liqueur‑free tiramisu twist: Add 5g (about 1tsp) of coffee‑flavored syrup or a splash of vanilla syrup if you like a dessert‑style latte.
- Boozy tiramisu latte (adults only): Add 10g (about 2tsp) of coffee liqueur into the espresso–milk base.
- Mocha tiramisu latte: Add 5g cocoa powder to the espresso–milk base for a chocolate‑coffee twist.
Storage, make‑ahead, and freezing
- Mascarpone layer:
- Keep in a covered container in the fridge for up to 24 hours. Stir gently before using.
- Do not freeze; it will separate and become grainy when thawed.
- Pre‑mixed espresso–milk base (no ice):
- Keep in a sealed container in the fridge for up to 24 hours.
- Shake well before serving.
- Unopened ingredients:
- Store mascarpone and milk according to package instructions. Avoid leaving them at room temperature more than 2 hours.
Serving suggestions and pairings
- Best enjoyed:
- First thing in the morning with a croissant or biscotti.
- After a dinner when you want something lighter than a full dessert.
- As a small, elegant drink for guests.
- Pairing ideas:
- A slice of lemon bar or shortbread for a contrasting citrusy note.
- A dark chocolate brownie for extra indulgence.
- A simple buttery cookie to keep the focus on the drink.
FAQs (tiramisu iced latte)
Can I make this with instant coffee instead of espresso?
Yes. Use 15g instant coffee dissolved in 45g hot water to make a strong “espresso‑style” base. Let it cool before using.
How do I prevent the mascarpone from curdling?
- Warm the espresso slightly (not hot).
- Mix the mascarpone with a little milk and coffee until smooth before adding more.
- Don’t pour piping‑hot coffee directly onto cold mascarpone.
Can I double this recipe?
Yes. Simply double all ingredient amounts and use a larger glass or serve two smaller portions. The ratios stay the same.
Which milk is best for this drink?
Whole milk gives the creamiest texture, but oat milk or almond milk work well for a lighter, dairy‑free version.
Can I make this drink ahead of time and store it?
You can keep the mascarpone layer and espresso–milk base separate in the fridge for up to 24 hours, then assemble with ice just before serving. Do not store the fully assembled drink with ice for long, as it will dilute.
Is this drink safe for kids?
If you use regular espresso, it does contain caffeine. For a kid‑friendly version, use decaf espresso or strong decaf coffee and reduce sugar slightly.
Notes from my kitchen (testing log)
Batch 1:
- Used very cold espresso straight from the machine.
- Result: Mascarpone curdled and looked grainy.
- Adjustment: Let espresso cool to warm, then tried again.
Batch 2:
- Used too much milk in the mascarpone layer.
- Result: The layer sank and the drink tasted like sweet coffee, not tiramisu.
- Adjustment: Reduced milk and increased mascarpone slightly.
Batch 3 (final):
- Balanced ratios, slightly cooled espresso, and gentle mixing.
- Result: A creamy, layered tiramisu iced latte that stayed intact for several sips and tasted like dessert in a glass.
- Texture goal achieved: pudding‑on‑latte with clear, distinct layers and a soft cocoa finish.
Nutrition and disclaimer
Approximate per serving (entire drink, single serving):
- Calories: ~250
- Fat: ~15 g
- Carbohydrates: ~20 g
- Protein: ~6 g
Note:
Values are estimates and will vary based on brands, milk fat, and sugar amounts. Always follow food‑safety best practices: keep dairy and coffee refrigerated, avoid leaving the drink at room temperature for more than 2 hours, and consume promptly.
Final thoughts
This Tiramisu Iced Latte is a simple but satisfying way to enjoy the flavors of tiramisu without the fuss of baking. It’s forgiving enough for beginners, layered beautifully enough for Instagram, and easy to customize for lighter or richer preferences.