This recipe has been a fixture in our family for years, but it didn’t start out this way. The original blueprint came from one of my grandma’s old, spiral-bound church cookbooks, you know the kind, filled with recipes for Jell-O salads and casseroles held together by cream of mushroom soup. Tucked in the back was a recipe for “Lemony Ice Cream.” I was intrigued, but my first attempt was… well, let’s just say it was fine. It was a bit icy, the flavor was timid, and it called for bottled lemon juice, which, four years into this food blogging adventure, you know is practically a cardinal sin in my kitchen.
I knew it had potential, though. I loved the idea of a pure, bright lemon flavor, not one muddled with other fruits or extracts. So, I started tinkering. It became my little project, my culinary puzzle. A little more zest here, a different ratio of cream to milk there. I became obsessed with creating the perfect texture, that glorious, dense, scoop-shop-quality creaminess. And after a lot of trial, error, and one very memorable curdled disaster, I finally landed on this. The foolproof, sunshine-in-a-bowl recipe that my family now begs for from the first hint of spring until the last warm day of fall.
My Most Epic Fail
Let’s get real for a minute. If you’ve never had a kitchen experiment go horribly wrong, are you even cooking? My journey with this ice cream includes a mistake so classic I have to share it, so you can avoid my fate.
In one of my early attempts to make the flavor more intense, I got impatient. I had my beautiful, fragrant, warm custard base ready to go. I thought, more lemon flavor, right now! And I proceeded to dump all of my freshly squeezed, very acidic lemon juice right into the warm, egg-and-cream mixture.
The result was instantaneous and tragic. The entire base curdled before my eyes. It went from a smooth, silky liquid to a pot of sad, grainy, lumpy stuff that looked like watery ricotta cheese. There was no saving it. I had to pour the whole thing down the drain, and I was so bummed. All those lovely fresh lemons and good cream, wasted.
Here’s the lesson I learned the hard way: Acid and hot dairy are not friends. The heat and acid will cause the proteins in the milk and eggs to seize up and separate. The key is to let your custard base cool completely. And I mean completely completely. I stick my bowl in the fridge for at least 4 hours, but honestly, making it the day before and letting it chill overnight is the absolute best practice. When you’re ready to churn, you whisk the cold lemon juice into the cold custard base. Patience is the secret ingredient that keeps it perfectly smooth.

Let’s Talk Ingredients: Why These Specifics Matter
After making this recipe dozens of times, I’ve developed some very strong opinions. When you’re dealing with a recipe with so few ingredients, the quality of each one really shines through.
- Lemons, obviously: Please, for the love of all that is good, use fresh lemons. The vibrant, zesty flavor from a real lemon is worlds away from the dull, muted taste of bottled juice. Plus, you need the zest! That’s where all the aromatic oils live. If you can find Meyer lemons (usually in winter and early spring), grab them! They are a cross between a lemon and a mandarin orange, so they’re slightly sweeter and less aggressively acidic, with a floral aroma that is just divine in this ice cream. If not, regular Eureka lemons from the grocery store work beautifully.
- The Cream Situation: This is not the time for half-and-half. You need the fat content from heavy cream (or heavy whipping cream) to achieve that luxurious, creamy mouthfeel and prevent ice crystals from forming. Fat is flavor, but in ice cream, it’s also texture! I’ve played around with this, and my favorite little twist is to substitute one cup of the heavy cream with a can of full-fat coconut milk (the thick, creamy kind from the Asian food aisle, not the watery stuff in a carton). It doesn’t scream coconut, but it adds a subtle, lovely tropical background note and makes it even creamier.
- My Secret Weapon: Cream Cheese! Okay, this is the real game-changer. Just two ounces of full-fat, brick-style Philadelphia Cream Cheese will transform your ice cream. It acts as a stabilizer, just like the ones used in commercial ice cream, which makes the final product incredibly smooth and scoopable, even after days in the freezer. Make sure it’s fully softened to room temperature before you whisk in the hot custard; otherwise, you’ll get little lumps. Trust me on this one. It doesn’t make it taste like cheesecake; it just makes it better.
Practical Tips from a Mom Who’s Been There
These are the little things I’ve learned over time that aren’t on a standard recipe card but make all the difference.
- Chill Everything. I’m a broken record on this, but it’s the most important rule of homemade ice cream. Your ice cream maker’s freezer bowl needs to be frozen solid—I just store mine in the freezer at all times so it’s always ready. Your custard base needs to be cold. Even your lemon juice should be chilled. A super-cold base churns faster, which means smaller ice crystals and a much, much smoother final product.
- Don’t Waste the Zest. When you’re zesting the lemons, use a microplane. It shaves off only the yellow part of the peel. The white pit underneath is bitter and will lend an unpleasant taste to your beautiful ice cream. My favorite trick is to add the sugar directly to the zest in a bowl and use my fingers to rub them together for a minute. This releases all the fragrant lemon oils into the sugar and makes the flavor so much more pronounced. It will make your kitchen smell amazing.
- The Busy Mom Shortcut: Look, I get it. Sometimes you don’t have the energy to make a full custard base. If you need a serious shortcut, you can make an eggless, Philadelphia-style base (just cream, milk, and sugar) and swirl in a few spoonfuls of a high-quality, store-bought lemon curd at the end of churning. It’s a different ice cream, for sure, but it’s a great hack when you need a lemon fix in a hurry.
- The Final Freeze is Crucial. The ice cream that comes out of your machine will be the consistency of soft-serve. It needs a final hardening period in the freezer, a step called “ripening.” This allows the flavors to meld and mature and lets the ice cream firm up to a perfectly scoopable texture. I always press a piece of parchment paper directly onto the surface of the ice cream before putting the lid on my container. This prevents pesky ice crystals from forming on top.
How the Fam Devours It
The final verdict always comes down to my two toughest critics. Leo, my 12-year-old purist, loves it exactly as is. He says the tangy lemon flavor is “perfectly sour” and doesn’t need anything messing with it. My 8-year-old, Maya, is the queen of modifications. She needs texture and crunch. Her all-time favorite way to eat it is with a handful of crumbled Biscoff cookies or buttery shortbread mixed in during the last minute of churning. The spicy, caramelized cookie with the bright lemon is a surprisingly sophisticated and delicious combination. I have to admit, she’s onto something.
As for me? I love it served simply with fresh raspberries or blueberries on top. The sweetness of the berries is a perfect counterpoint to the tart lemon. It’s also absolutely incredible served alongside a slice of simple olive oil cake.
This recipe is more than just a dessert for us. It’s the taste of a chaotic Saturday turned around. It’s the feeling of creating something truly delicious from scratch and sharing it with the people you love most. It’s a little bit of effort, yes, but it’s so, so worth it. I hope you and your crew love it as much as we do!
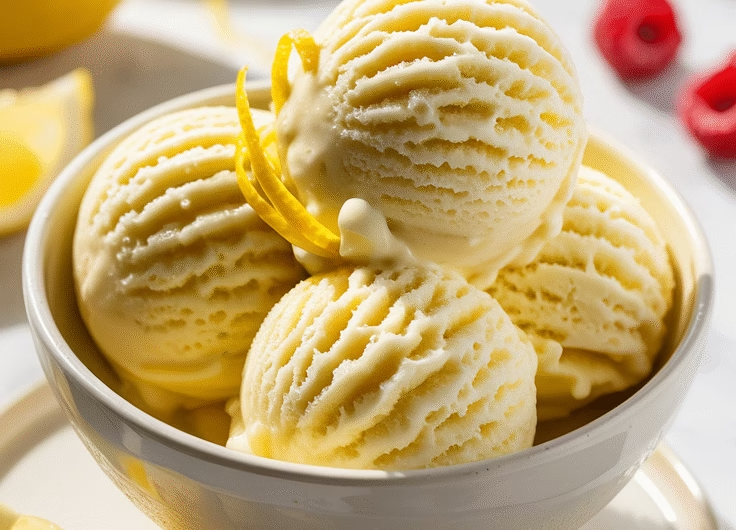
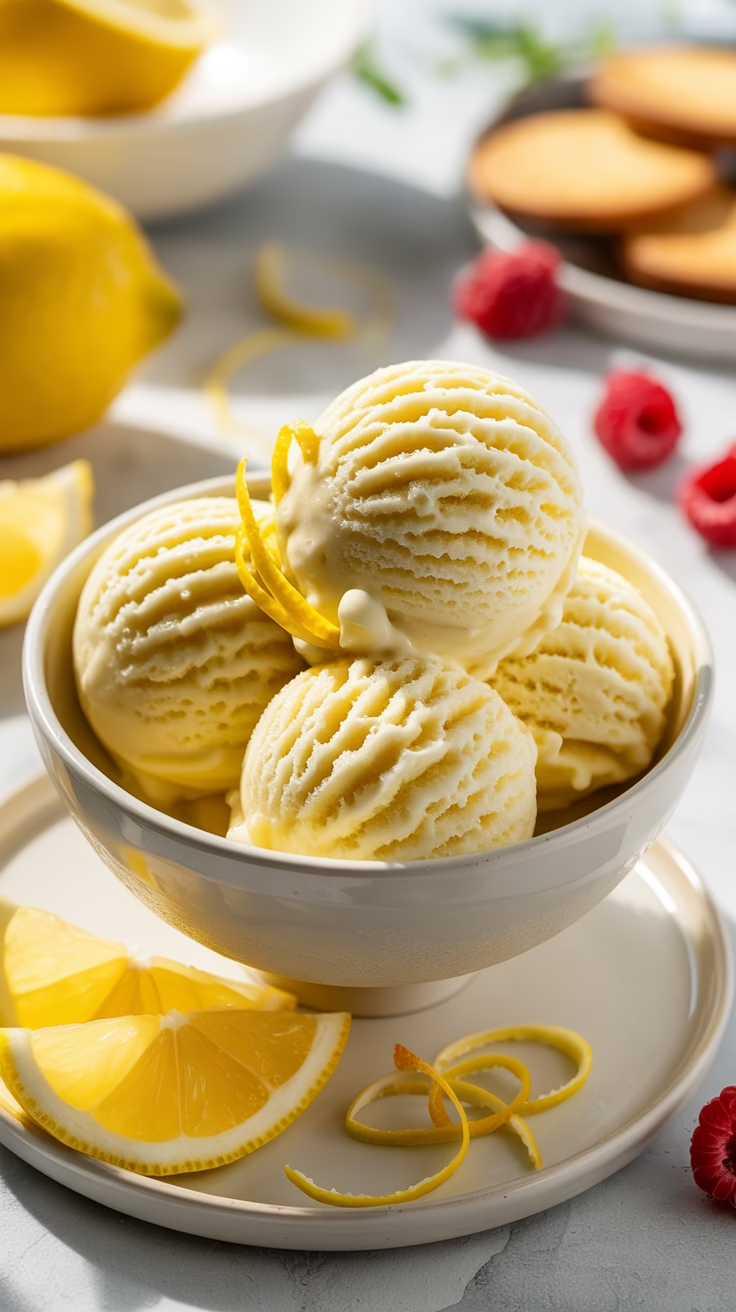
Zesty, Bright & Unbelievably Creamy Lemon Ice Cream
Course: DessertCuisine: AmericanDifficulty: Easy4
servings30
minutes250
kcal1
hour10
minutesChill time: 4 hours (or overnight)
Churn time: 20–25 minutes
A foolproof recipe for an intensely flavorful, ultra-creamy, and perfectly smooth homemade lemon ice cream. A secret ingredient (cream cheese!) ensures it stays soft and scoopable right from the freezer, while fresh lemon zest and juice provide a bright, zesty flavor that’s pure sunshine in a bowl.
Ingredients
2 large, fresh lemons (use Meyer lemons if you can find them!)
¾ cup (150g) granulated sugar
2 large egg yolks
1 ½ cups (360ml) heavy cream, divided
½ cup (120ml) whole milk
2 oz (56g) full-fat, brick-style cream cheese, fully softened to room temperature
A small pinch of salt
Directions
- Prepare the Lemons & Sugar: Use a microplane to zest both lemons into a medium bowl. Add the sugar and use your fingers to rub the zest into the sugar for about a minute. This releases the lemon oils for a more intense flavor. Set aside. Juice the lemons into a separate small bowl until you have ½ cup (120ml) of juice. Cover and refrigerate the juice.
- Make the Custard Base: In a medium, heavy-bottomed saucepan, whisk the egg yolks until smooth. Add the lemon-sugar mixture and whisk until pale and well-combined. Gradually whisk in 1 cup (240ml) of the heavy cream, the whole milk, and the pinch of salt.
- Cook the Custard: Heat the mixture over medium-low heat, stirring constantly with a heatproof spatula. Scrape the bottom of the pan to prevent scorching. Cook until the mixture thickens enough to coat the back of the spatula (it should register 170°F / 77°C on an instant-read thermometer), about 5–7 minutes. Do not let it boil.
- Incorporate Cream Cheese: Place the softened cream cheese in a large bowl. Set a fine-mesh sieve over the bowl and immediately pour the hot custard through it and onto the cream cheese. This strains out any potential lumps.
- Cool and Chill: Whisk the mixture until the cream cheese has completely melted and the base is smooth. Whisk in the remaining cold ½ cup (120ml) of heavy cream. Press a piece of plastic wrap directly onto the surface of the custard to prevent a skin from forming. Refrigerate for at least 4 hours, or preferably overnight, until thoroughly cold.
- Churn: Once the base is cold, remove it from the fridge. Slowly whisk in the chilled lemon juice. Pour the final mixture into your ice cream maker’s frozen bowl and churn according to the manufacturer’s instructions (typically 20-25 minutes), until it reaches the consistency of thick soft-serve.
- Freeze (Ripen): Transfer the ice cream to an airtight, freezer-safe container. Press a piece of parchment paper directly onto the surface to prevent ice crystals. Freeze for at least 4 hours to allow it to harden to a firm, scoopable consistency.
Notes
- Use Fresh Lemons: The flavor of fresh lemon juice and zest is essential for this recipe and far superior to bottled juice.
Chill Everything: For the creamiest result, ensure your ice cream maker bowl is frozen solid and your custard base is completely chilled before churning.
Variations: For a fun texture, mix in crumbled shortbread cookies, Biscoff cookies, or a handful of fresh raspberries during the last minute of churning.
Serving Suggestion: Delicious on its own, or served with fresh berries or a slice of pound cake.